

Template studio
This section of the documentation is designed to provide a comprehensive guide to the process of creating and defining templates. The goal is to enable you to create templates safely and efficiently.
We will guide you through the basic steps required to create a functional template, focusing on the key aspects of template creation. This includes selecting specific configurations, defining variables, and providing clear and precise descriptions to allow other users to understand and effectively utilize the created template.
Delve into the configuration instructions in a style that complements your learning preferences. For those who appreciate a thorough, step-by-step guide, the text version below, complete with detailed images, will clarify each stage of the process. Conversely, if you prefer a dynamic audiovisual learning experience, our video tutorial offers an alternative method of absorbing the information.
License and rights requirements for Template studio access
Access to the Template studio is limited to users with an active Premium or Enterprise license.
Also, you can only create a new template definition from companies for which you have rights as a General editor. Additionally, in the Template studio list, you will only see those templates for which you have General editor rights.
Template studio list
To access the Template Studio, click on the user name in the bottom left corner and choose Template Studio from the provided options. Here, you'll find the Template list, which displays all the defined templates. If no template has been created, the list will appear empty. The default view displays the active templates only.
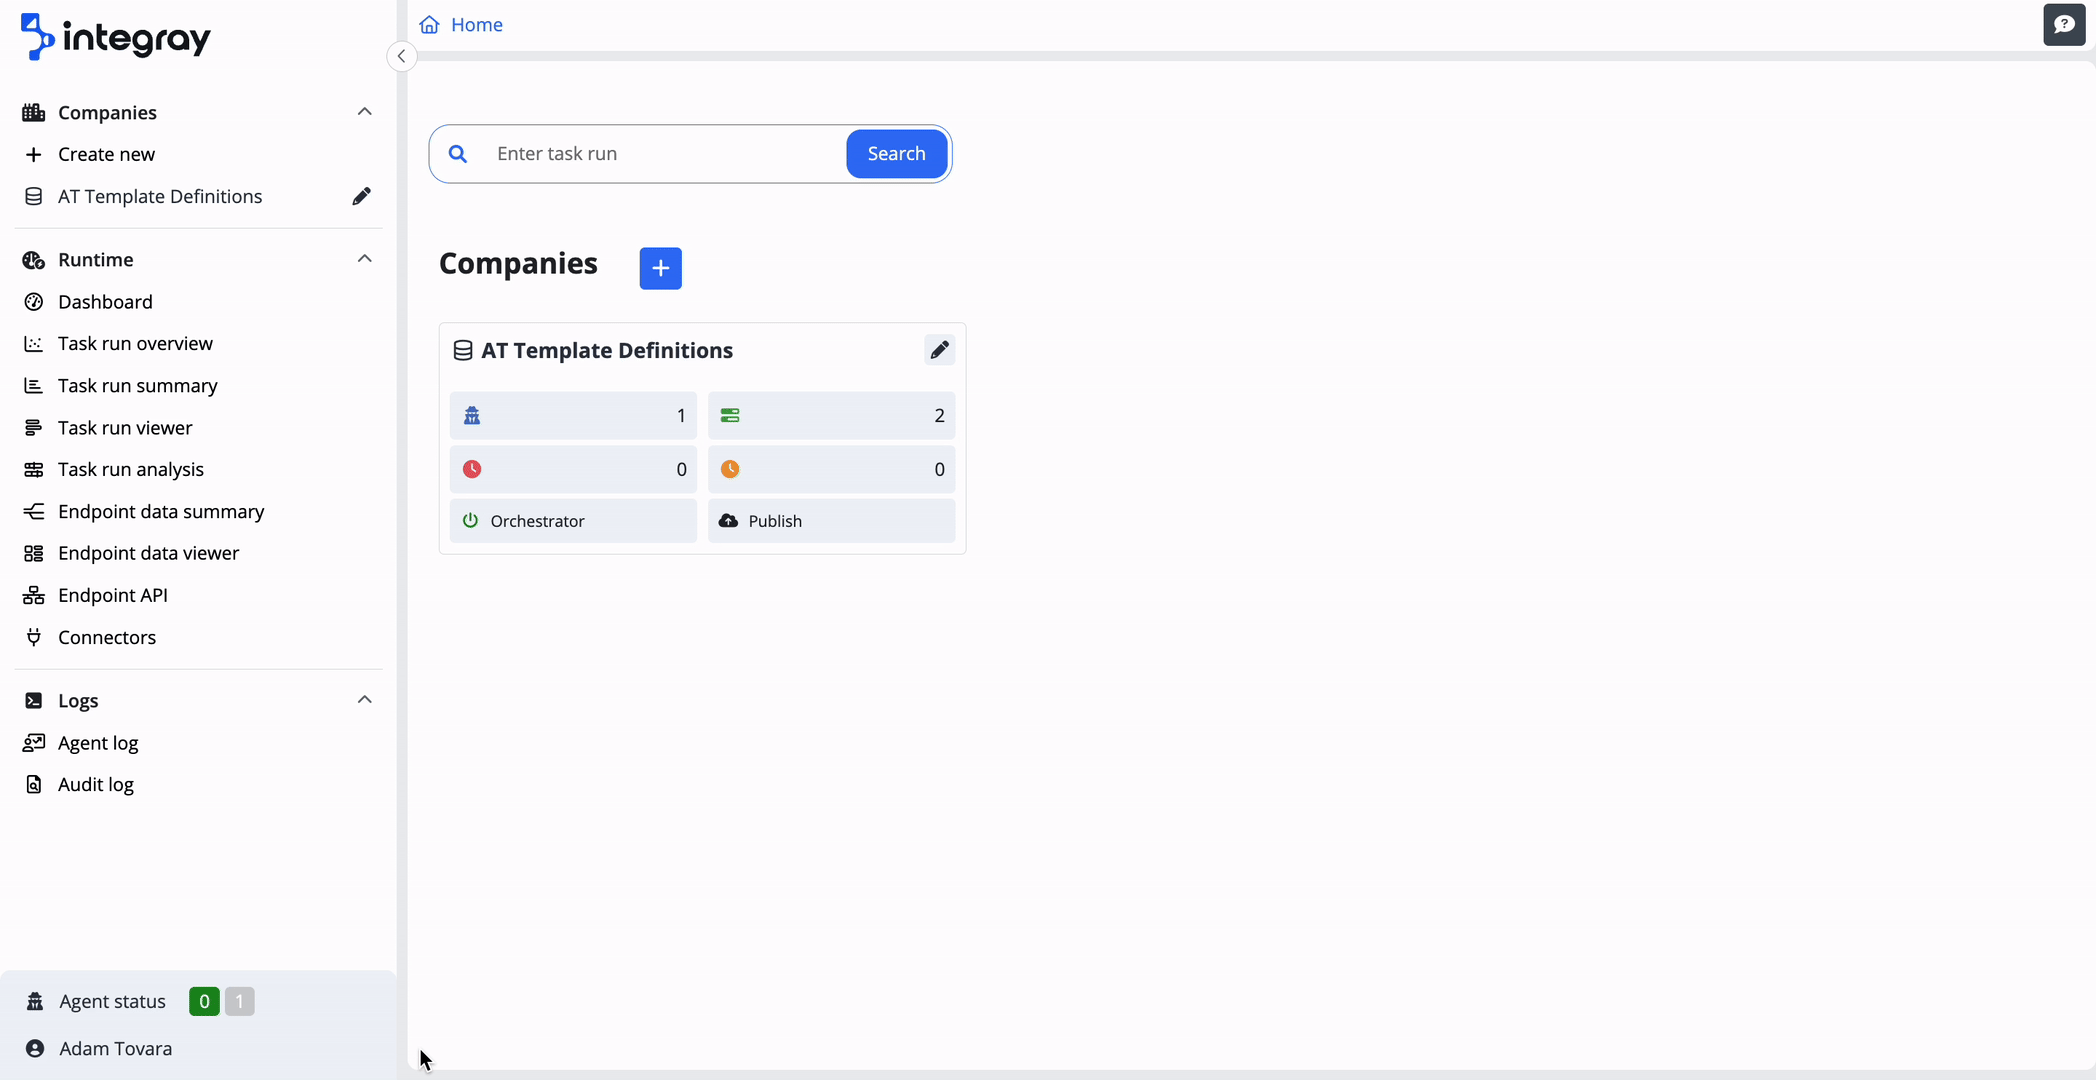
In the upper section of the Template list, you will find a search field for quick and efficient template filtering.
In the right part, you can see the Show In/Active button, which switches between active and inactive templates views, and the + Add button, which starts creating a new template and opens the Template content editor.
Template list view provides you with essential information about the templates:
- Name: The name of the template is displayed here.
- Version: Indicates the current version of the template.
- Description: A brief summary of the template’s functionality and purpose.
- Last update: The date of the last update of the template is displayed here
The template record row includes additional control with dynamically changing icons of a trash bin and recycling, allowing you to deactivate and reactivate the template as needed. These icons adapt dynamically based on whether active or inactive templates are currently displayed. The icon of the trash allows you to temporarily deactivate the template, while the recycling symbol suggests the possibility of reactivating the specific template.
Creating a new template
Before creating a new template, it's essential to have a fully functional and tested configuration set up. It's important to note that users who apply the template will not have the capability to modify the configuration itself. Their customization options will be limited to adjusting variable values, modifying the endpoint slug, assigning a different agent, and changing token values during the template application.
To initiate creating a new template, navigate to the Template studio, and click the + Add button. This action will open a window for defining the new template.
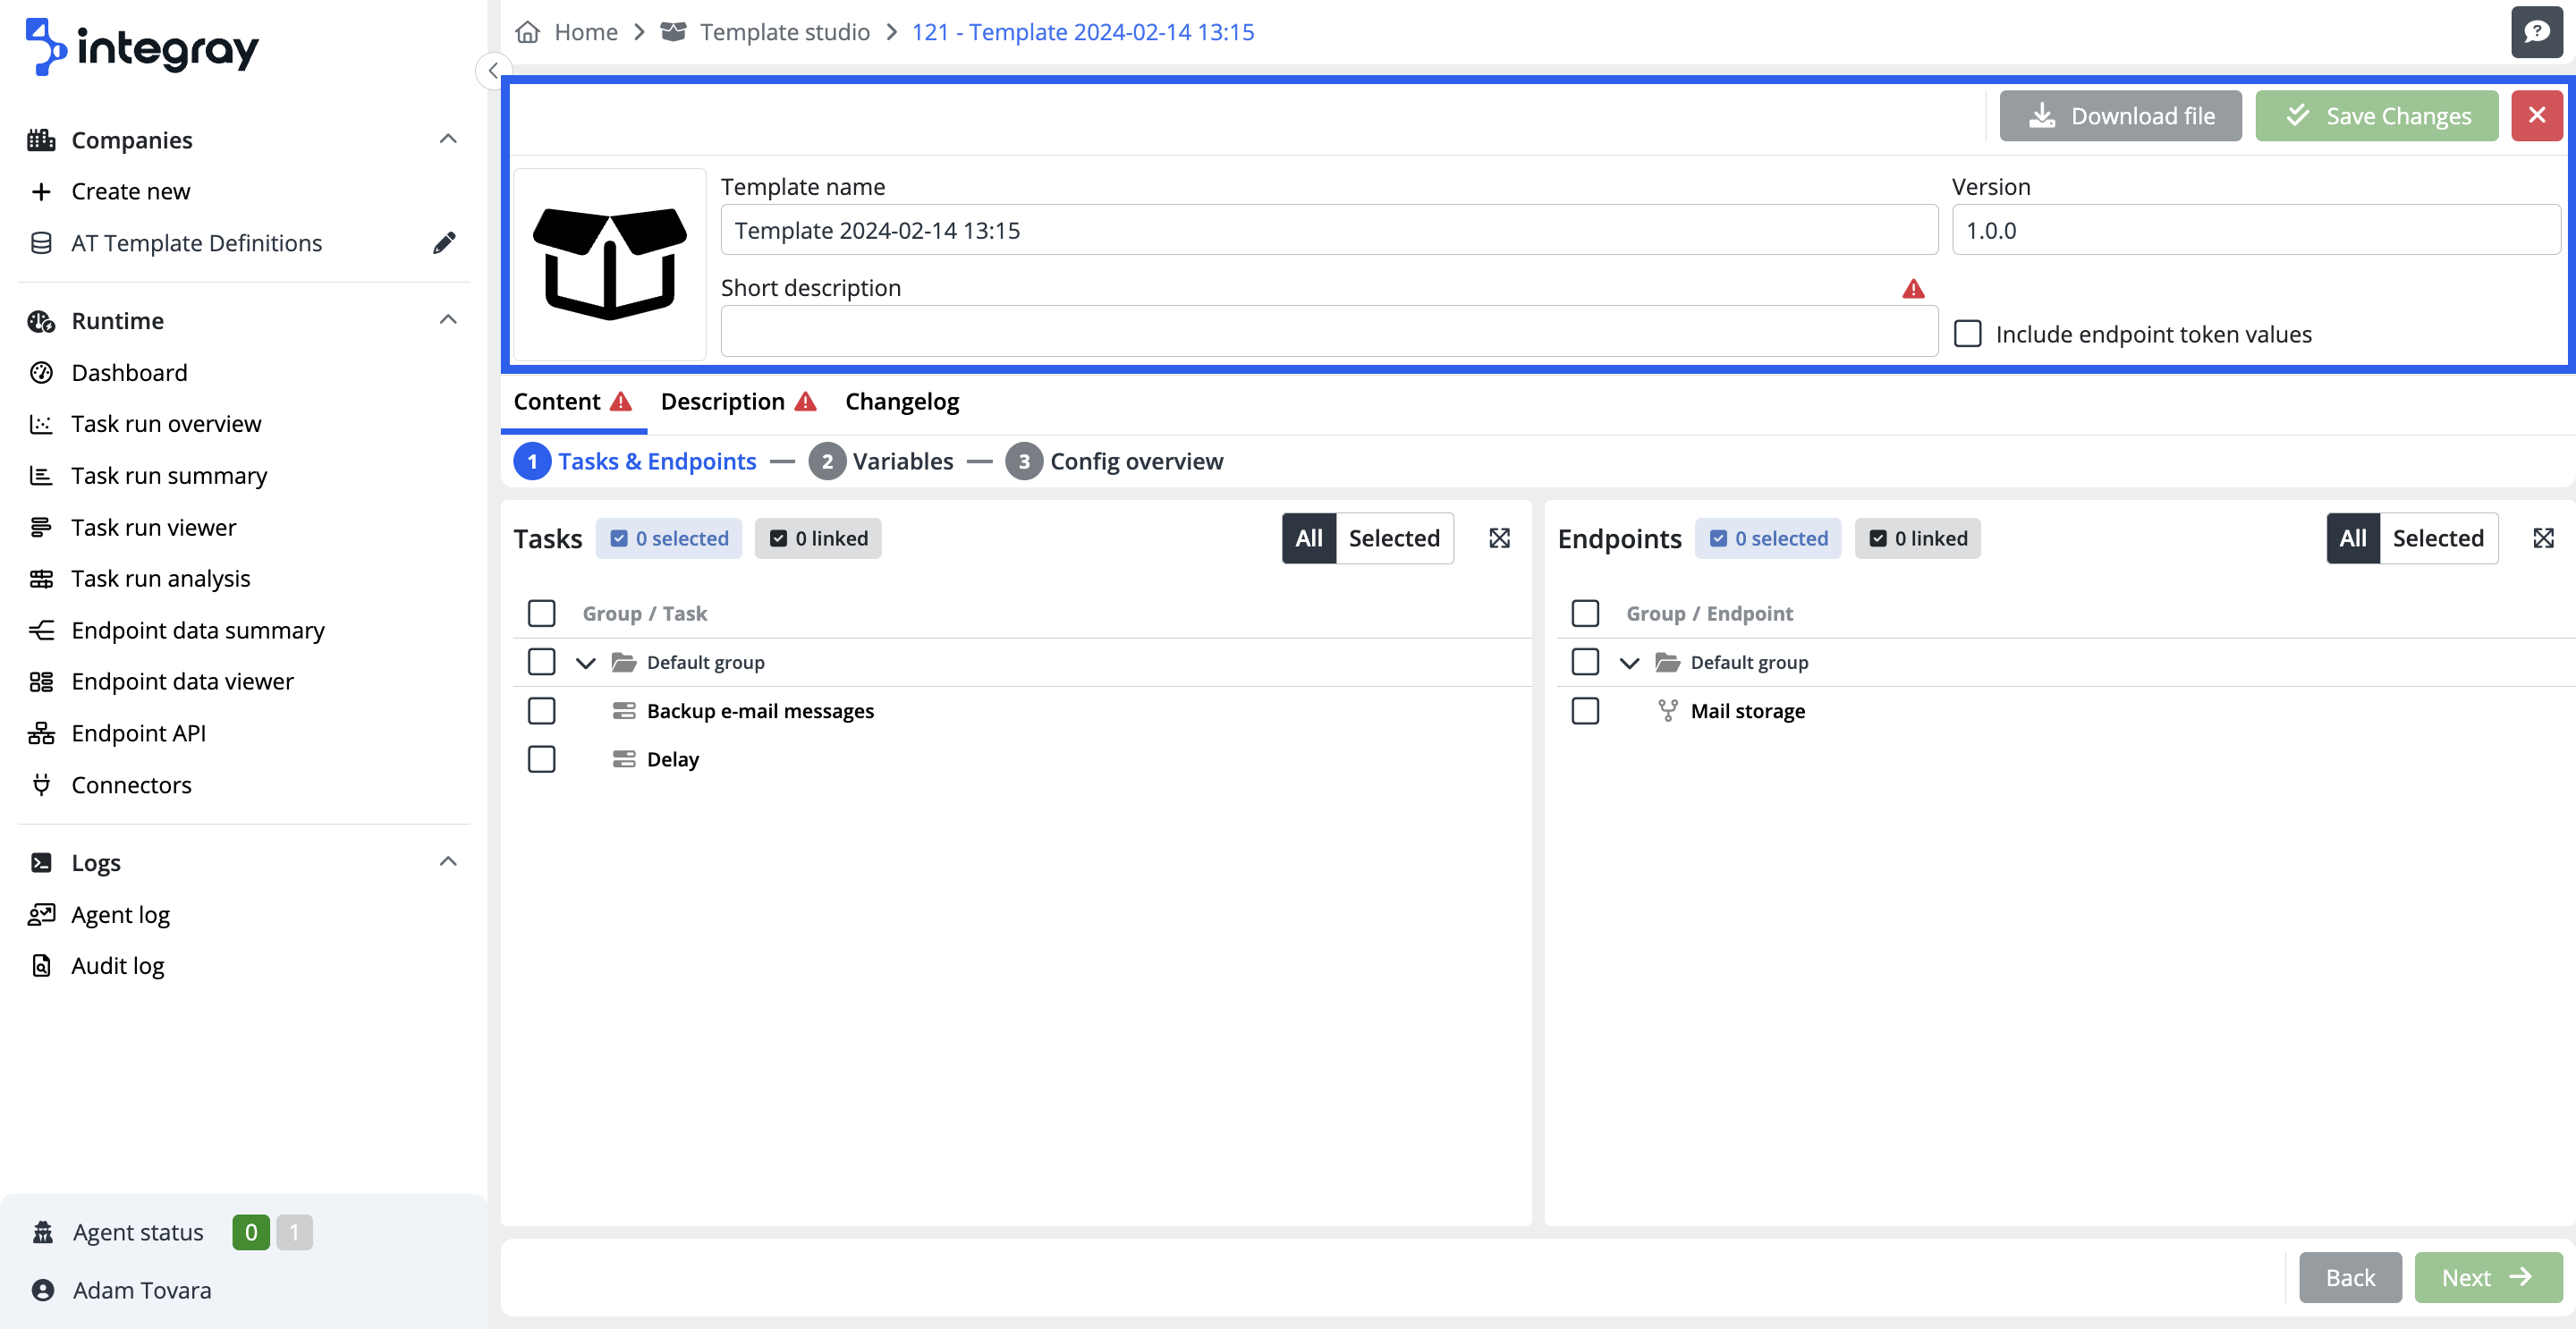
The interface of this window consists of a header section and three distinct tabs, each featuring different editing tools:
-
Template header menu, which is primarily used for entering template details.
-
Content editor, where the specific tasks are selected and variables are defined. You will also find here the Config Overview, which provides a comprehensive overview of what will be included in the new template.
-
Description editor, which provides a place for a detailed template description. The text entered here will be displayed to users who wish to apply the template, offering them a comprehensive understanding of the template.
-
Changelog editor, which serves as a log for recording different versions of the template and any modifications made, ensuring explicit tracking of its evolution.
Template header menu
-
Logo: Add a specific logo to the template by clicking the pencil icon button. You can also leave the logo set to its default value.
-
Template name: Enter a name for your template that accurately reflects its purpose. Under this name, the template will appear in the Template list. The default name generated by the system is always in the format "Template YYYY-MM-DD HH:MM".
-
Short description: Add a brief description that clearly explains the template's function and usage.
-
Version: Specify the version of the template. This is particularly important for tracking updates and changes in the template.
-
Include endpoint token values: If you want endpoint token values to be included in the template, check the appropriate box. Otherwise, leave the box unchecked and token values will be regenerated.
Required fields
Template name, Short description, and Version fields are required and must be filled out.
Within the Template header menu, the following buttons are available:
-
Download file: This button is enabled once the template file is generated. Utilize this function to download the template file, facilitating its distribution to the other users.
-
Save changes: Use this button to save any modifications to the template's definition.
Content editor
The Template Content Editor is organized into three tabs: the Task & Endpoints, Variables and Config overview. On the first tab you will find two main sections: Tasks and Endpoints. In the Tasks section, select the task you wish to create a template for. If the selected task is bound with an endpoint, that endpoint will automatically be selected to the right in the Endpoints section by the system. Similarly, suppose you start by selecting an endpoint in the Endpoints section that is bound to a specific task. In that case, the related task will be automatically selected in the Tasks section. This reciprocal selection mechanism ensures a seamless integration between tasks and endpoints within your template creation process.
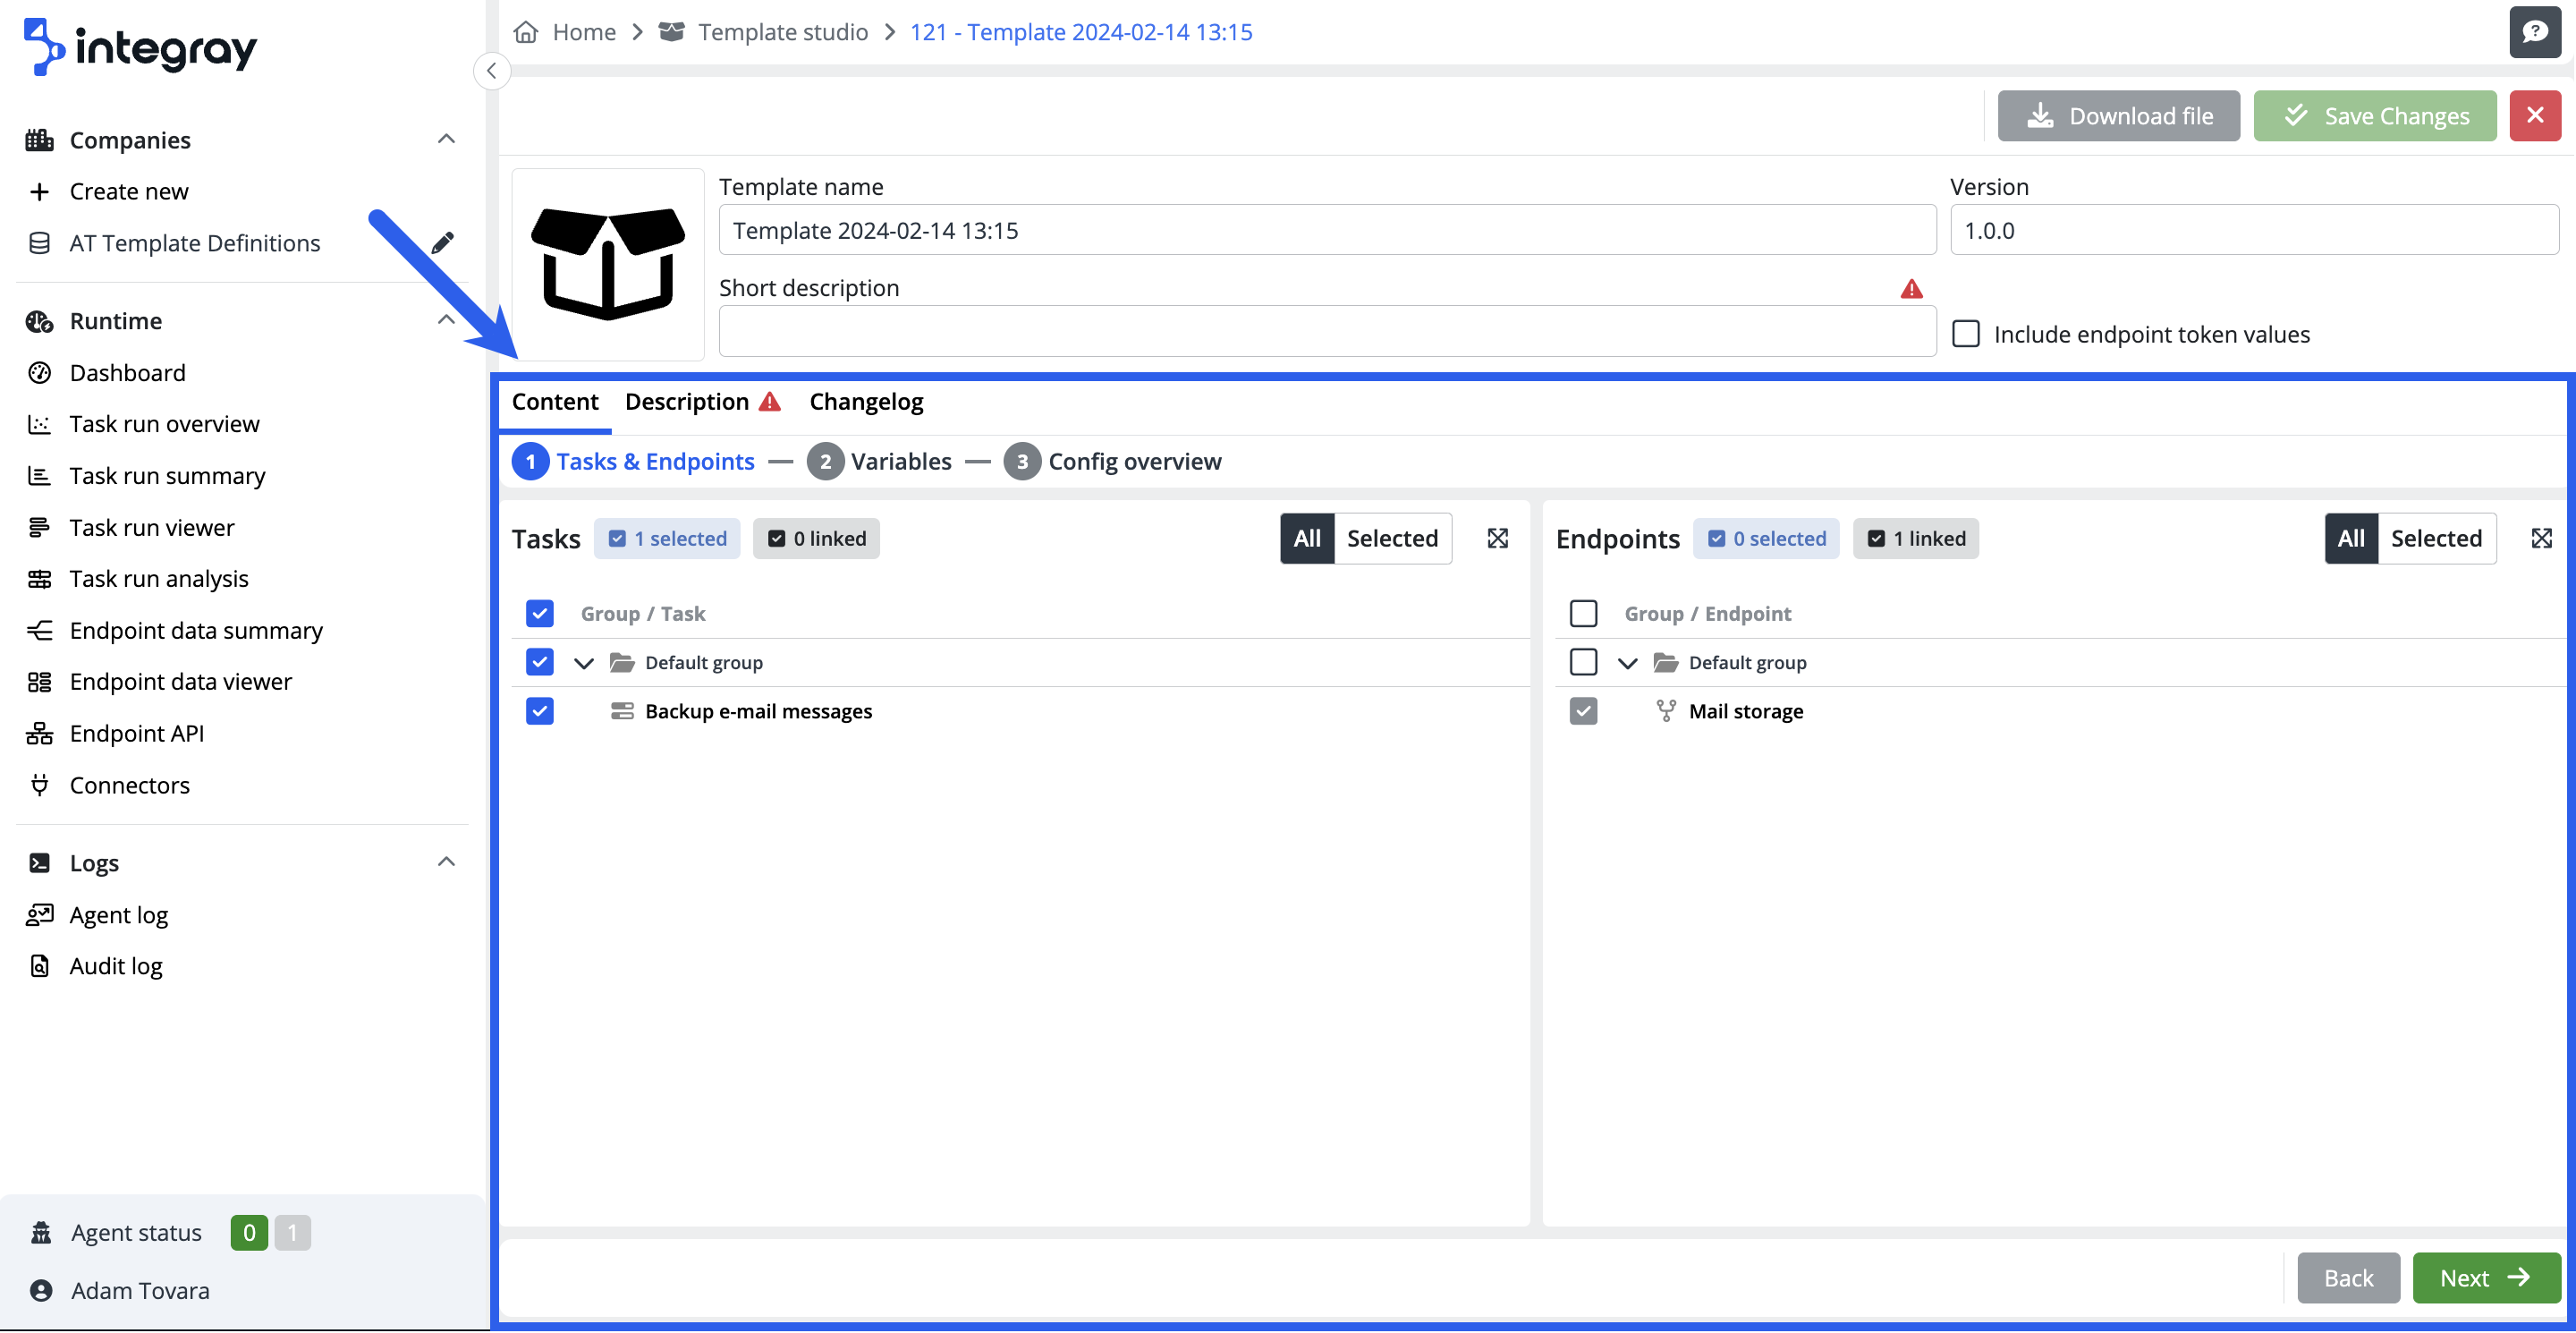
At the top of the Content editor, whether in the Tasks or Endpoints section, you will find two indicators. These indicators display the number of selected and linked tasks or endpoints. For instance, if you select a task in the Tasks section that is connected to an endpoint, the "selected" indicator in the Tasks section will show a value of 1. Concurrently, in the Endpoints section, the indicator "linked" will also reflect a value of 1.
In addition to the indicators mentioned above, the top of the interface includes filter buttons for tasks and endpoints. These filters allow you to display either all tasks and endpoints or only those selected.
Next to the filter, there is a button that allows you to expand or collapse sections of the editor. This feature aims to improve your view of the available tasks or endpoints, simplifying navigation.
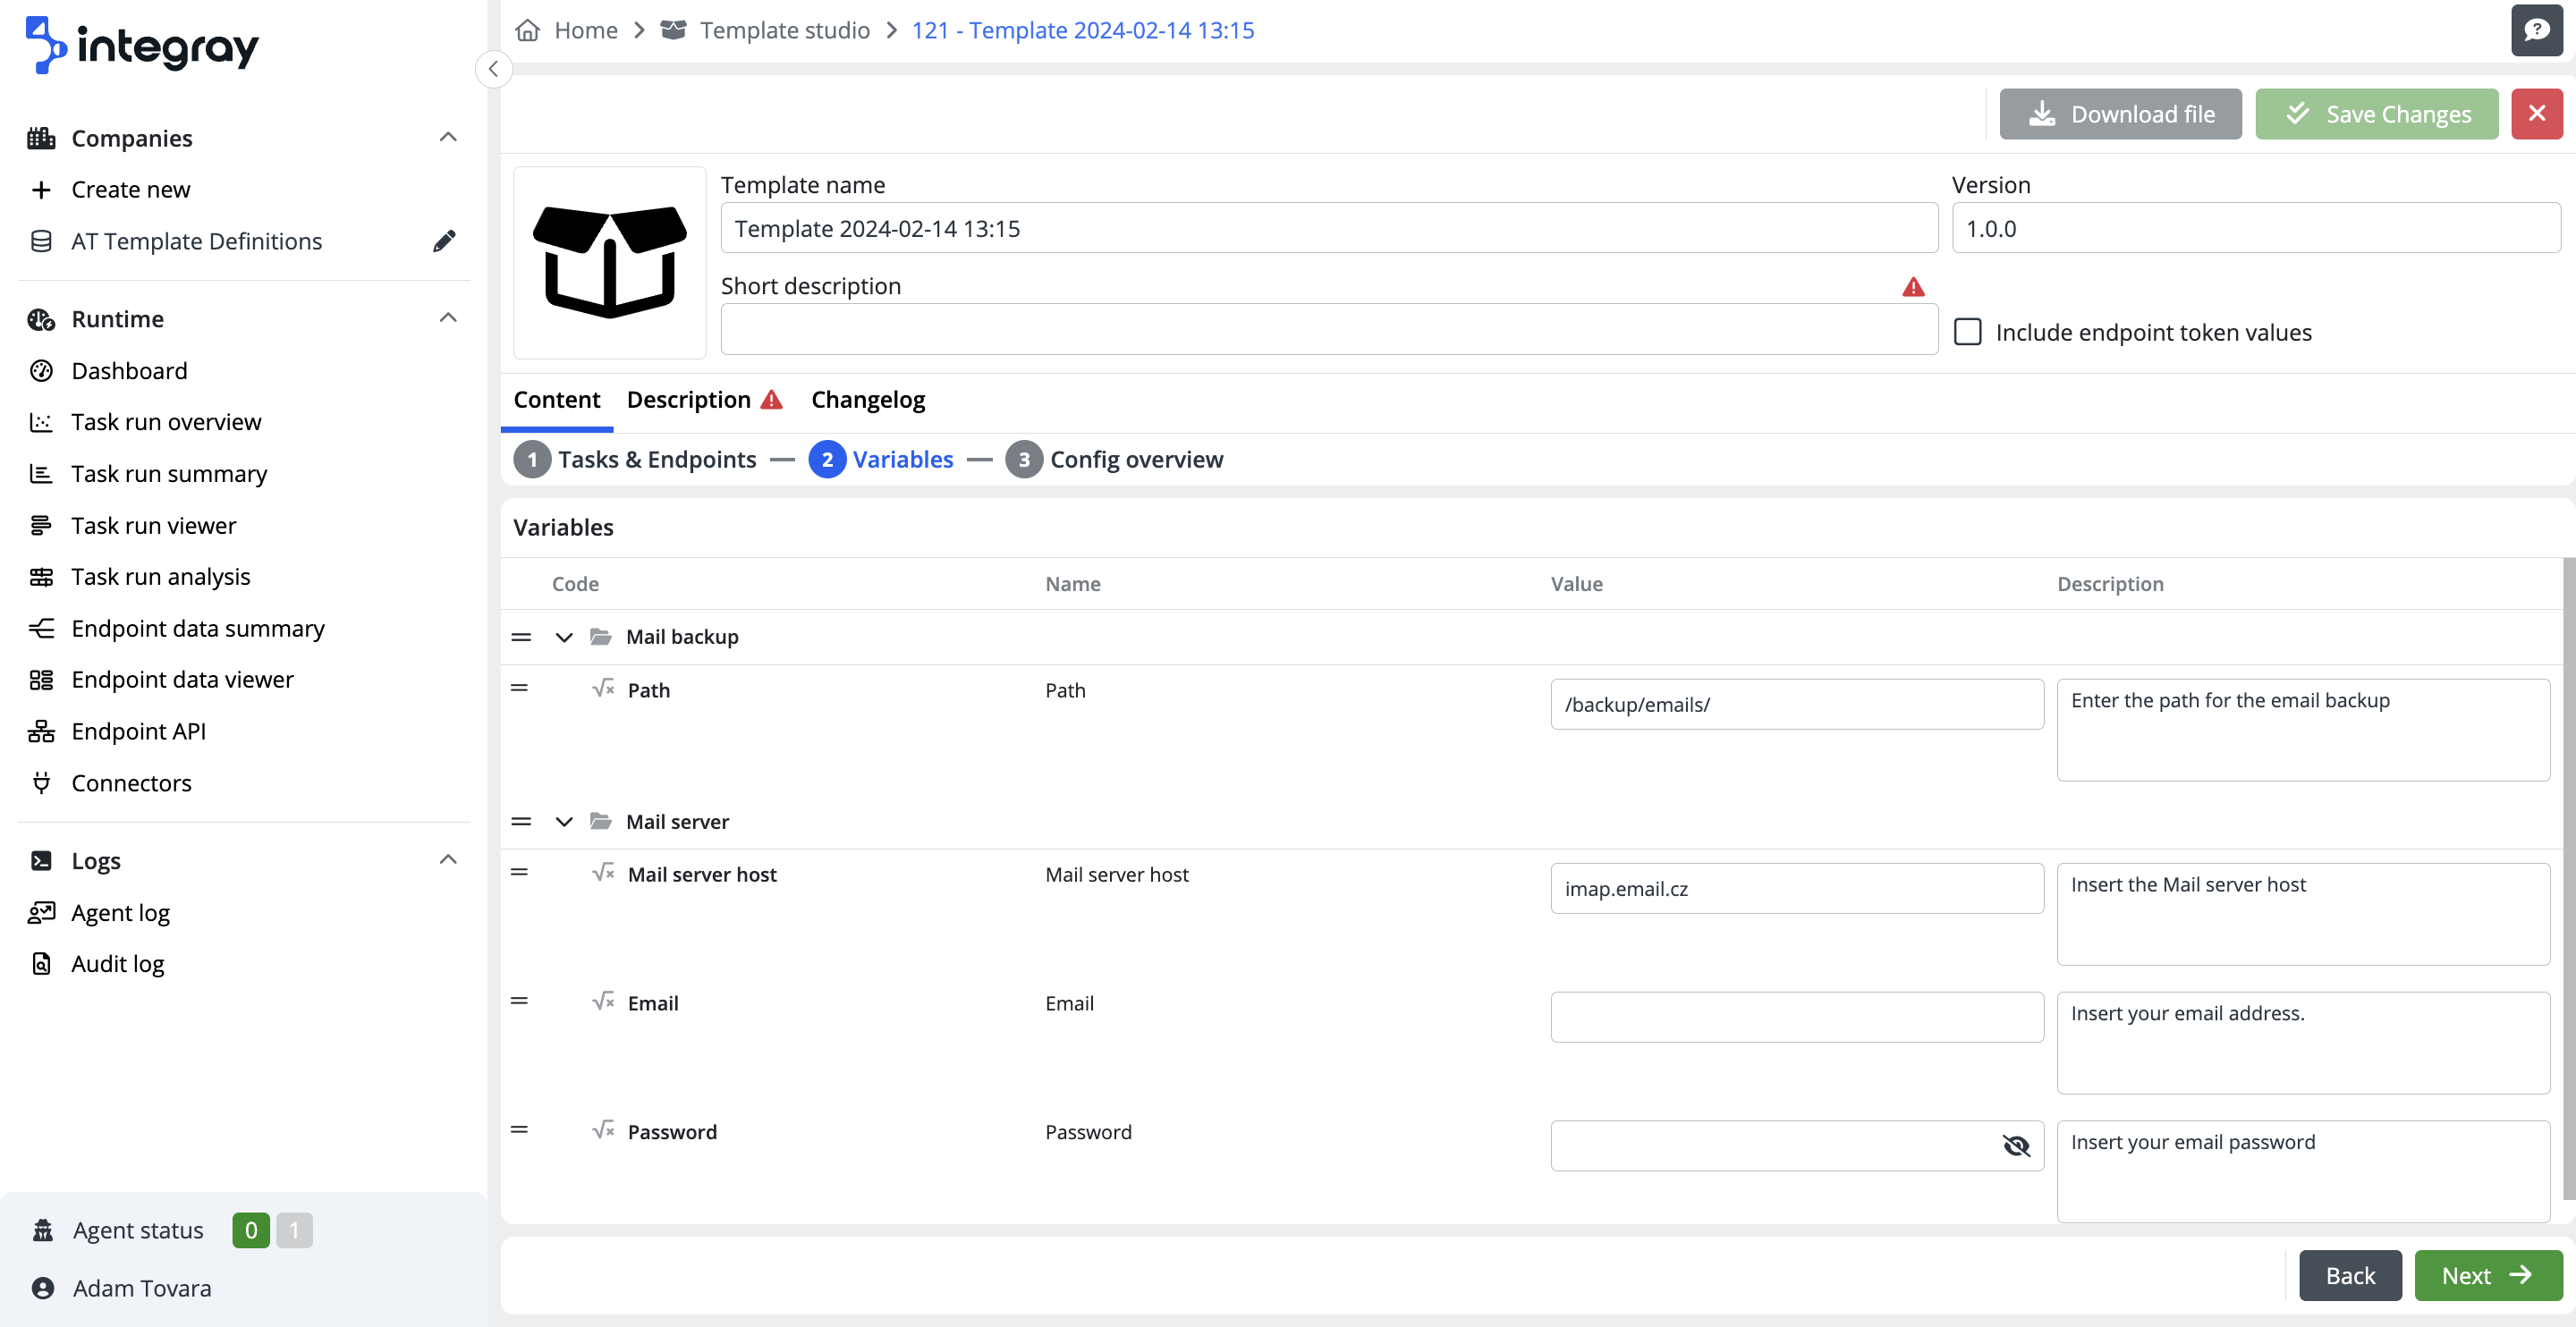
Once you've selected the necessary Tasks and Endpoints, use the Next button in the bottom right corner to move to the Variables tab to the next phase of defining your template, which focuses on Variables. If your integration includes Variables, their list will be displayed here. This list provides details such as the variable's Code, Name, Value, and Description. These details can either be retained in their initially loaded state or modified to suit the specific requirements of your template creation. When applying the template you've created, users will be prompted to fill in, adjust, or maintain the values in these variables according to their specific needs.
By pressing the Next button again, you will reach the Config overview screen, which provides a detailed overview of the contents that will be included in the new template.
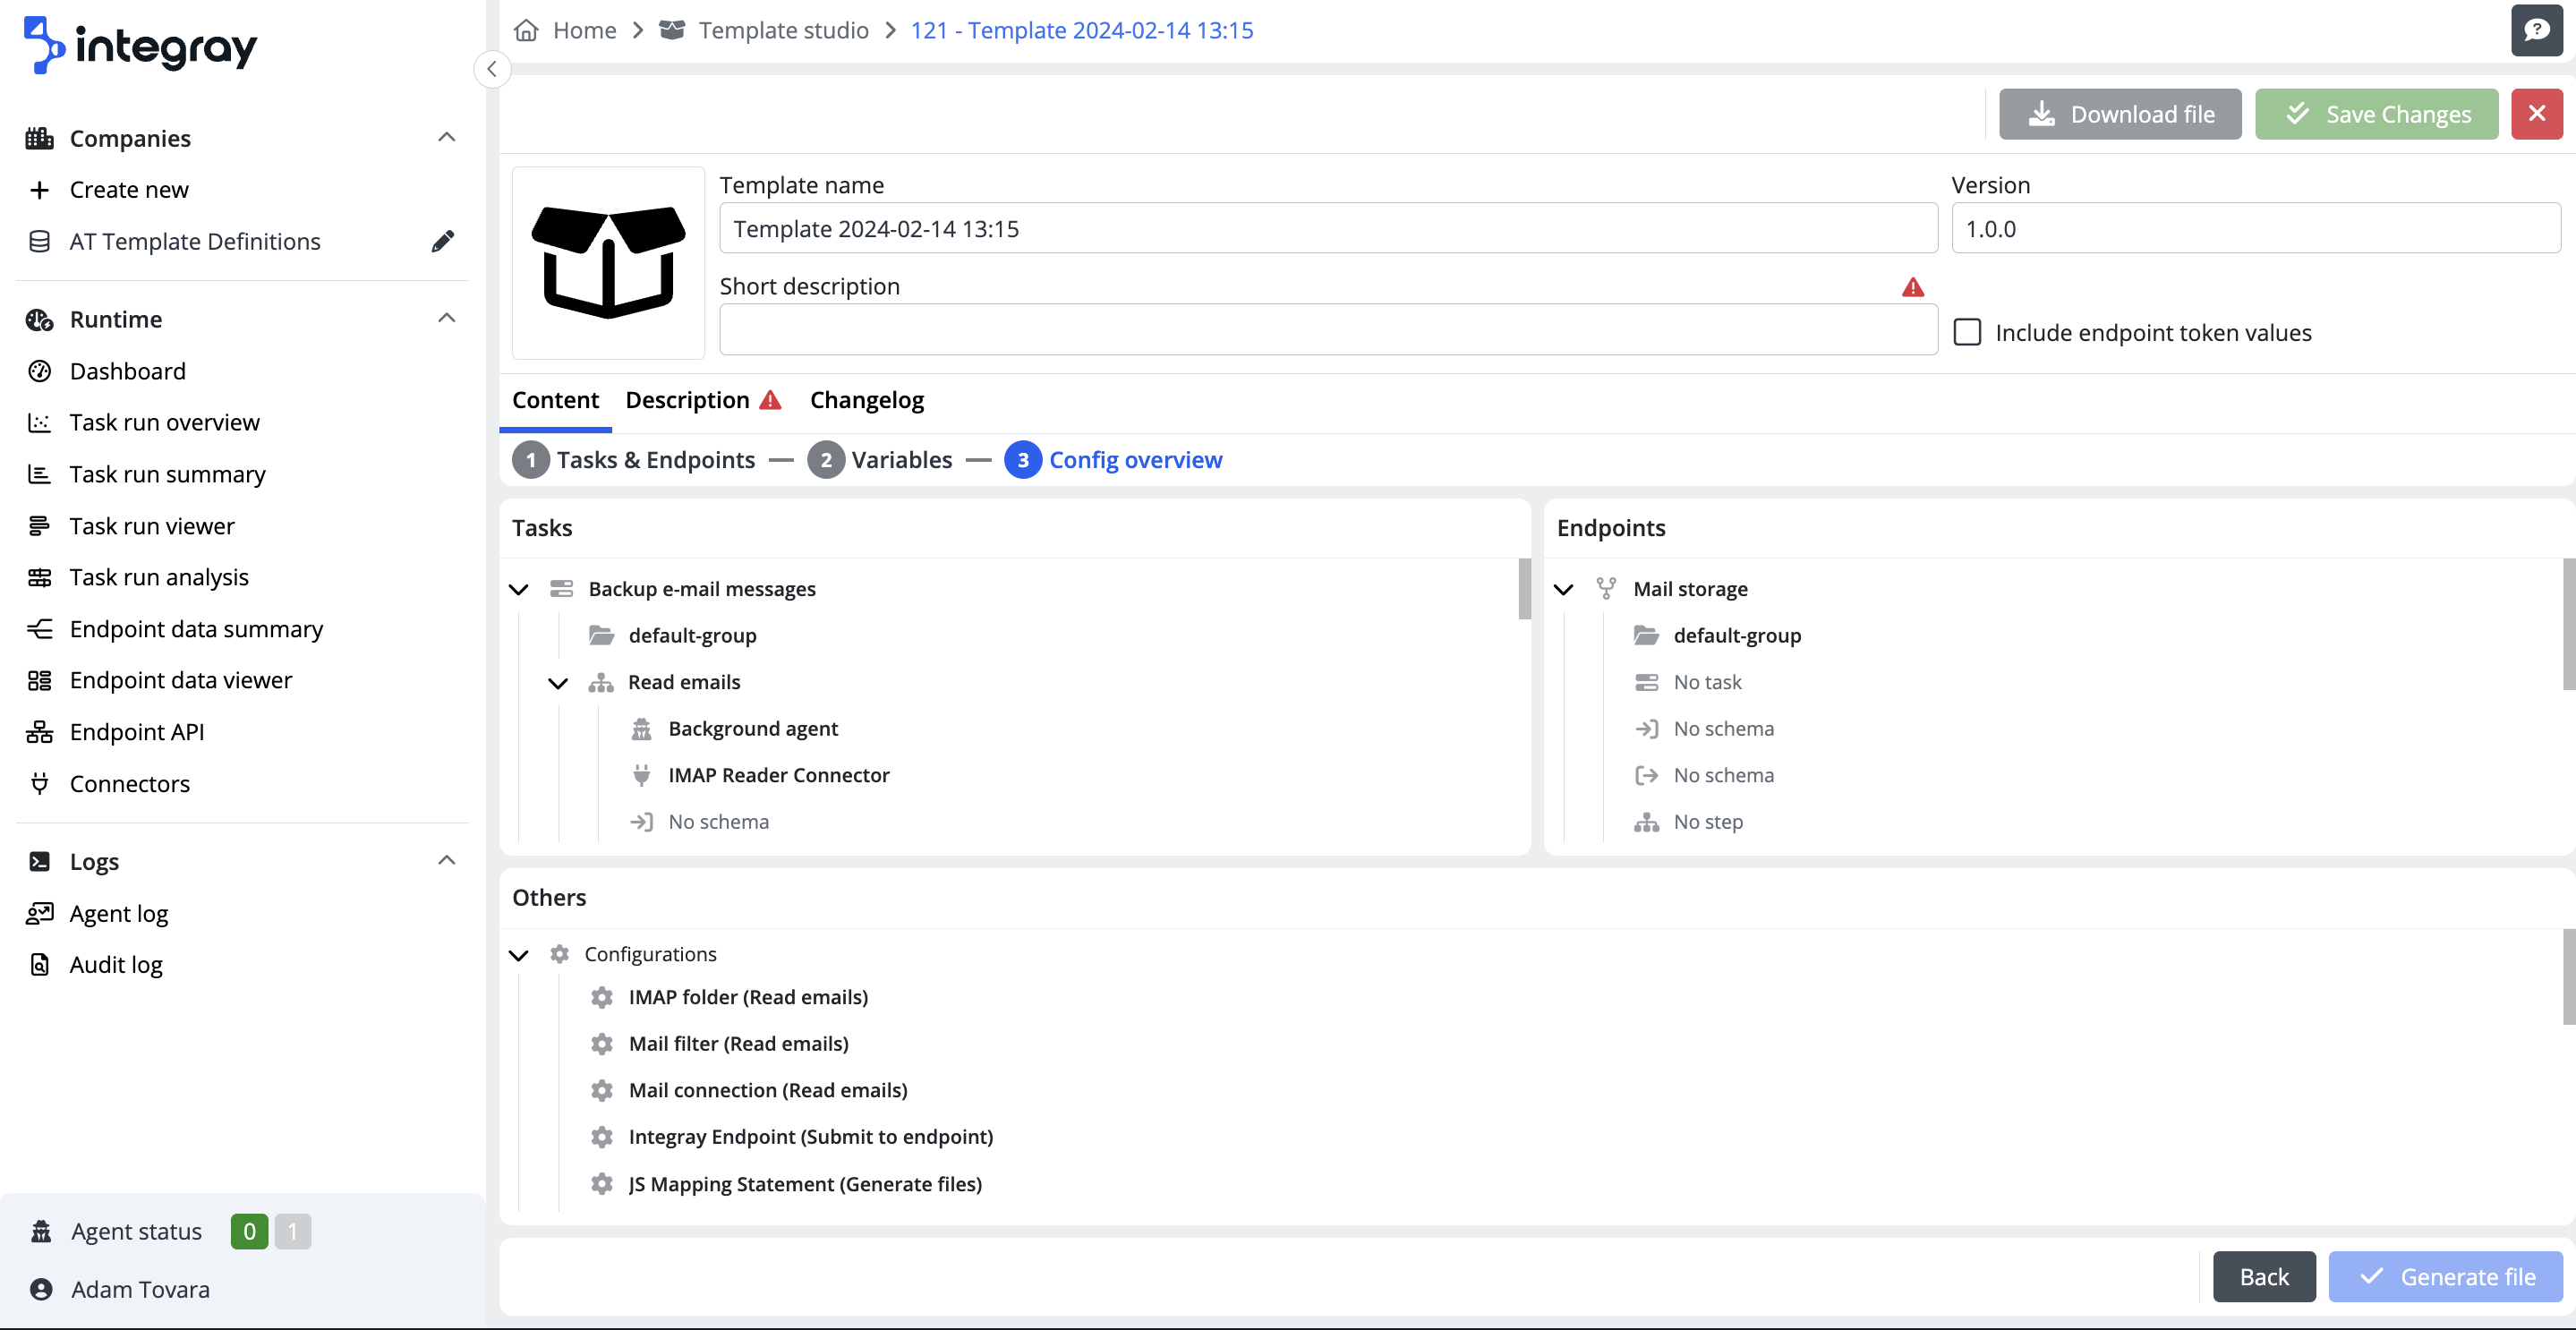
Additionally, you will find the Generate file button on this screen, which you can use to generate the template file. This button becomes active once all mandatory fields (marked with a red triangle containing an exclamation symbol) are filled in within the whole template creation process.
Description editor
The template description provided by an expert users is expected to contain the template's purpose and help end users understand the meaning of variables and the potential configuration of related external systems.
To provide a detailed description of your template, click the Description tab to access the Description editor. The editor interface is divided into two panels. On the left, you’ll find the Template full description area, where you can provide an in-depth description using Markdown formatting. As you add details to this area, the right side of the editor will display a live preview of how your text will appear to users when they choose to implement the template.
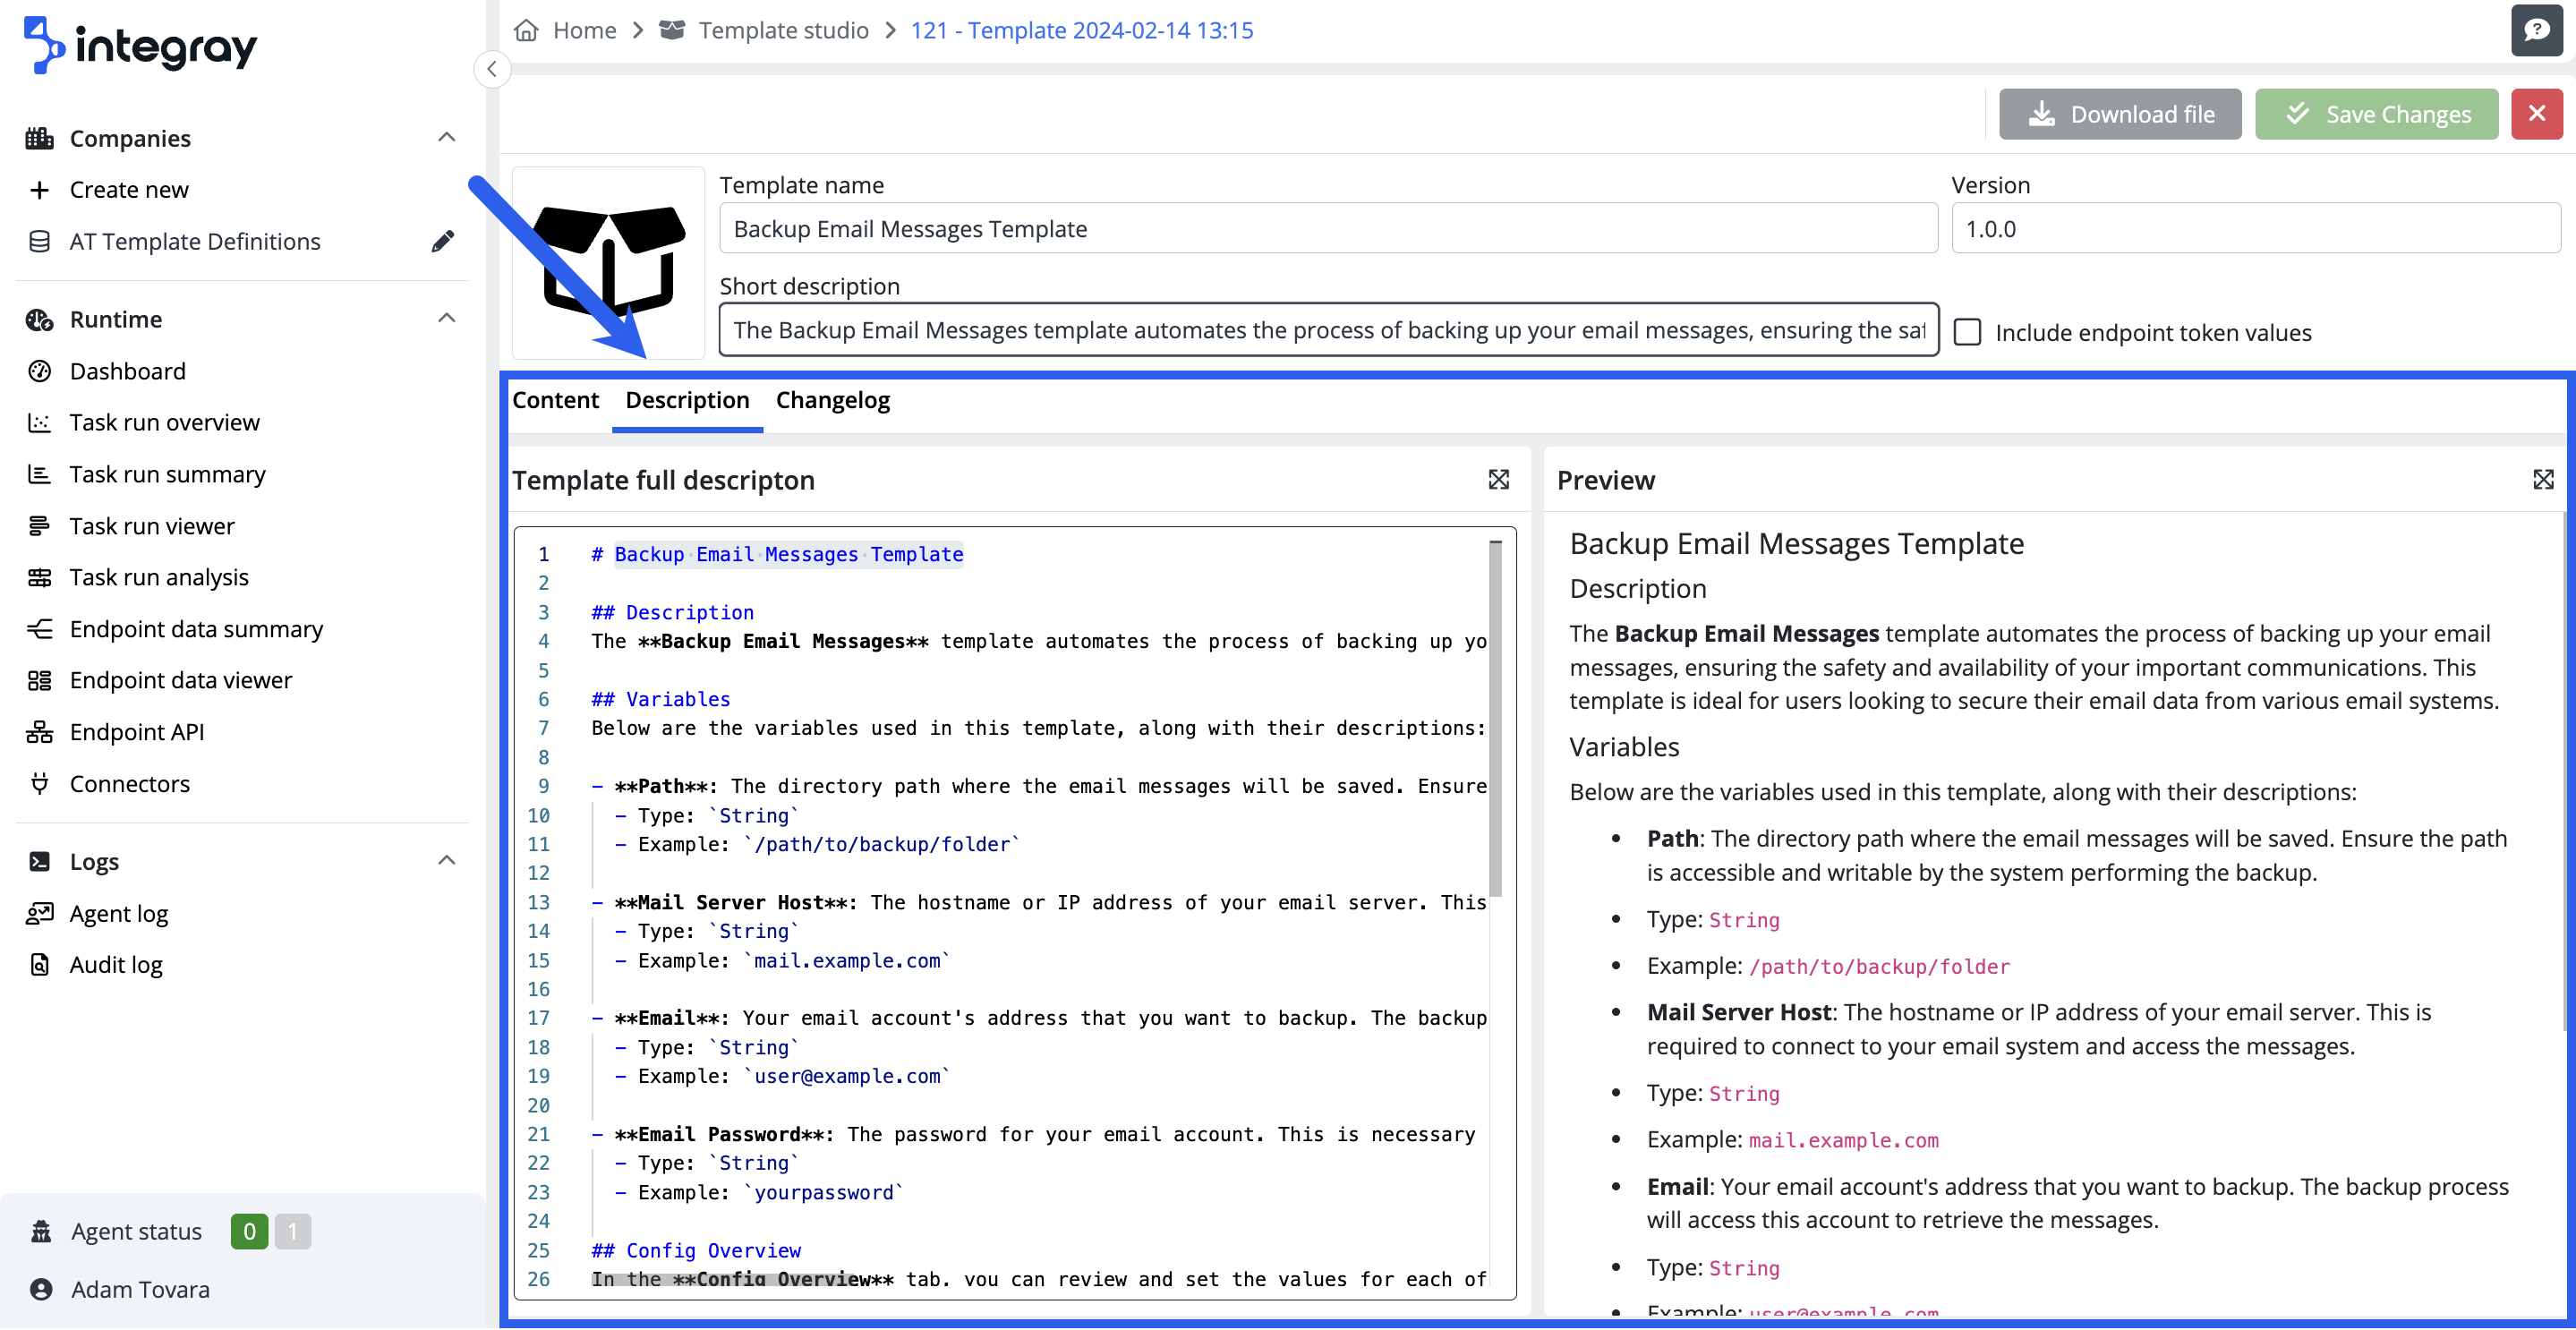
Required field
The description field is required for the template to be comprehensive and easily understood by users. Complete this field to provide essential information about the template's use and capabilities.
Change log editor
A change log, also known as a record of changes, is a section complementing the overall description of a template. Here, you can record the template's significant modifications, updates, and fixes. This tool is essential for both users who define the template and those who apply it. In this editor as well, Markdown formatting is utilized for writing in the left part, and on the right part, you'll see a preview of how the text will appear to users applying the template.
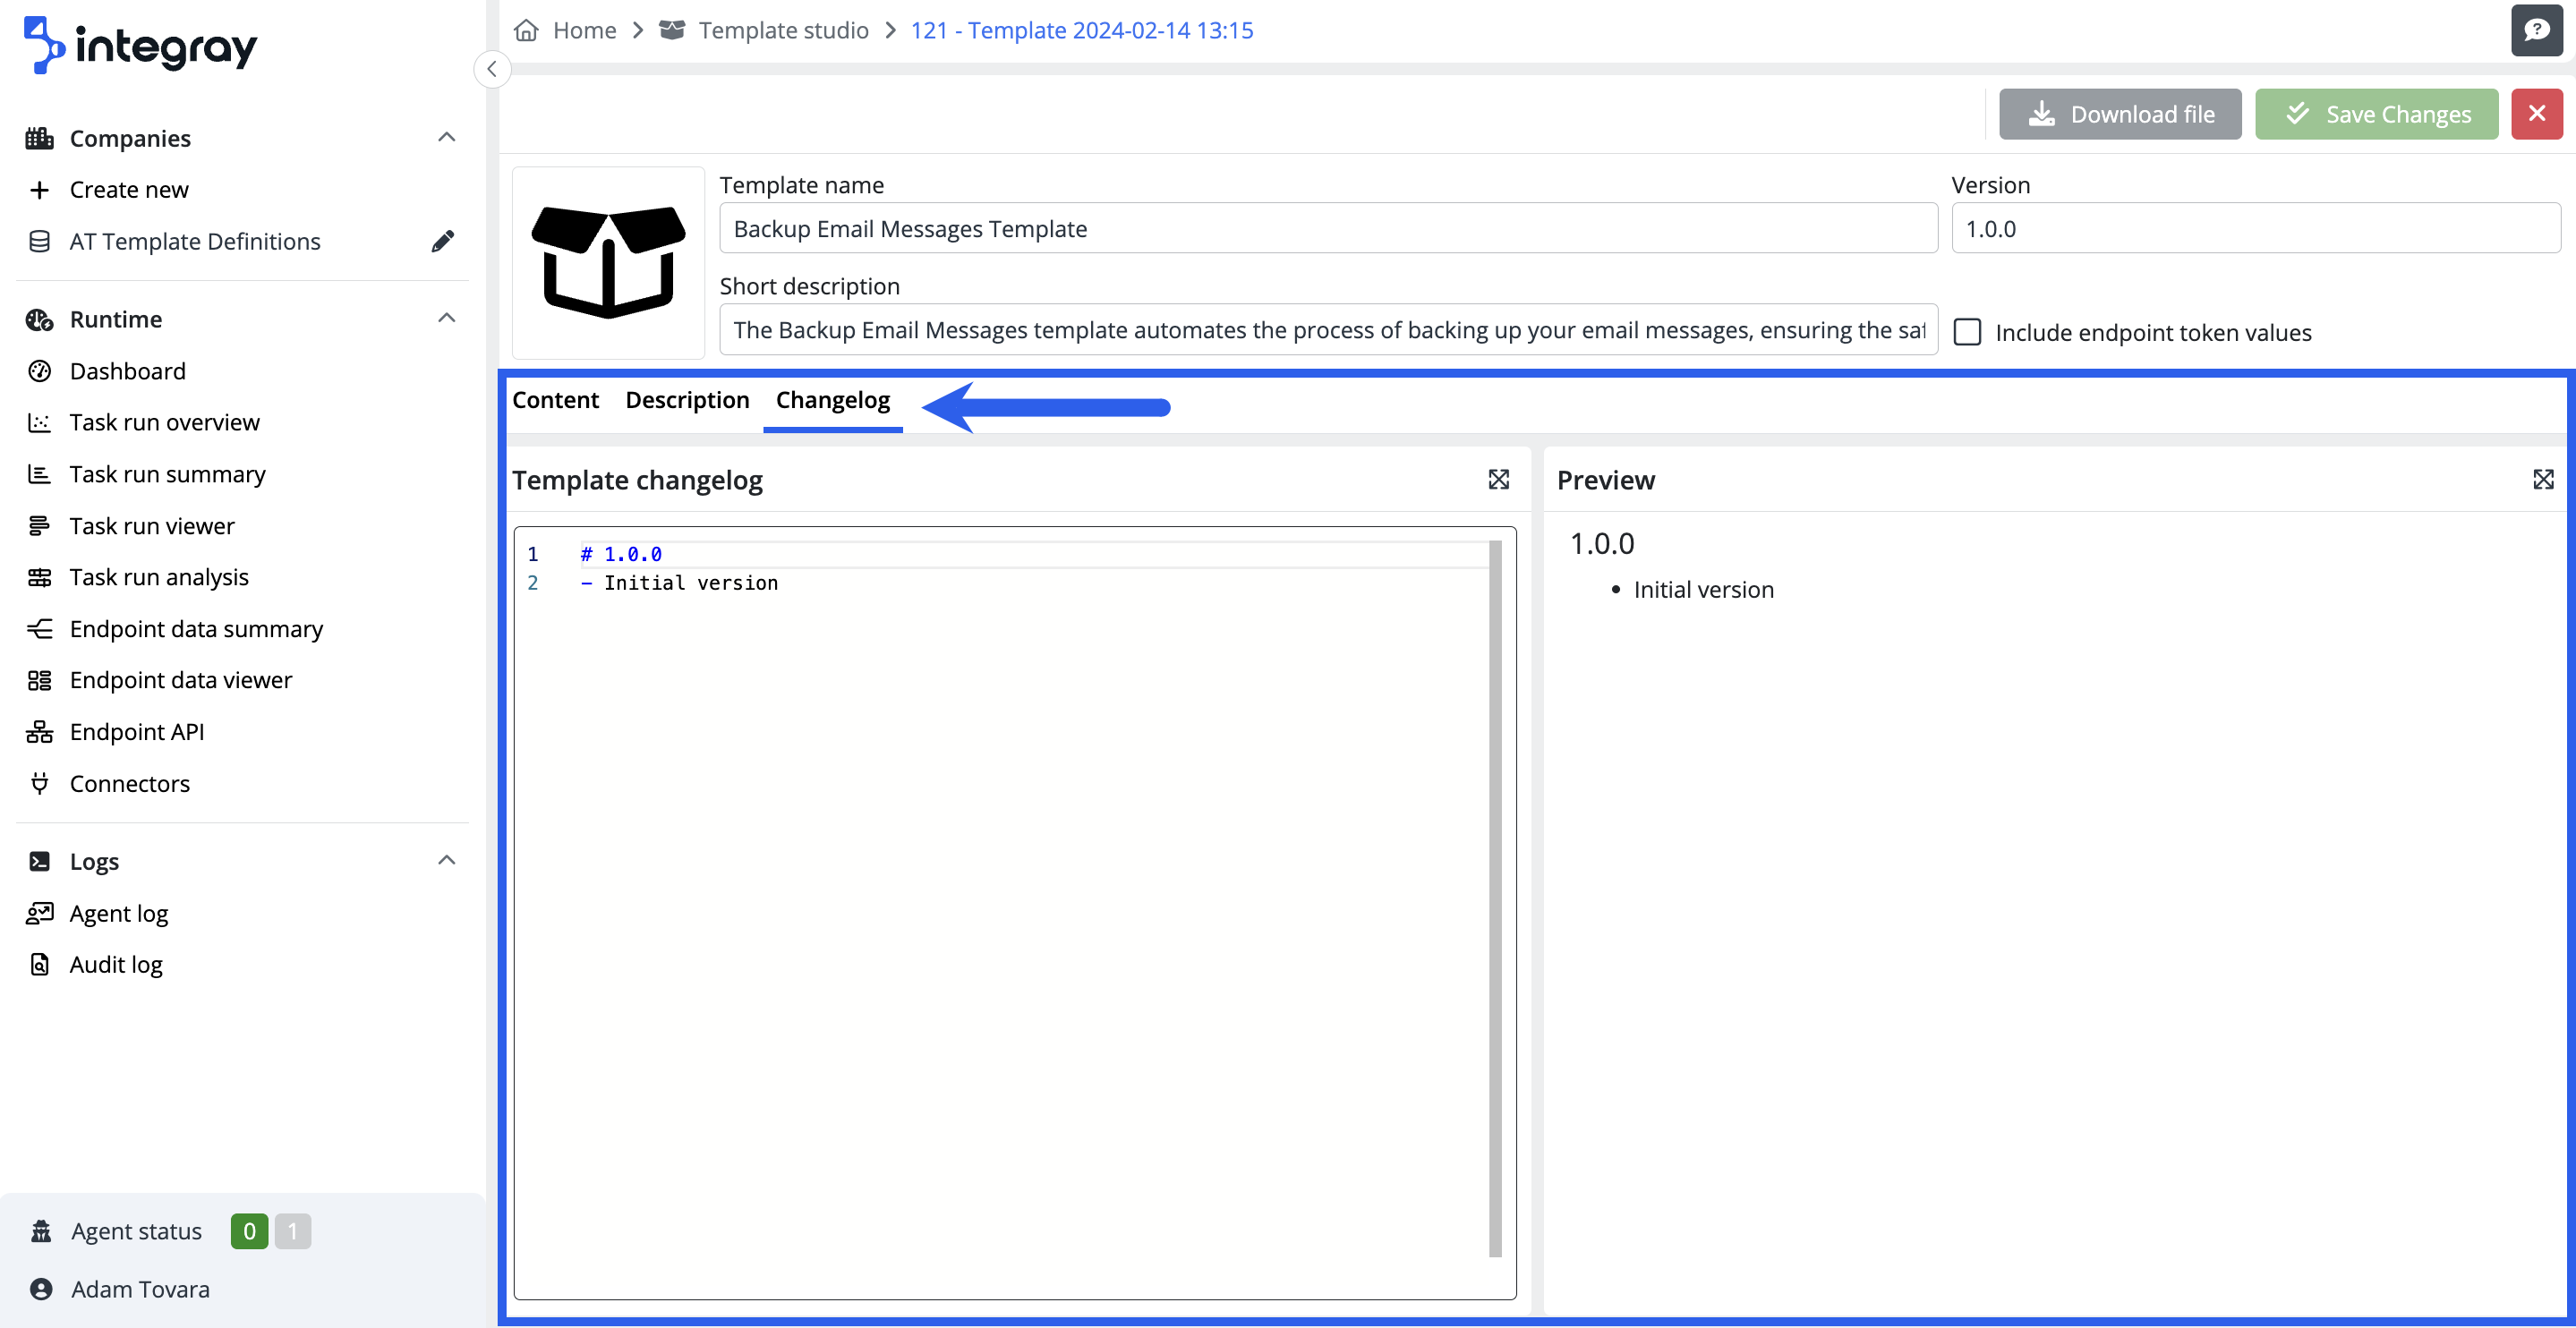
Main functions and benefits of the Change log:
- Change history: Tracks how the template evolved over time.
- Transparency: Provides users with insights into the changes made.
- Bug fix record: Details the bugs fixed.
- Update details: Announces new features or improvements added to the template.
- Decision support: Helps users decide whether to update based on the changes made.
After filling in all required details and customizing the template as per your preferences, click the Generate file button in the Config overview tab of the Content editor to start generating your template. A toast notification, "File successfully generated," will appear to confirm the file's generation. After generating the file, the system will enable the Download file button in the Template header menu, which lets you download the template as a JSON file. The system will name the file after the template. Once downloaded, you can share your template with other users.
Template definition update
To update your template, start by navigating to the Template Studio. This is where all your templates are organized. Locate the template you wish to update. You can use the search function to find specific templates easily.
Open the template, and you can now make adjustments throughout the entire editor. It's crucial to edit the version number, modify the description to reflect any changes accurately, and, most importantly, fill in the change log. Ensuring the current version number helps track the template's evolution and facilitates easier management. An updated description provides clear insights into the template's current functionalities, while a detailed change log captures all modifications, enhancements, or fixes made. This comprehensive approach to updating ensures that your template remains organized, transparent, and user-friendly.
Unsaved changes alert
When editing a template, your modifications will be lost if you make changes and attempt to close it without saving it. To safeguard against unintentional data loss, we've implemented a feature that detects unsaved changes. Suppose you try to navigate away or close the template under these conditions. In that case, a popup notification will alert you, allowing you to return or confirm your intention to discard them.