

Check the signature of a Respond.io webhook
The Respond.io - Check Webhook Signature connector is used to receive selected changes (see Signing key) that have occurred on the respondio account. In this example, we'll show how webhook work and how to use them effectively.
Each of you has a different, special ability to absorb information. That's why we've divided the process of creating our examples into visual and textual. If details are important to you, continue with the text tutorial below, complete with visual examples. If you prefer an audio-visual experience, try the video tutorial from our YouTube channel. And of course, you can combine reading and watching to fully understand the process of creating an integration between Integray and Respond.io.
Prerequisites
Create an account with an email and password at Respond.io (a confirmation code will be sent to your email, so you must have access to the email). Fill in the necessary information in "Let's set up your organization".
You also need to enter a contact. You can enter the contacts manually or use our example Create, update, or get a contact.
We did this with an example by creating a task with a contact update on Integray.

Now that we have a configured Respond.io account, and we have a task for updating user credentials in Respond.io, we can move on to the webhook settings.
We will focus on the changes in the contacts.
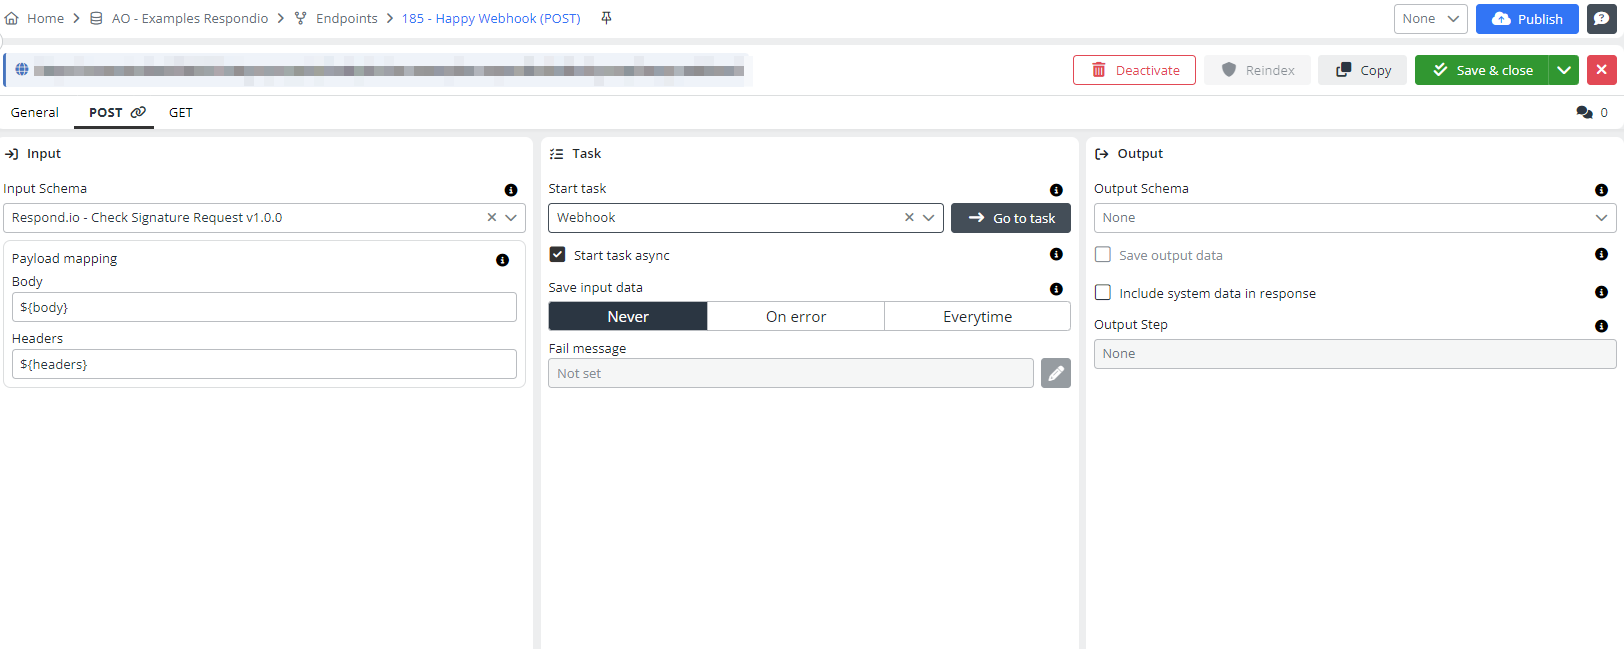
Create an endpoint. Go to POST, select the input schema - Respond.io - Check Signature Request.
In the mapping, edit the input data to placeholders, as shown in screenshot below.
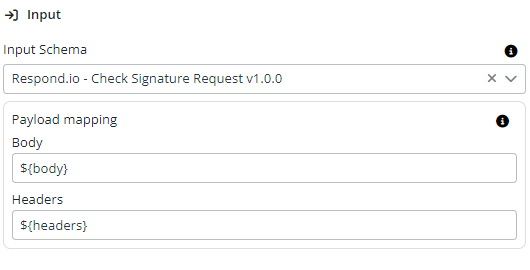
Save the endpoint.
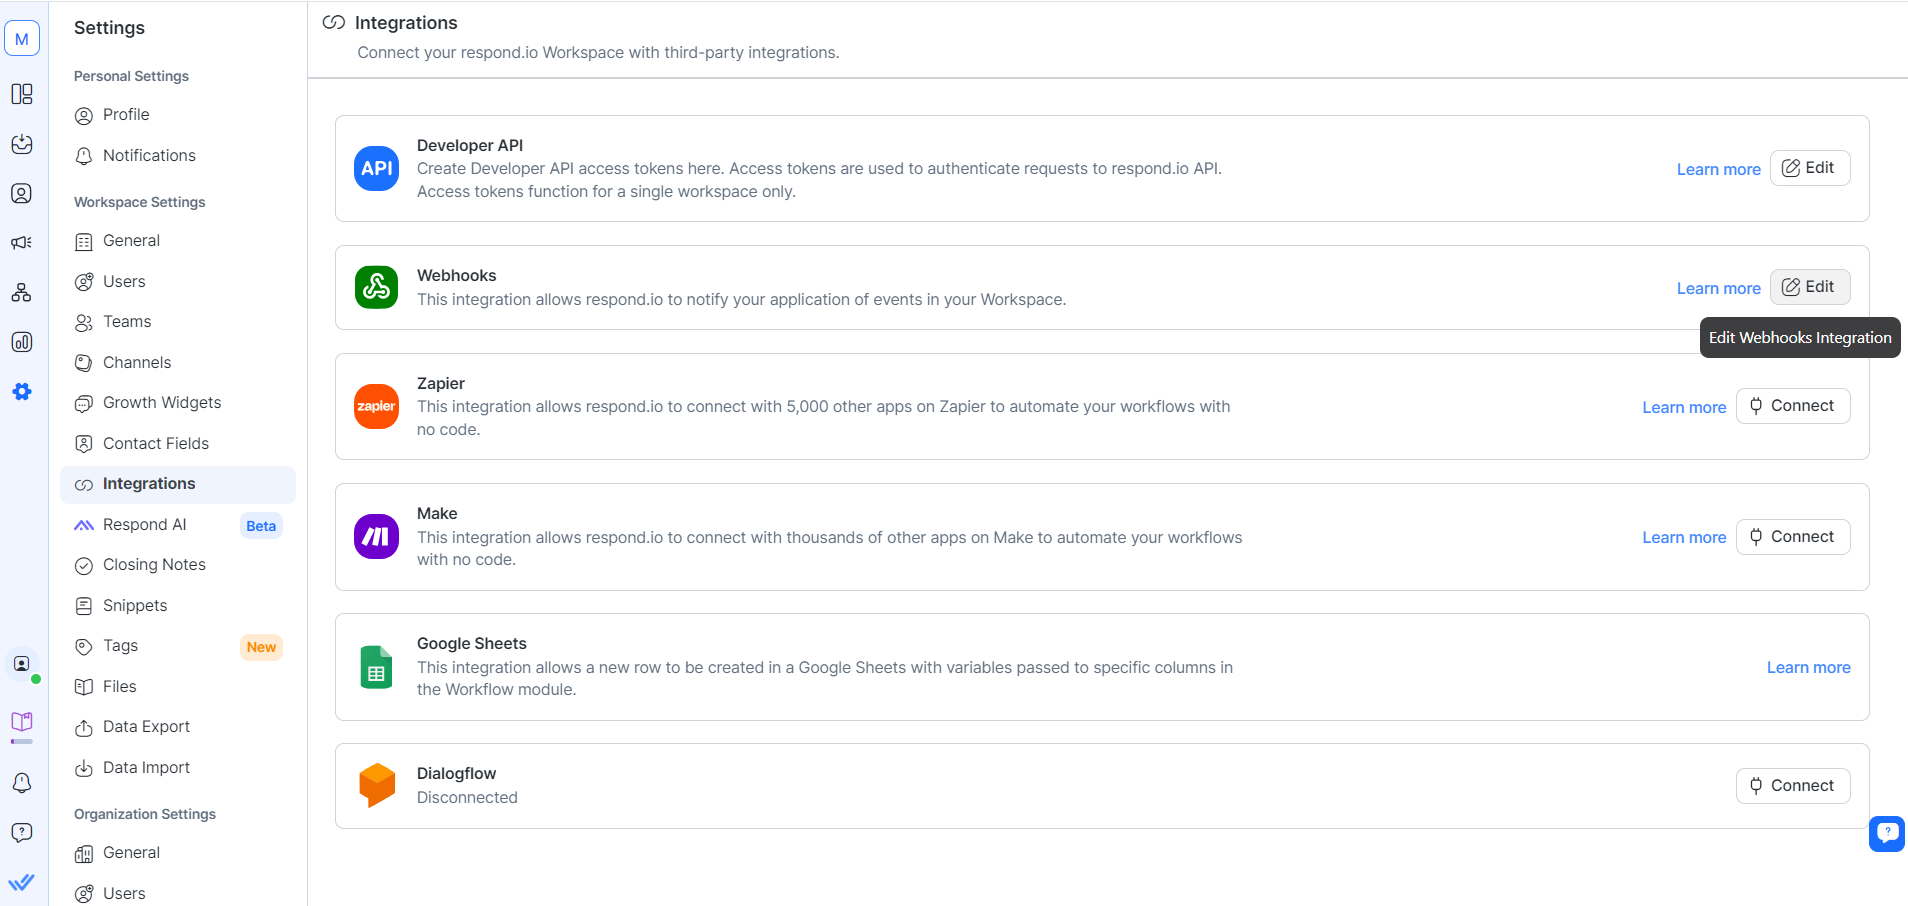
Let's go back to Respond.io for a moment.
Go to Respond.io. Create a new signature key.
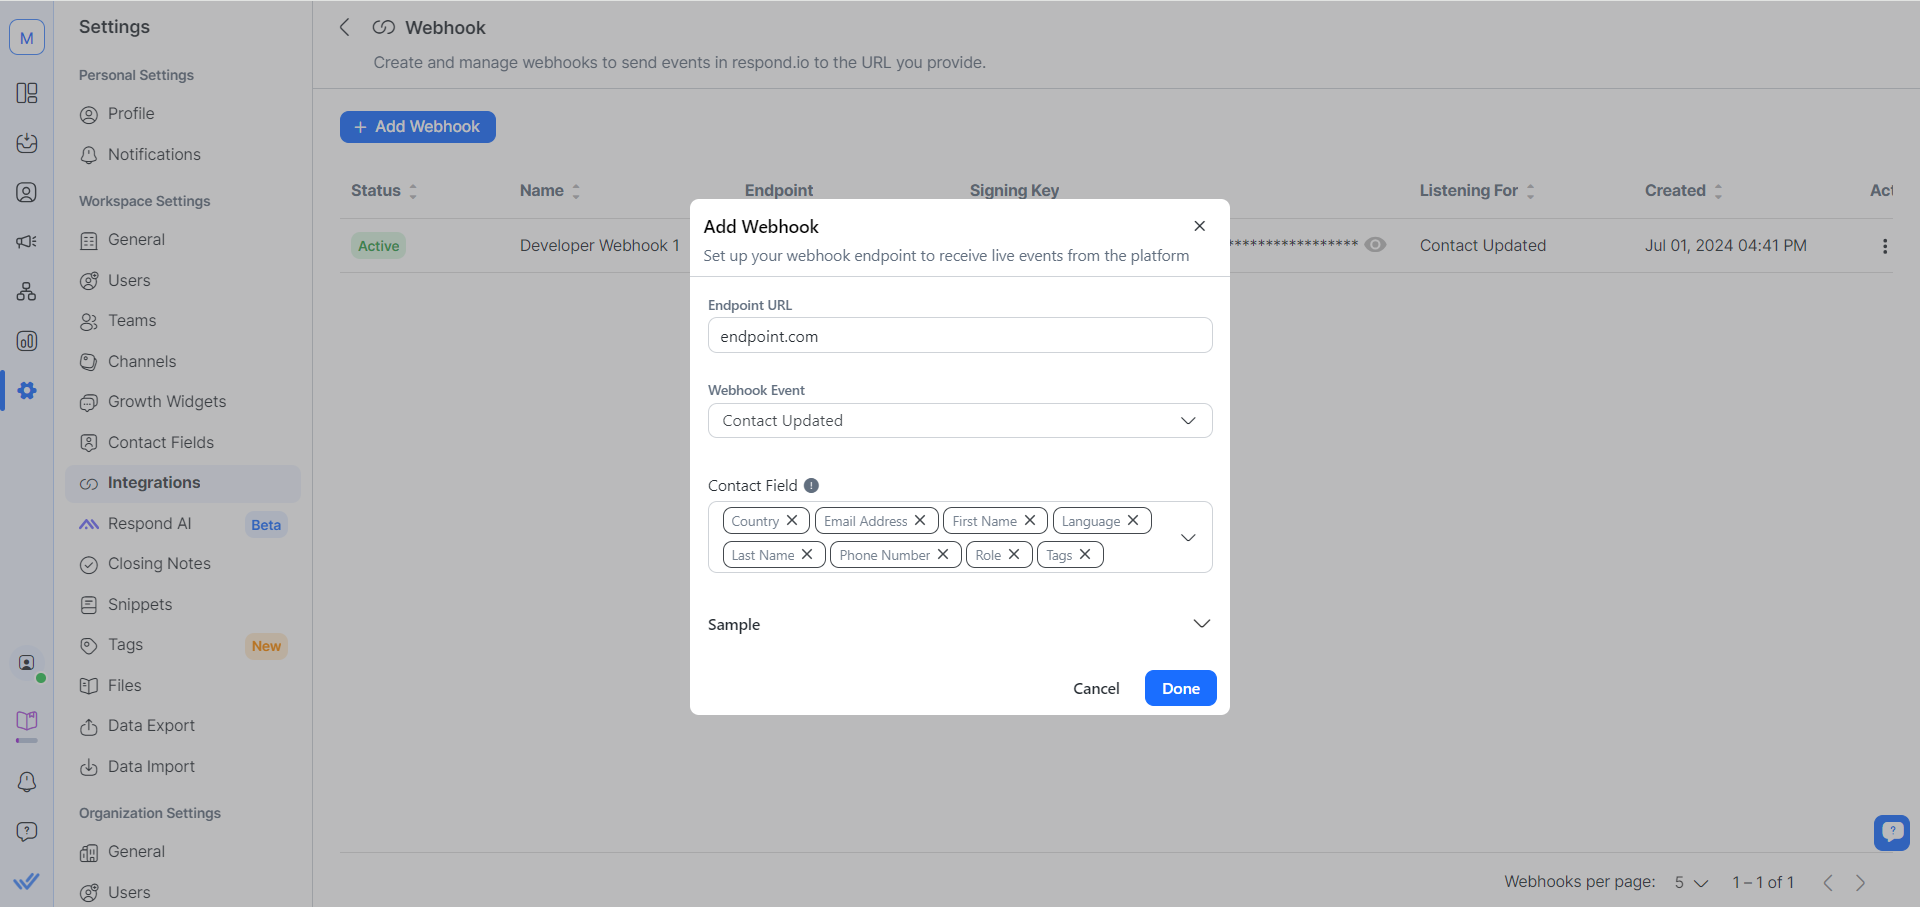
Add a new webhook, add the endpoint URL and select the action we want to be notified about via webhook - Contact Updated. Confirm by clicking Done.
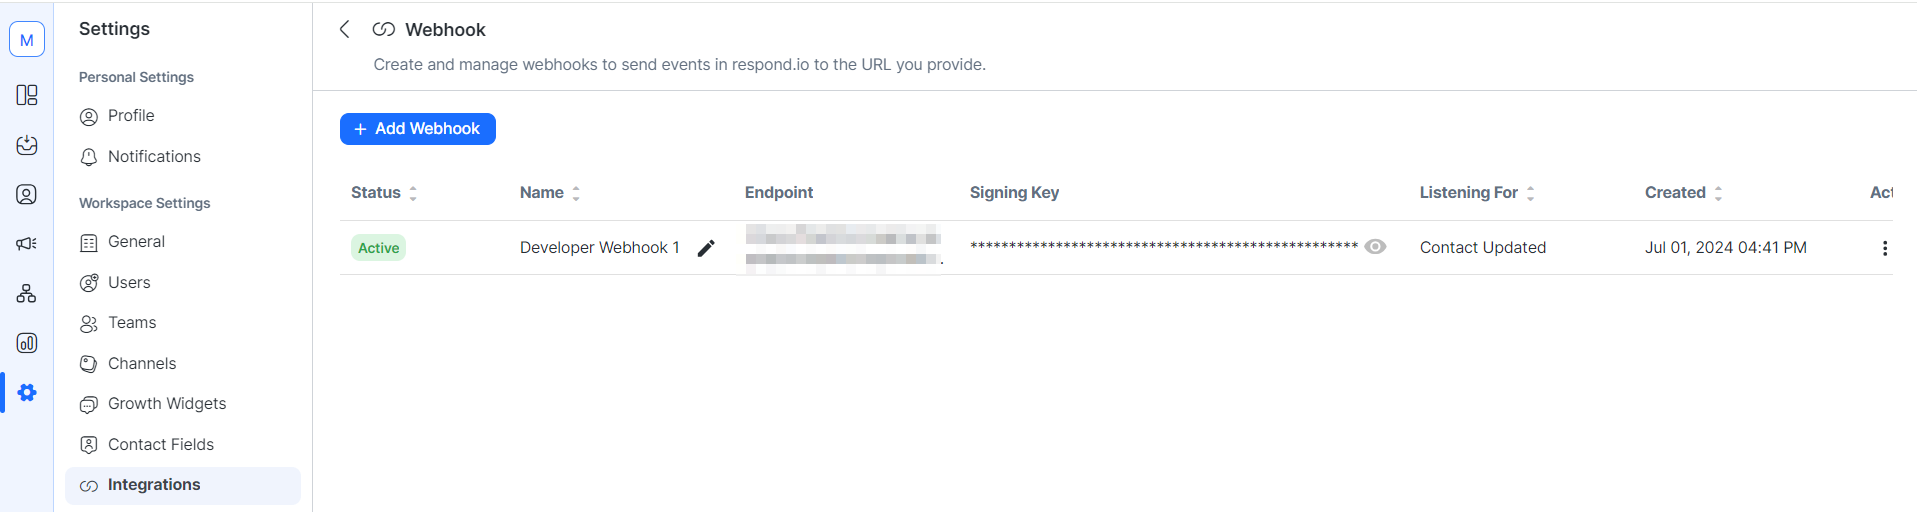
Copy the newly created signature key.
Now we'll go to Integray again.
Add a new Task and name it Webhook.
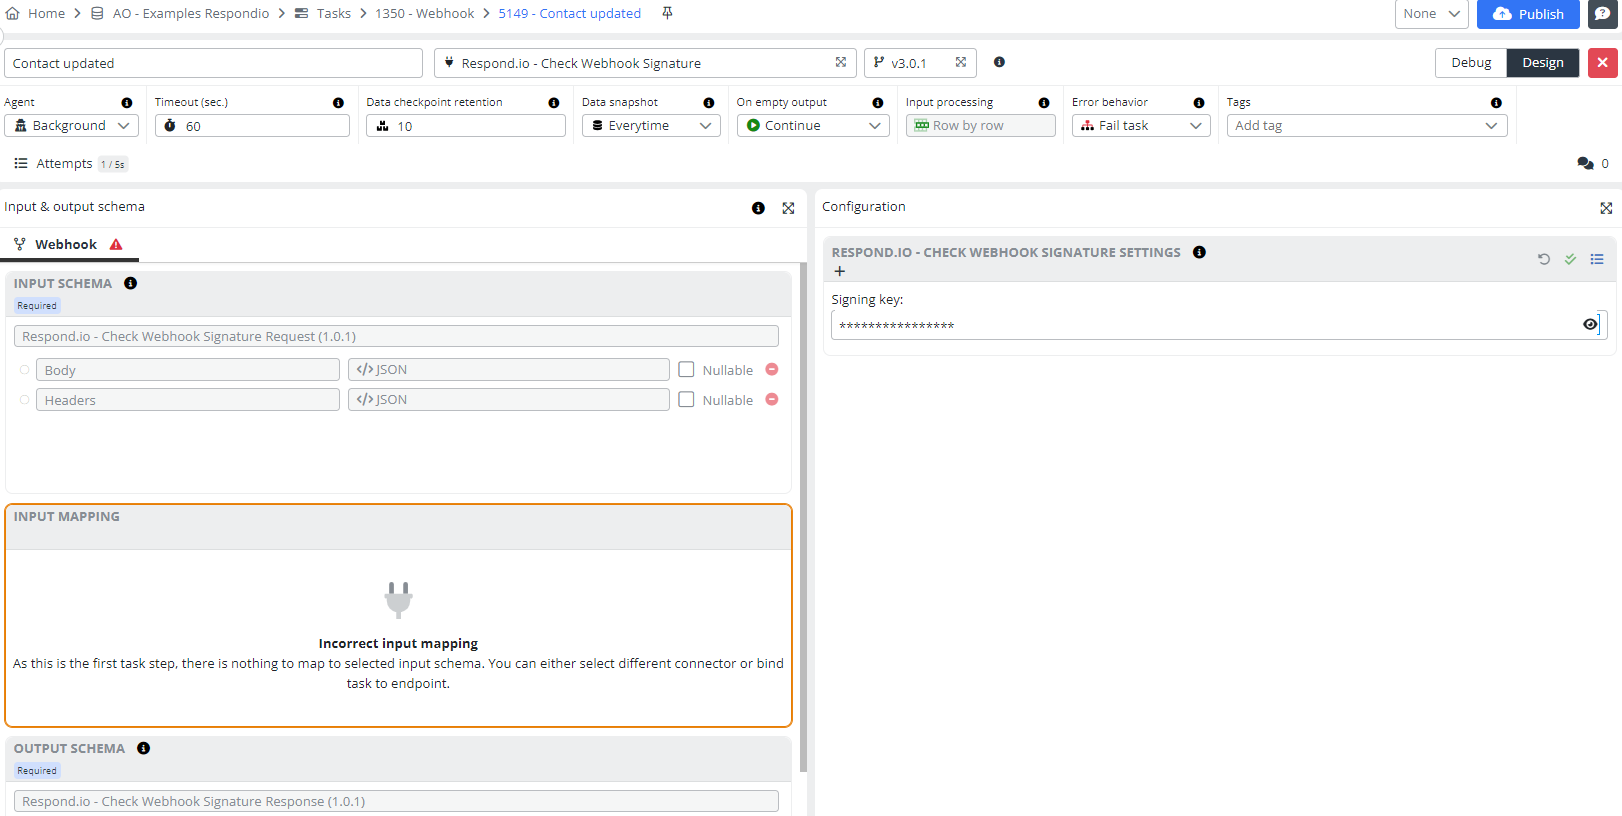
Check Webhook Signature
A webhook in Respond.io allows your apps to communicate in real-time. Think of it as a messenger that instantly sends data from Respond.io to other applications when certain events happen. For example, if you receive a new message on Respond.io, a webhook can instantly send this information to Integray.
Configuration
Add a Task step:
- Step name: Contact updated
- Connector: Respond.io - Check Webhook Signature
Open the Task step editor. Add the copied signing key to the appropriate field in step configuration.
Go back to the endpoint, add the created task to it and save.
Add the mapping from the endpoint to the task.
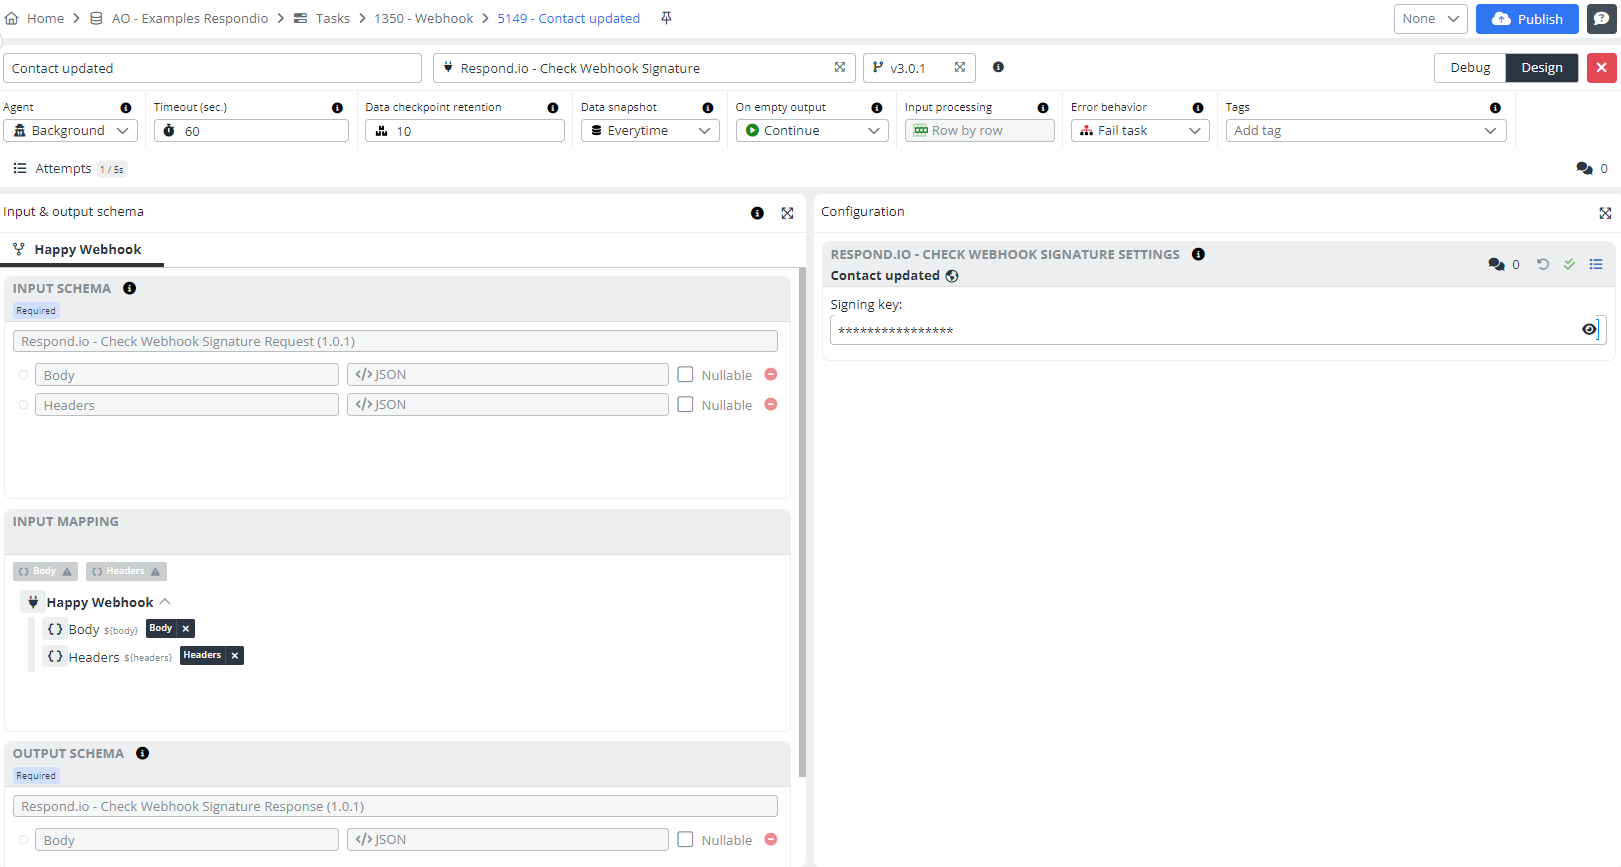
Press the Publish button.
In Integray, it looks something like this: we have a task for updating user credentials in Respond.io. Here's the webhook connected to the endpoint.

Result - The webhook triggers automatically
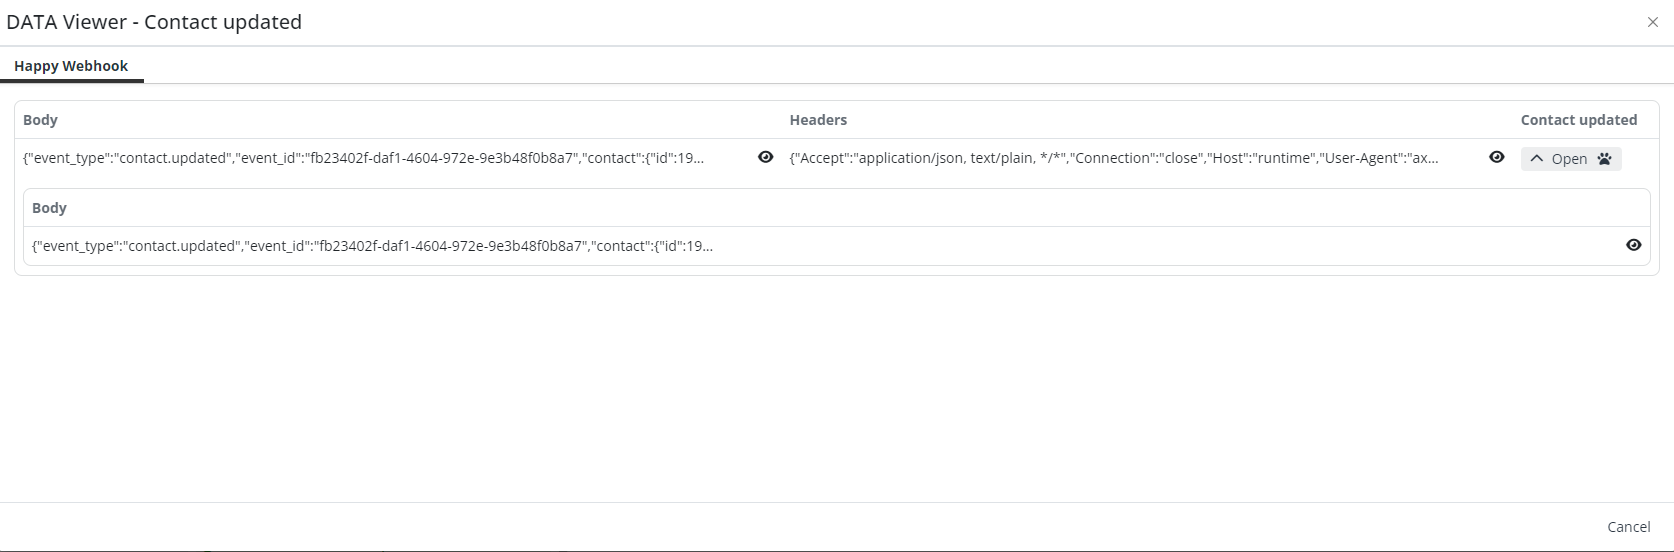
When we start the Update Contact task, the webhook automatically activates because it detects the changes made to the user credentials. Now, when we click on the webhook, we can see that this task also ran successfully.
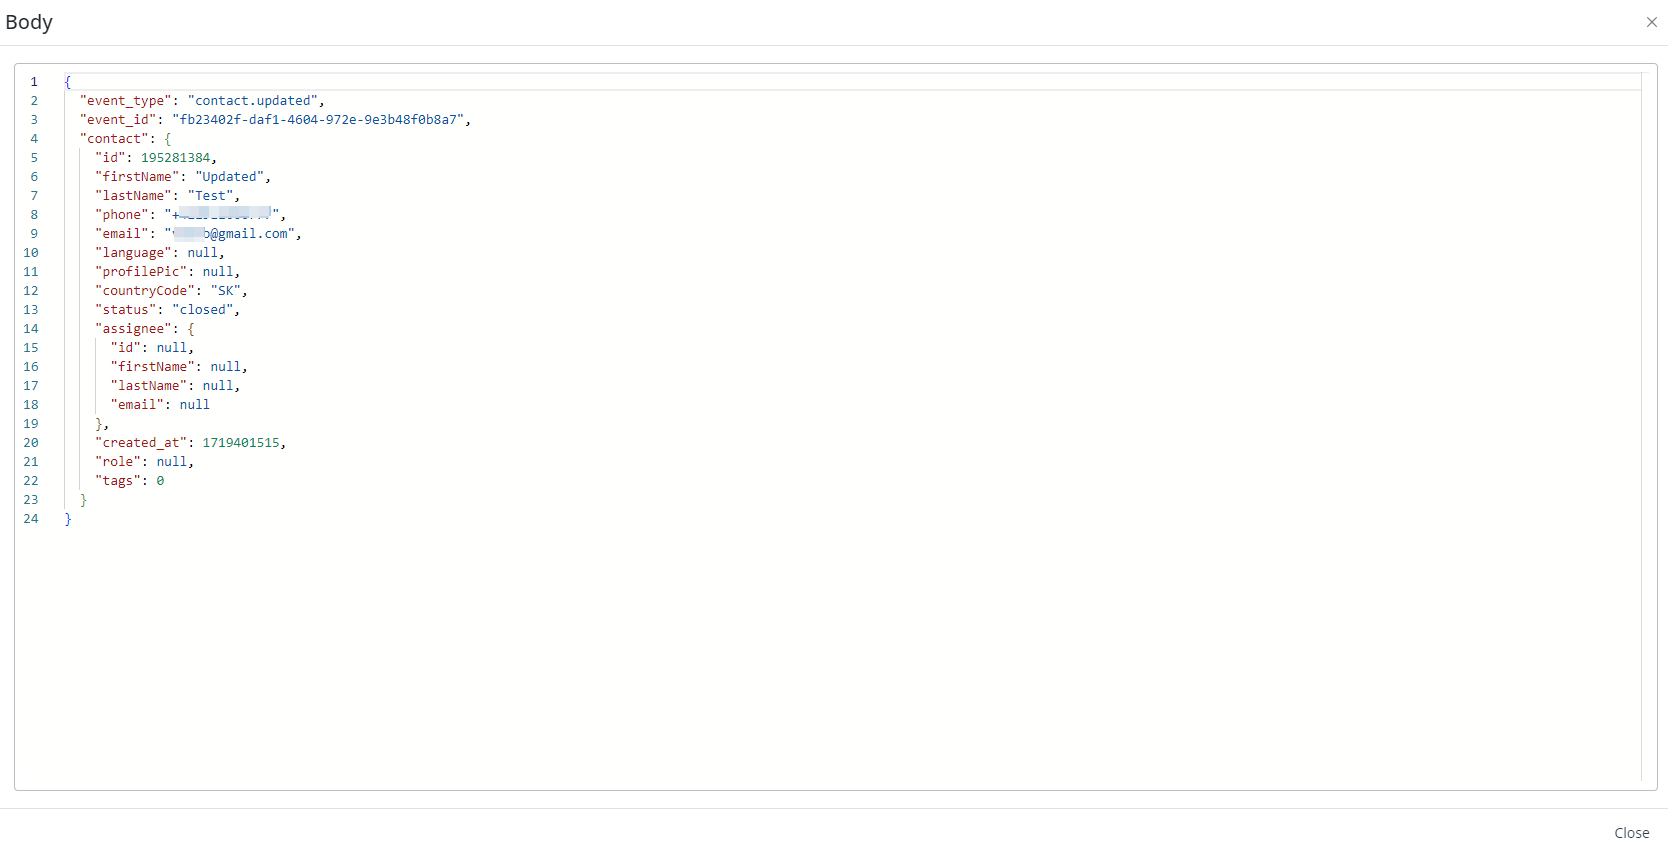
We can open the data snapshot, then click on the body section, and here we can see all the data the webhook captured. This data can be modified and used across Integray for further processing and automation.
We hope that you have successfully completed the task following our detailed instructions. Thank you for your attention and we invite you to use our examples in the future.