

Create, update, or get a contact
Respond.io is a platform that aggregates different communication channels and makes it possible to send messages to different devices in different conversations in the same clear way (to email, to Instagram, or via Telegram or SMS).
We'll walk you through the process of creating a new contact, getting contact information, and updating an existing contact on Respond.io using a few connectors.
Create your own example using the most appropriate style for your perception. For a detailed dive into the steps of the task, continue exploring the text tutorial below, complete with visuals. Or if you prefer an audio-visual experience, take advantage of video tutorial from our YouTube channel. And, of course, you can combine reading and watching to fully understand the process of creating an integration between Integray and Respond.io.
Prerequisites
Create an account with an email and password at Respond.io (a confirmation code will be sent to your email, so you must have access to the email).
Fill in the necessary information in "Let's set up your organization".
A course to get started is offered on the main page - don't notice it.
You can add contacts without an existing channel.
Create Contact
Let's start with the first example, where we use the connector Respond.io - Create Or Update Contact to create a new contact on the Respond.io.
To create our first contact, we must have some data. These data will be used later on in the whole information flow. We can enter them ourselves using the JS Mapper connector. Or they can be not just entered, but, for example, extracted from the Excel table where we have entered the contact data. But for this feature, we need to use other connectors to read data from tables, like Excell Reader. In this example, we will use the JS Mapper for data entry.
Configuration
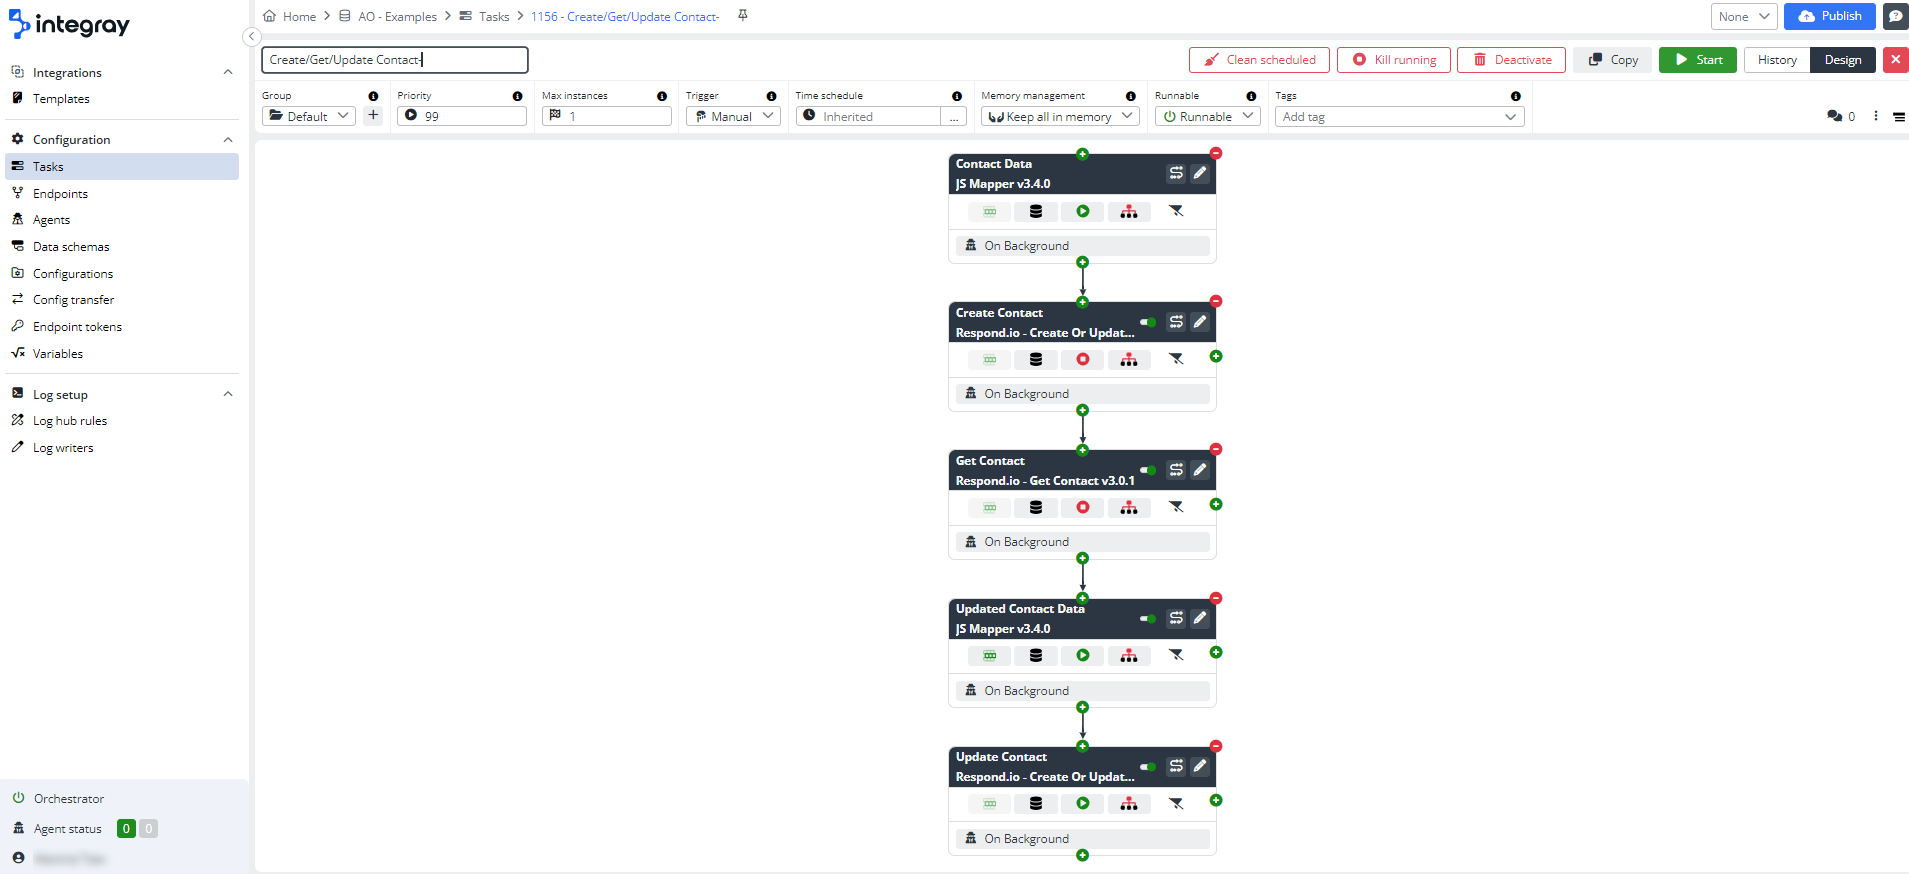
Add a new Task and name it Create/Get/Update Contact.
Add a first Task step:
- Step name: Contact Data
- Connector: JS Mapper
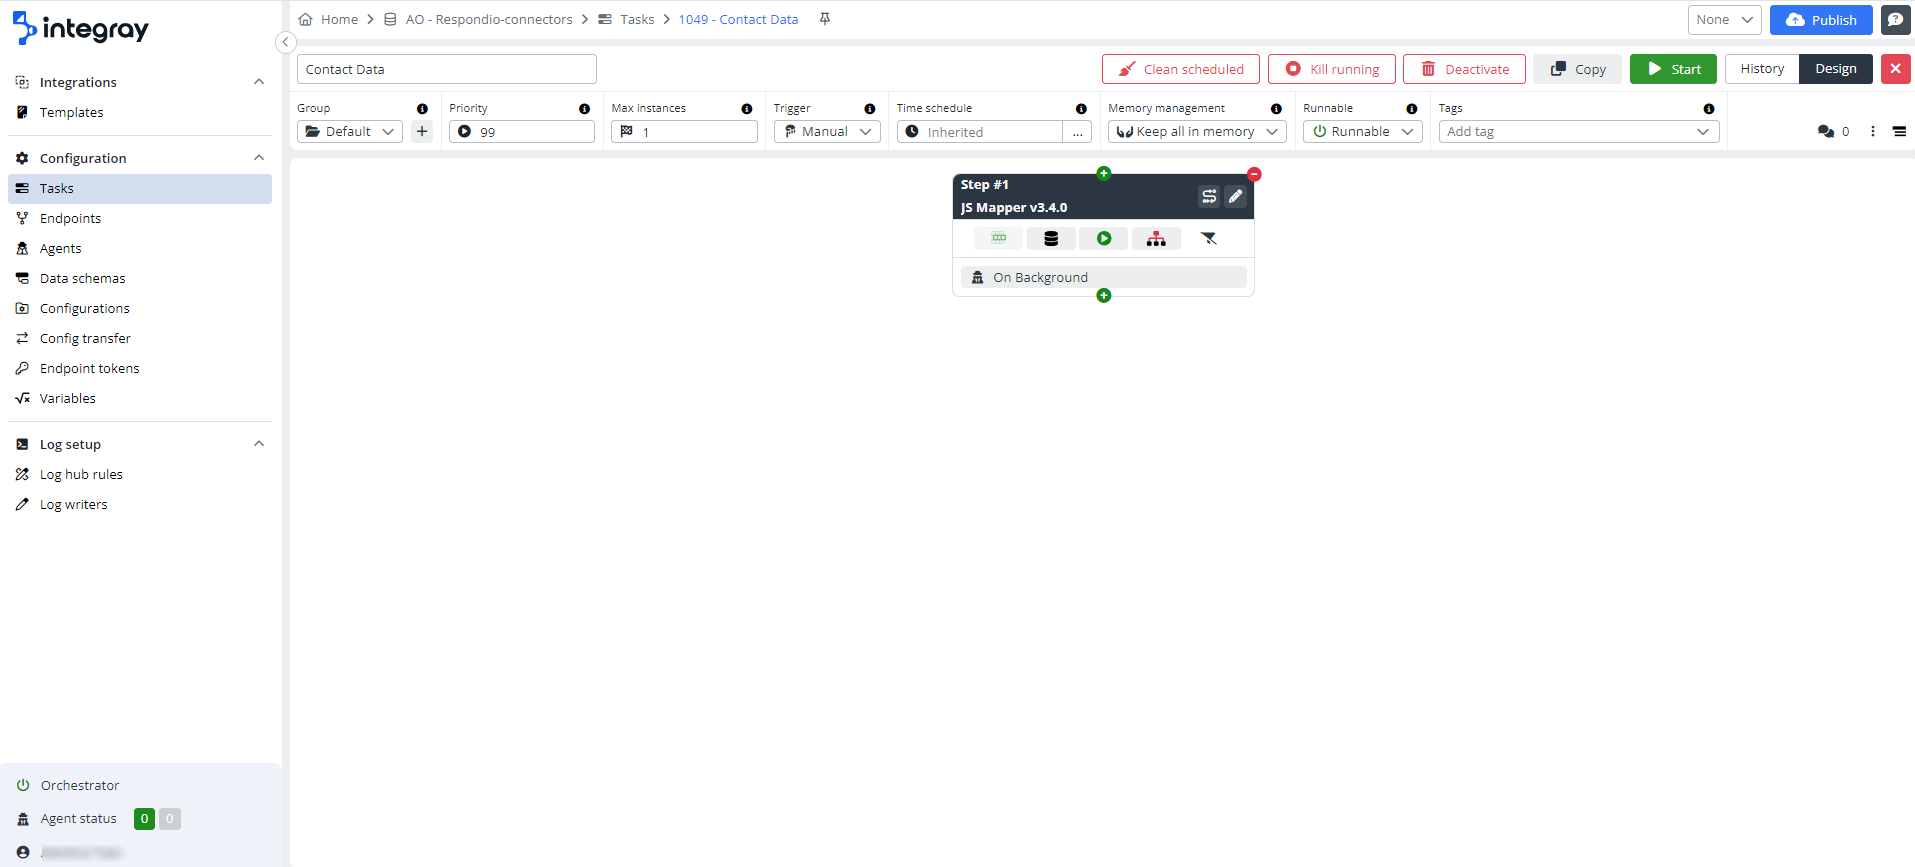
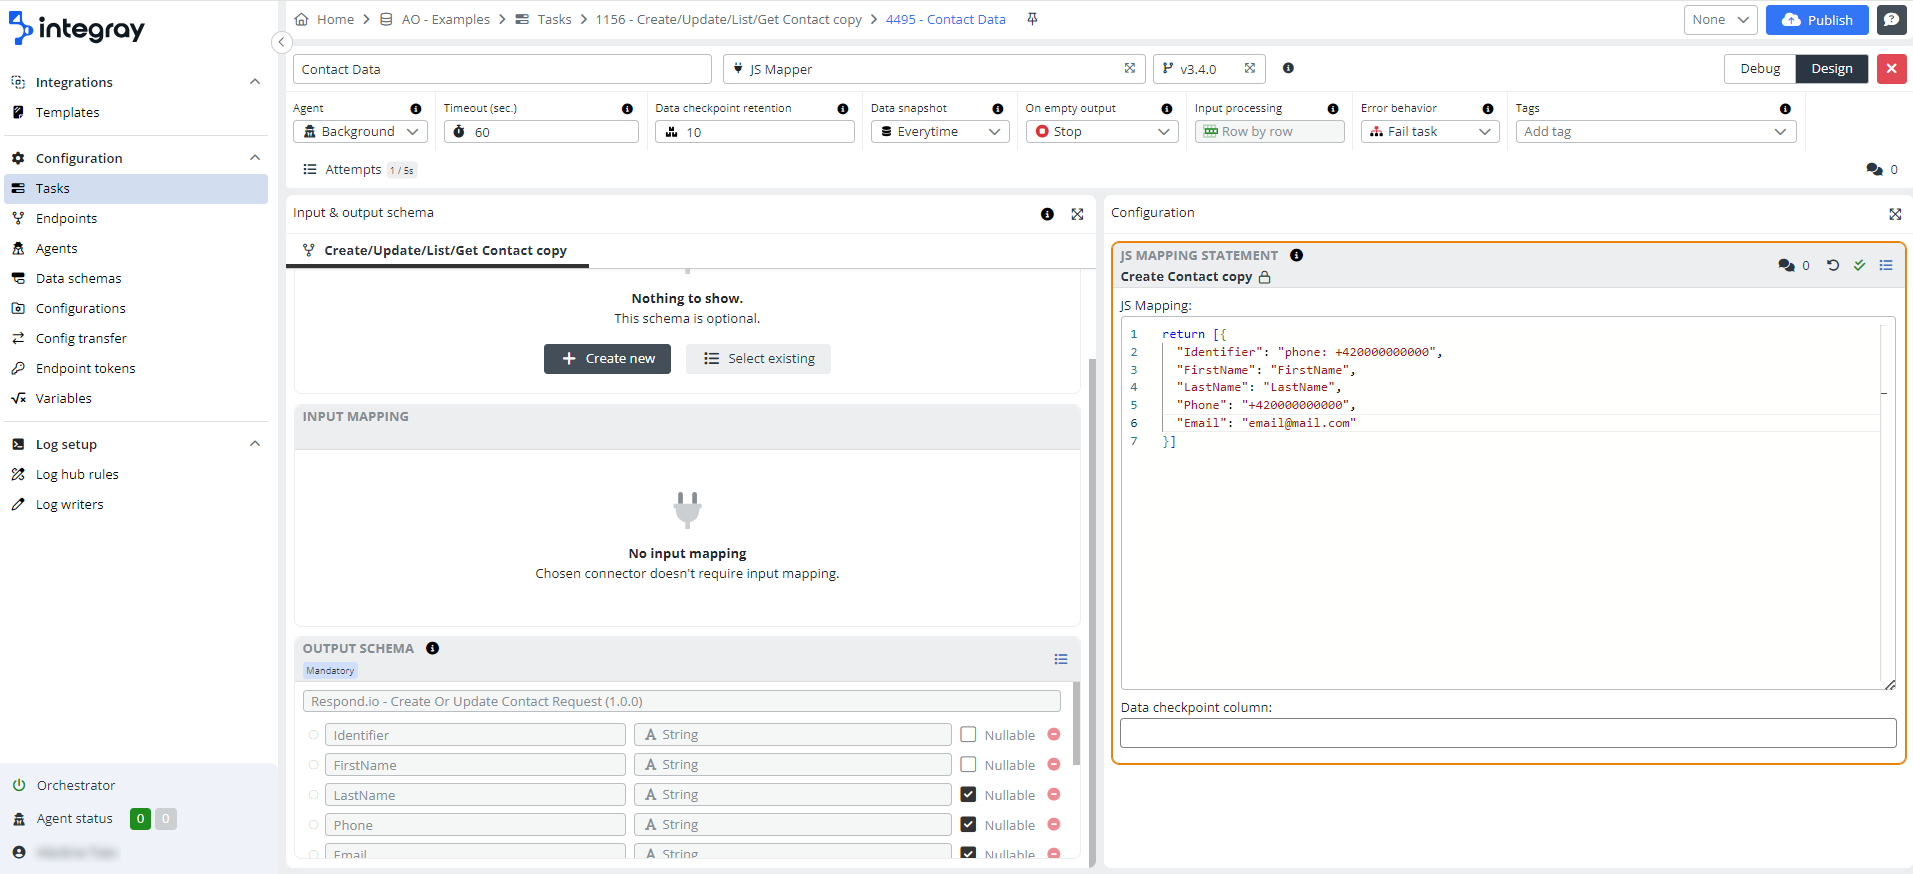
Open the step's Task step editor by clicking the button with the pencil symbol.
Insert the following code into the JS Mapping statement configuration:
return [{
  "Identifier": "email:first.test@email.cz",
  "FirstName": "First",
  "LastName": "Tester",
  "Phone": "+420123456790",
  "Email": "first.test@email.cz",
  "Language": "cs",
  "ProfilePictureUrl": "https://cdn.respond.io/profile_avatar.png",
  "CountryCode": "CZ"
}]
Identifier- contact identifier, which can be either a phone number, email, or contact ID (we get the contact ID after saving the contact, so it is used in case of editing the contact). The identifier is mandatoryFirstName- the name of the contact, it is mandatoryLastName- last namePhone- phone number in the format +420111222333Email- the contact's emailLanguage- language codeProfilePictureUrl- URL of the profile pictureCountryCode- country codeCustomFields- optional fields that you can select in the Respond.io settings
Select the Output schema Respond.io - Create Or Update Contact Request.
The setting of the first step can look like follows:
Add a second Task step:
- Step name: Create Contact
- Connector: Respond.io - Create Or Update Contact
Open the step's Task step editor by clicking the pencil symbol button.
Pin input mapping.
Fill in the token - find it after the instructions here: API Respond.io
Save the configuration.
Select error behavior and save the configuration again.
Press the Publish button.
Execute the task.
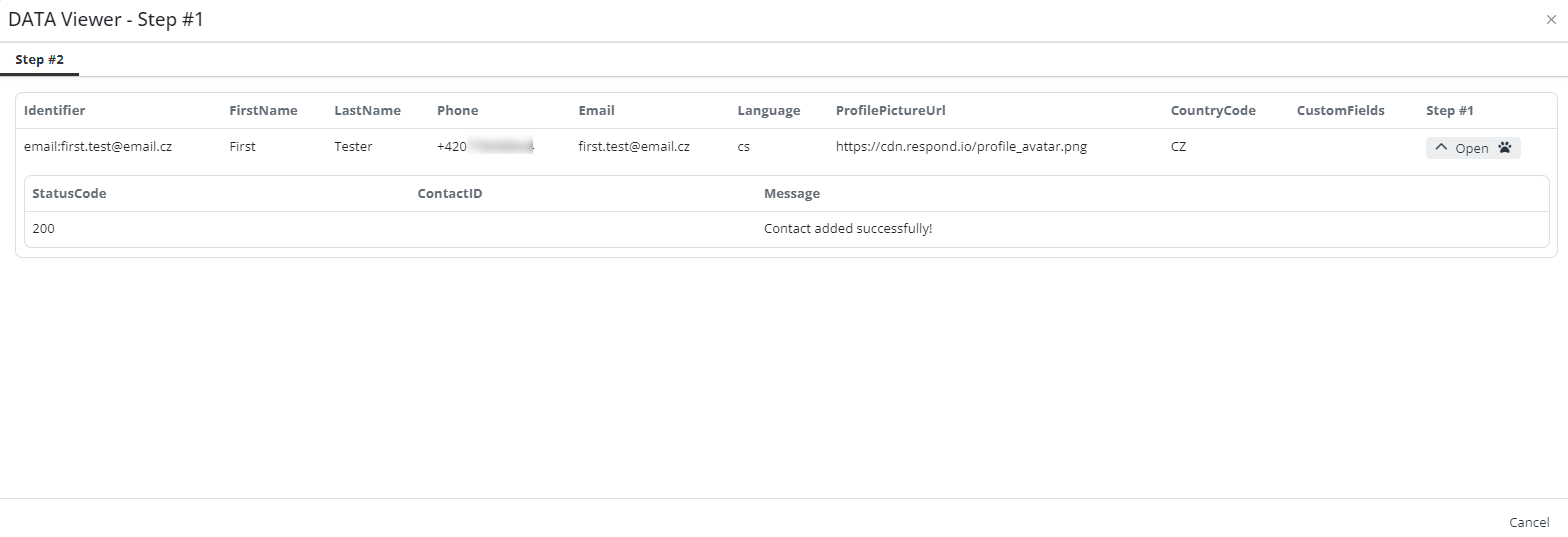
Result - newly created contact
As a result, we have a new contact created.
This is the result in Integray.
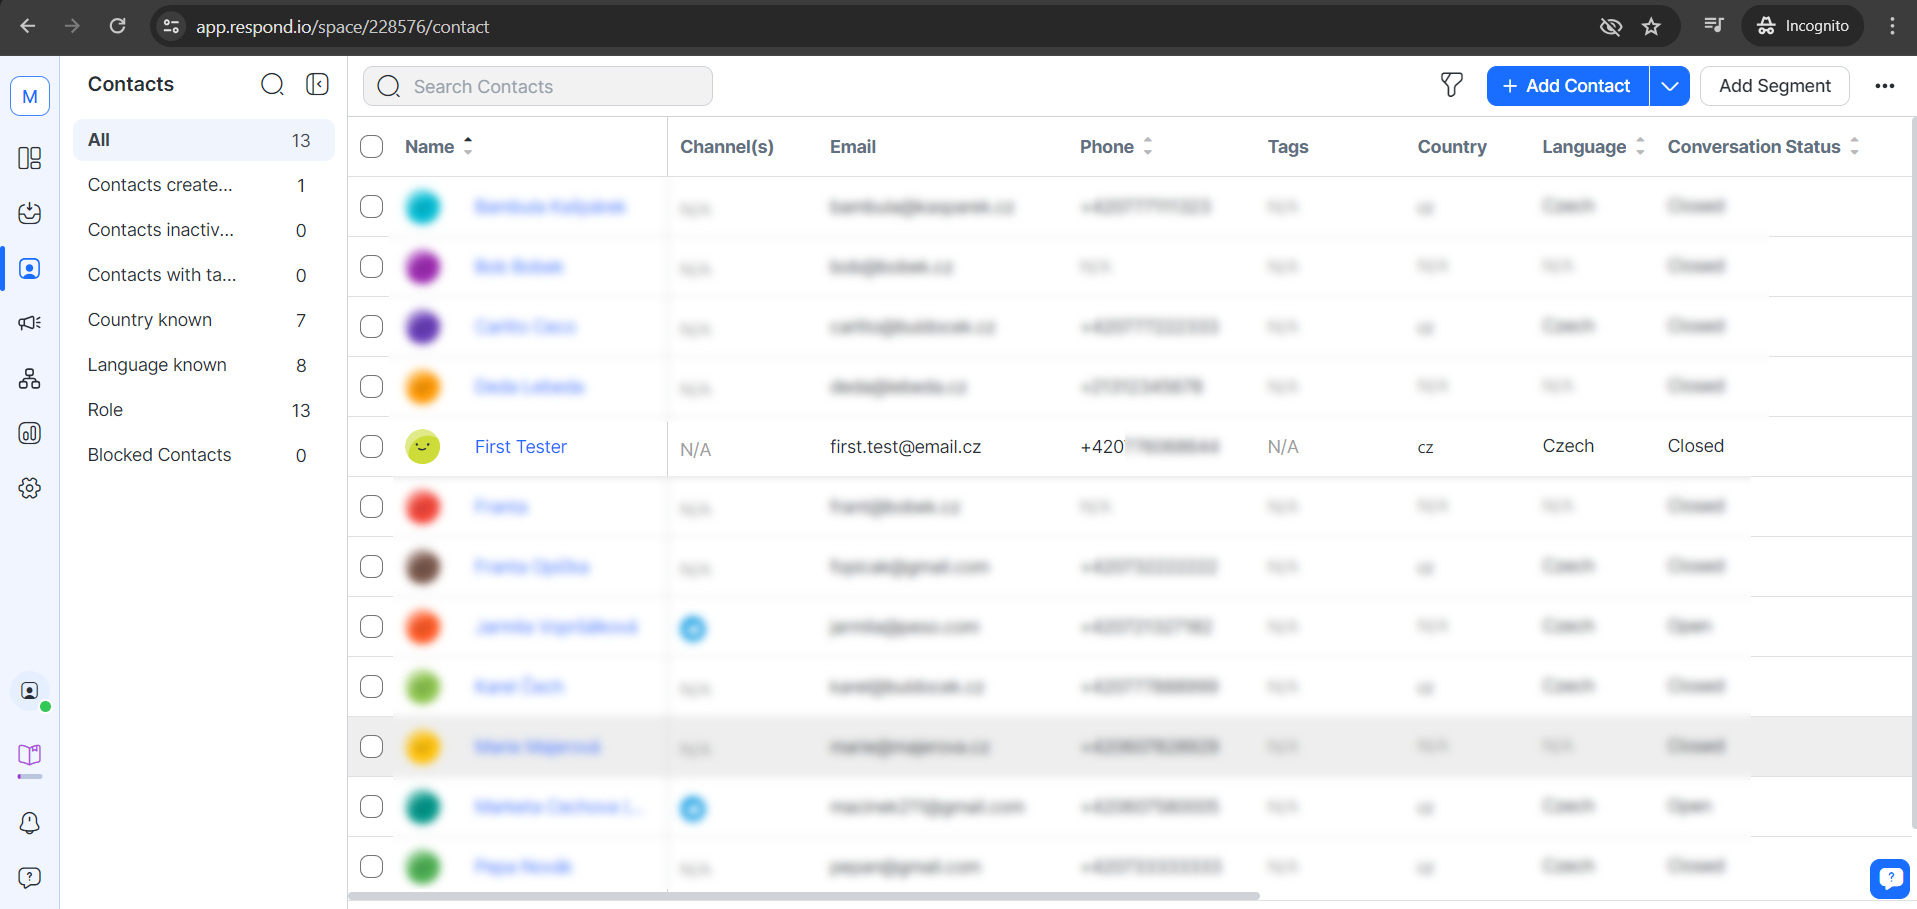
And this is a newly created contact in Respond.io
Get contact
Now, we will use the connector Respond.io - Get Contact to get information about the contact.
Configuration
Add a third Task step:
- Step name: Get Contact
- Connector: Respond.io - Get Contact
Open the step's Task step editor by clicking the pencil symbol button.
Pin input mapping.
Fill in the token - find it after instructions here: API Respond.io
Save the configuration.
Select error behavior and save the configuration again.
Press the Publish button.
Execute the task.
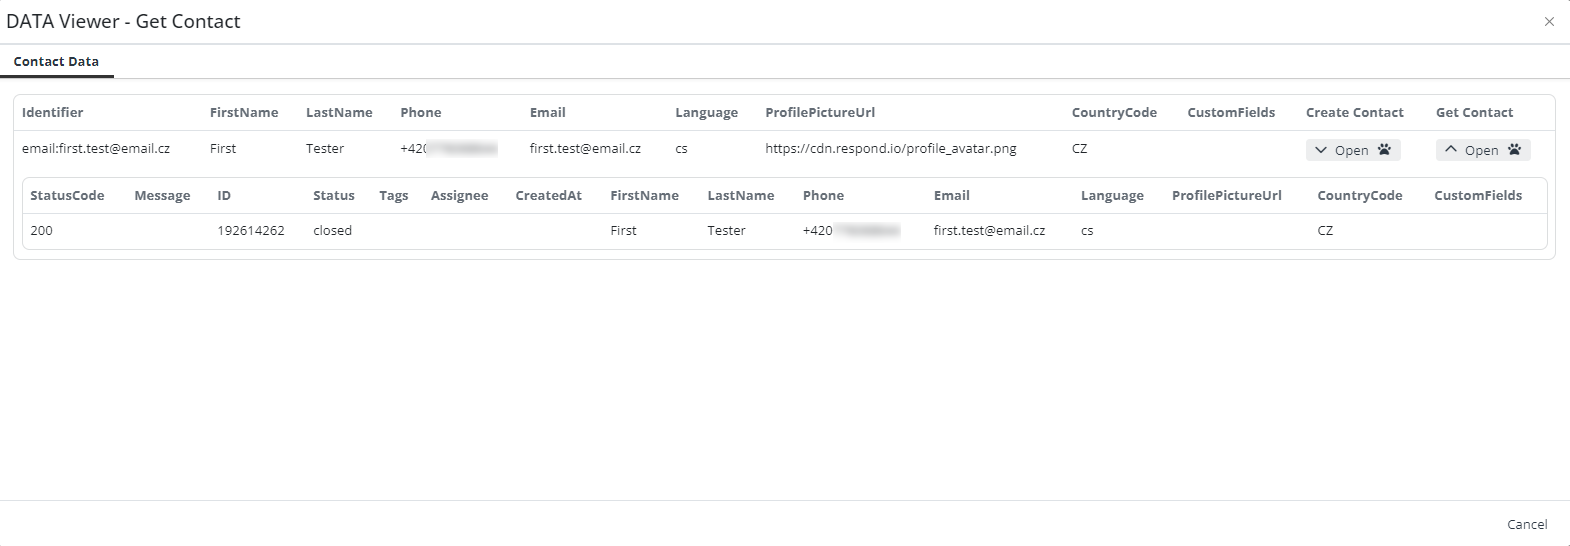
Result - get contact info
We've got the contact information we see in the Data Viewer.
Contact update
You can also update a contact, in this case, you proceed in the same way as when creating a contact, but in the JS Mapper settings in the first step, you change the required elements in the statement.
Configuration
Add a next Task step:
- Step name: Updated Contact Data
- Connector: JS Mapper
Open the step's Task step editor by clicking the button with the pencil symbol.
Copy the configuration from step one JS Mapping statement, and change some contact data in it (in this case, we changed the first name and email):
return [{
  "Identifier": "email:next.test@email.cz",
  "FirstName": "Next",
  "LastName": "Tester",
  "Email": "next.test@email.cz",
  "Language": "cs",
  "ProfilePictureUrl": "https://cdn.respond.io/profile_avatar.png",
  "CountryCode": "CZ"
}]
Add a next Task step:
- Step name: Update Contact
- Connector: Respond.io - Create Or Update Contact
Open the step's Task step editor by clicking the pencil symbol button.
Pin input mapping.
Fill in the token - find it after the instructions here: API Respond.io
Save the configuration.
Select error behavior and save the configuration again.
Press the Publish button.
Execute the task.
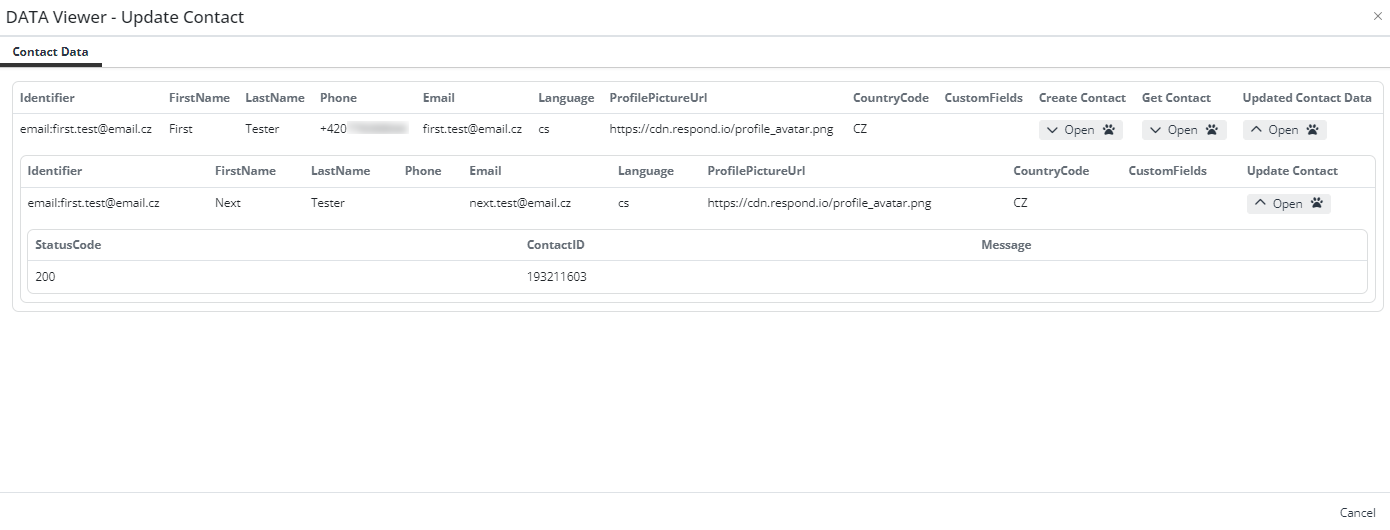
Result - updated contact
The contact's data has been updated, we can see it in the Data Viewer
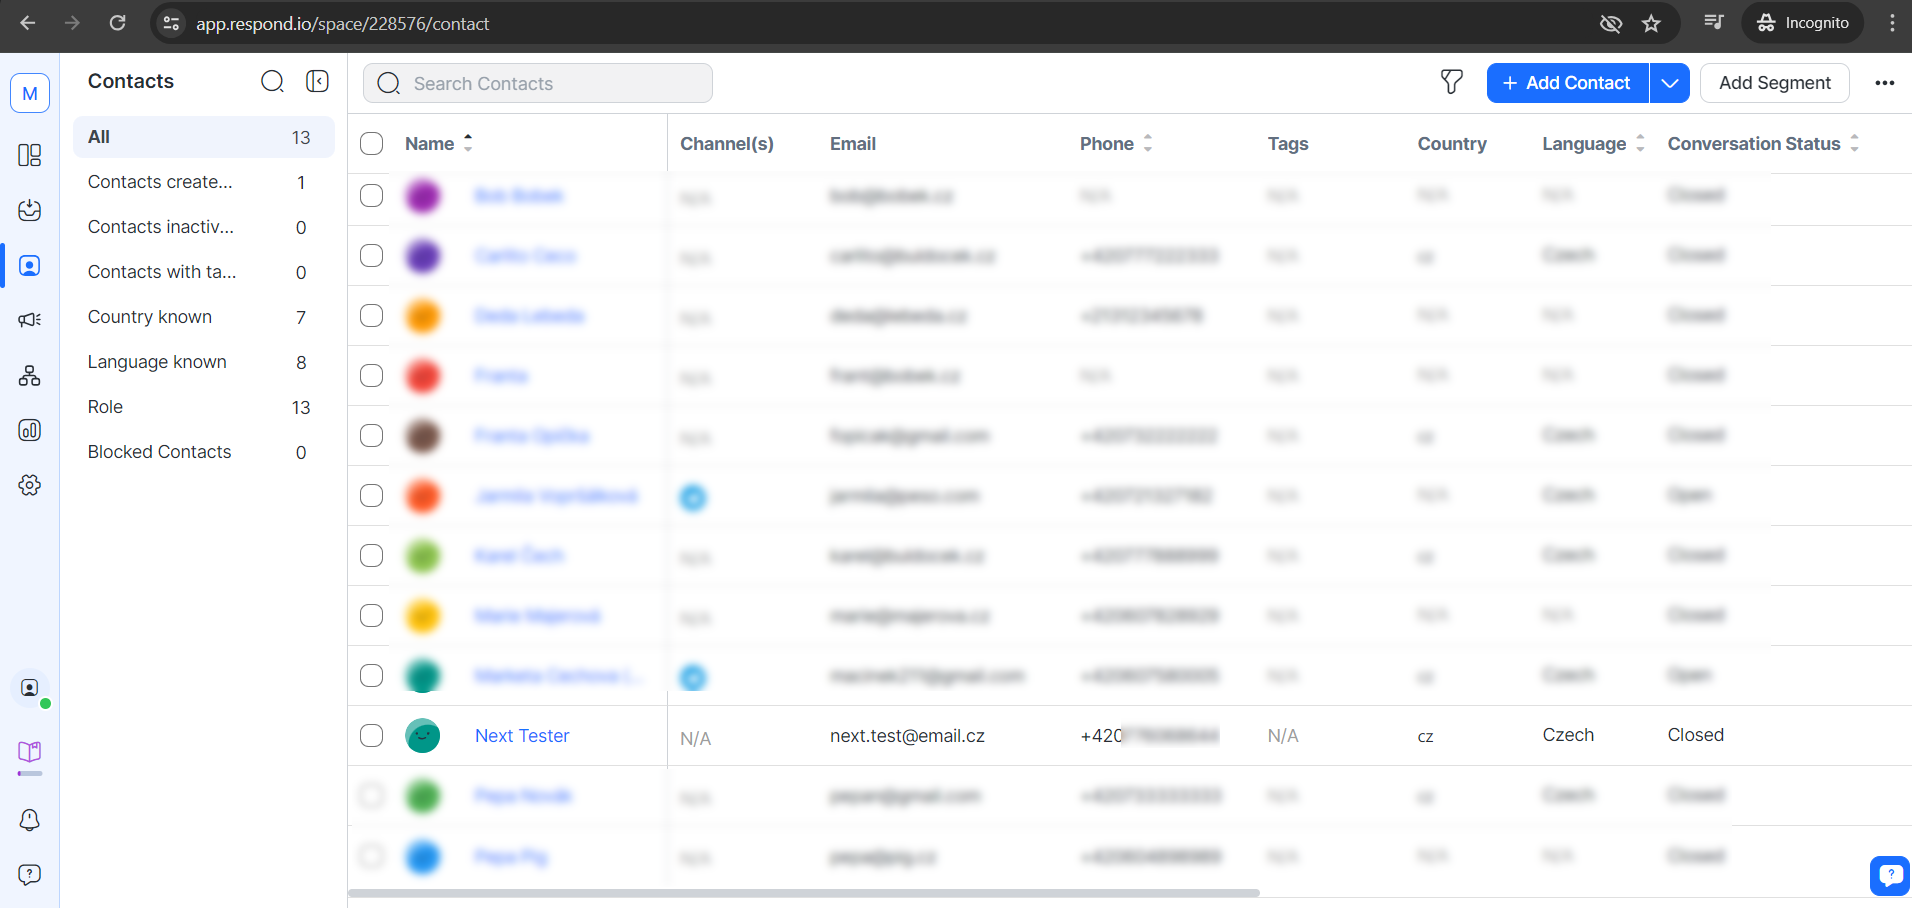
And here's an updated contact in Respond.io
After successfully completing a task on Respond.io, a new contact is seamlessly created, updated and you get contact info. In this way, we have demonstrated how to use integrations effectively, showing the immediate benefits of using these connectors in your workflow. You can easily incorporate the Respond.io connectors into your processes, creating and updating new contacts, and increasing efficiency within the Respond.io platform.