Advanced Rest API Connector with Connector Actions
This feature allows you to select an action for connectors that support multiple actions. Once the desired action is chosen, the system automatically adjusts the configuration and input/output schema to match the specific requirements of the connector.
If you prefer a more interactive learning experience, check out our YouTube channel.
Let's use the Advanced Rest API Connector as an example to try out all three actions in a single task. This will be a task with three branches. For the input, we’ll use a Delay to compose three different branches for each of the Сonnector Аctions. Next, in each branch, we will use the JS Mapper to specify the APIs for each of the actions. We will also use the JokeAPI platform that provides API documentation.
Configuration
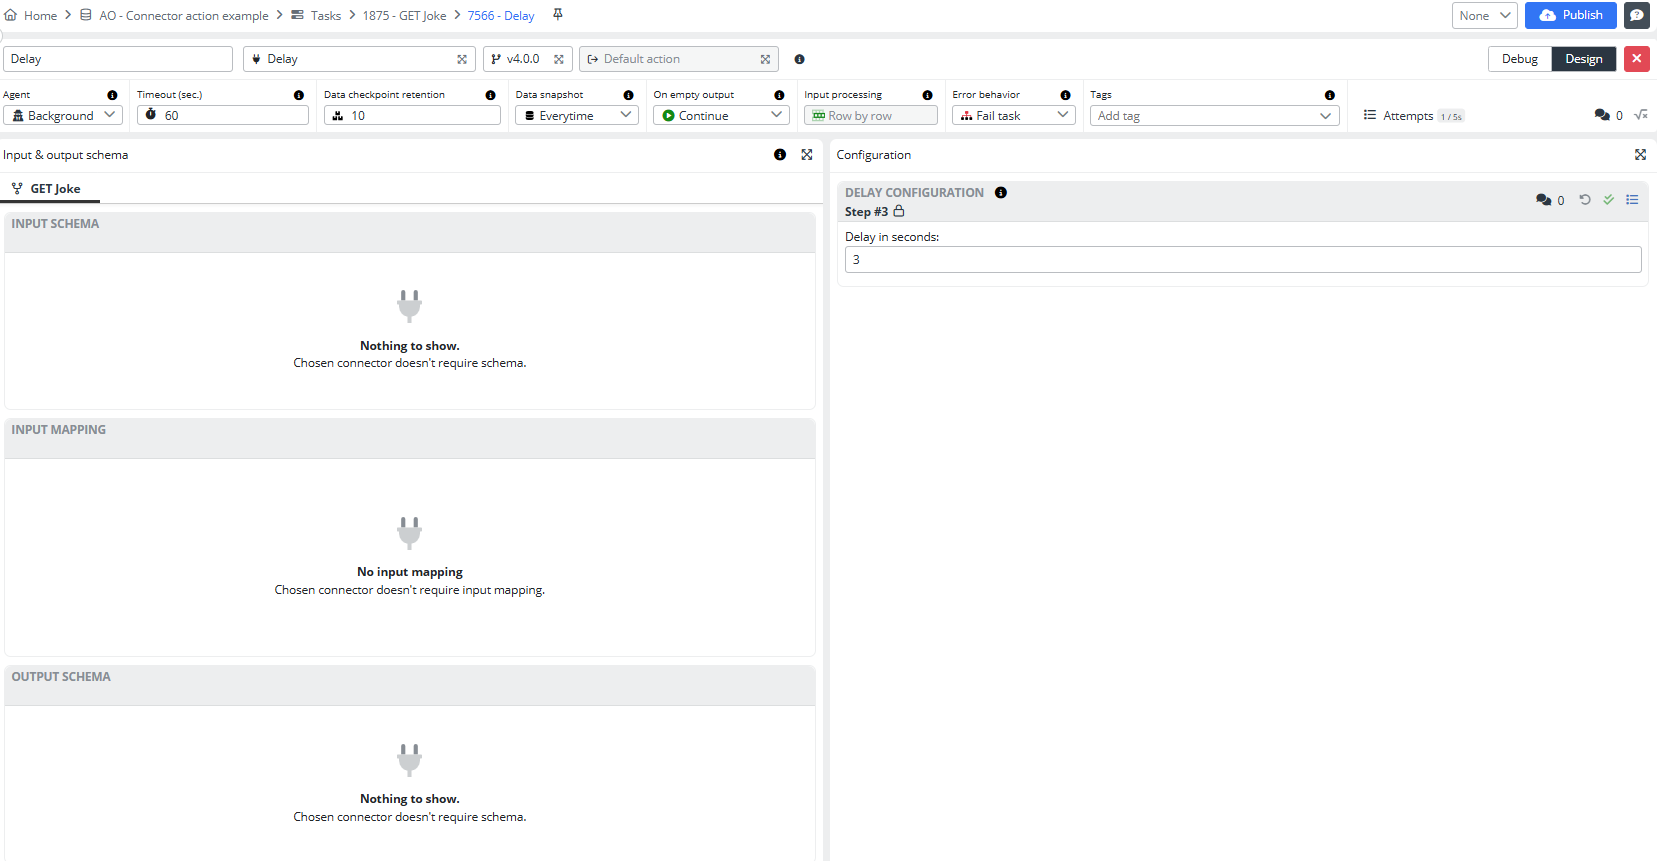
Add a first task step:
- Connector: Delay
And just set Delay Configuration in seconds - 3 sec.
Let's compose the second line of our task. This will be the line where we will make three branches with JS mapper, where we will send the data, which is a link to the API platform, for different Connector Actions.
Add a second task step:
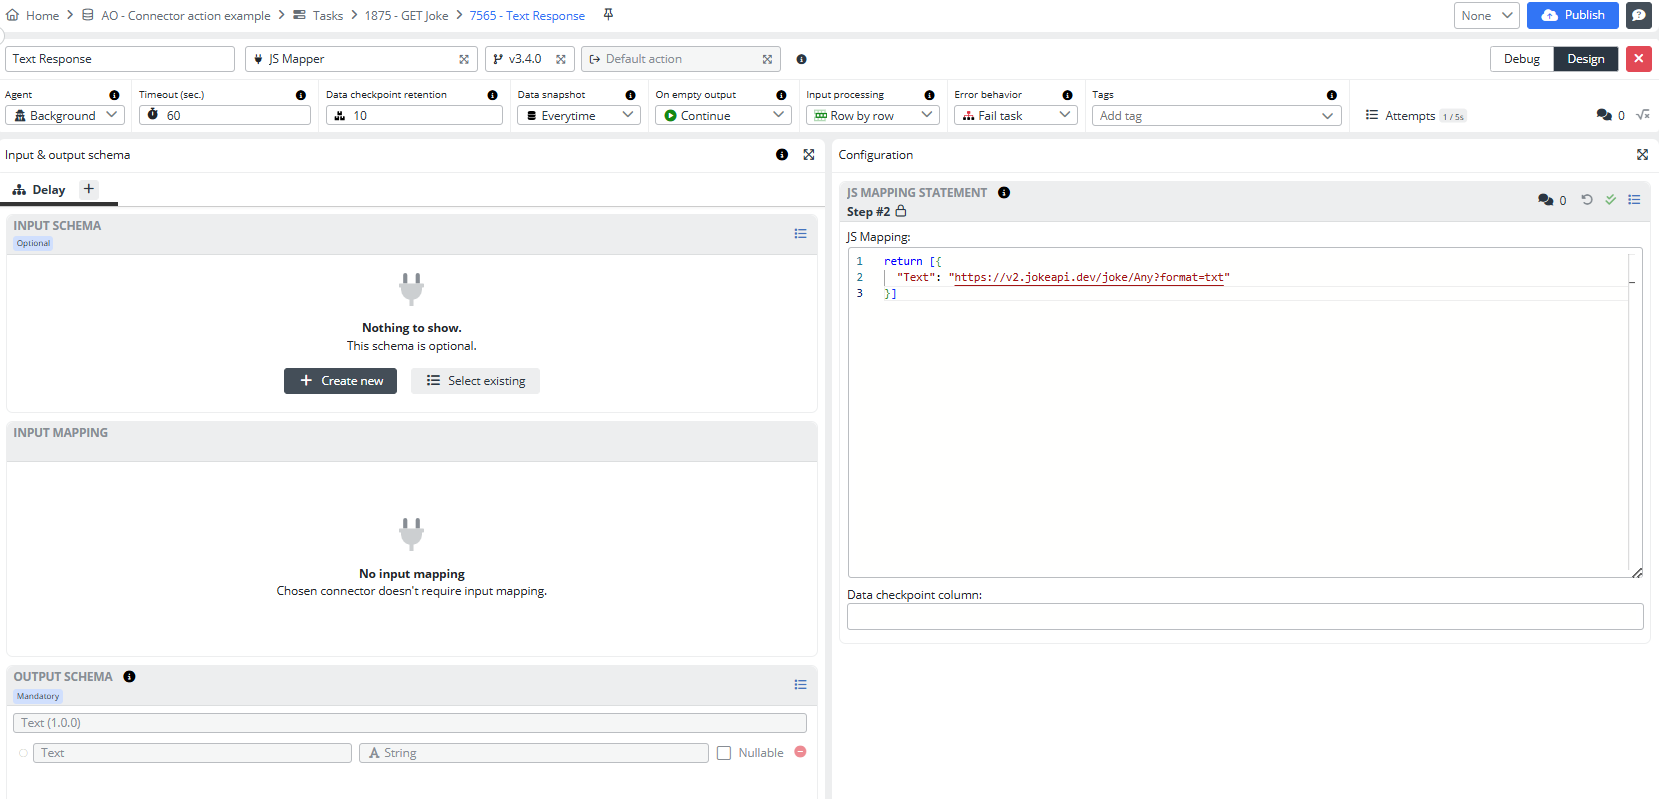
- Connector: JS Mapper
- Output Schema: Text
- JS Mapping Statement:
return [{
  "Text": "https://v2.jokeapi.dev/joke/Any?format=txt"
}]
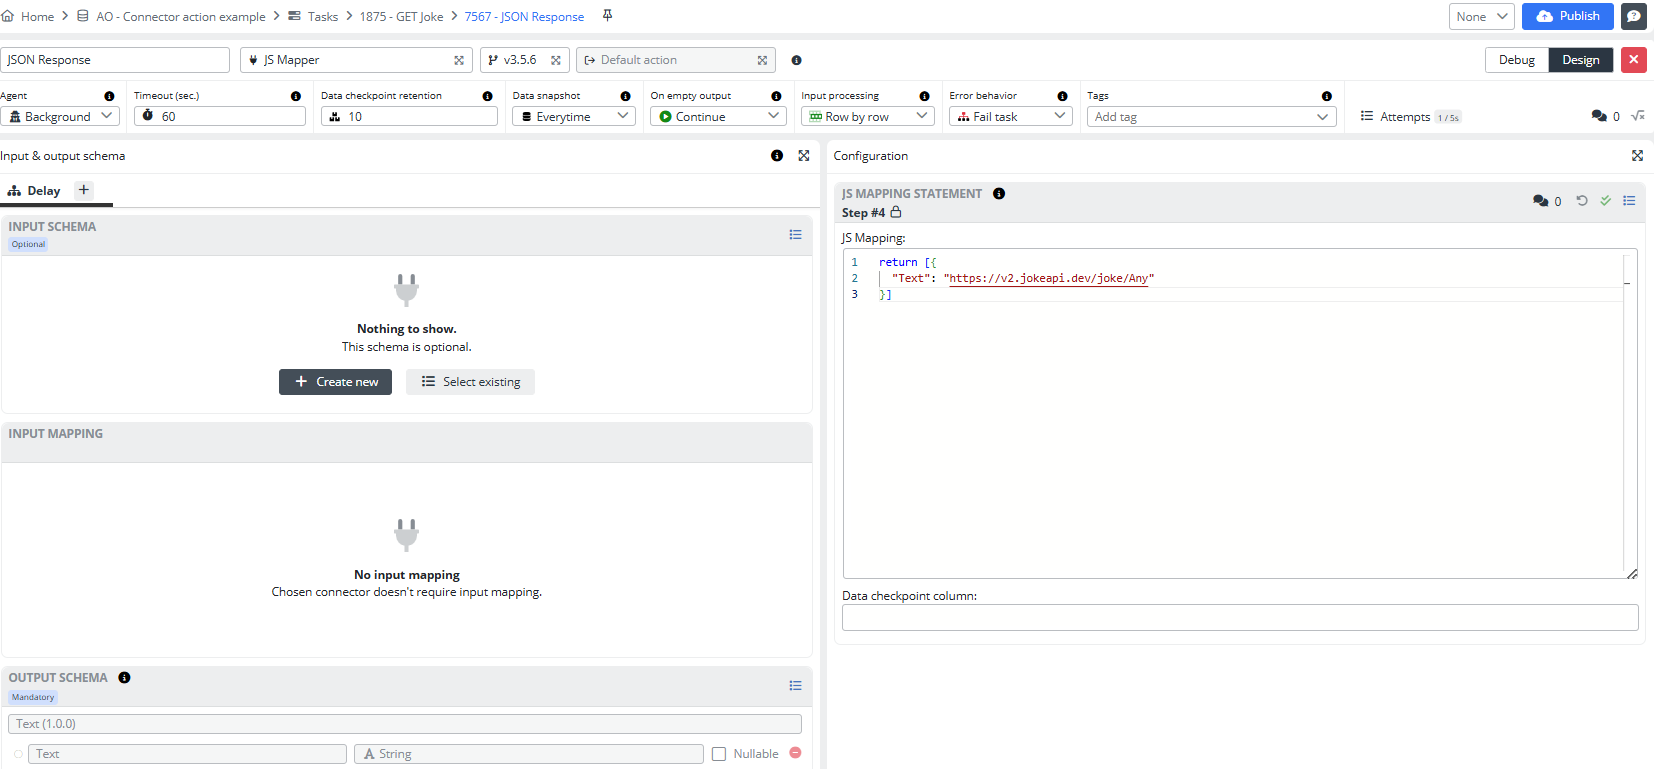
Save the configuration. Close this step and now create the next two branches by clicking on the plus sign on the right of the second step.
Add a third task step:
- Connector: JS Mapper
- Output Schema: Text
- JS Mapping Statement:
return [{
  "Text": "https://v2.jokeapi.dev/joke/Any"
}]
This is how the detail of the third step looks.
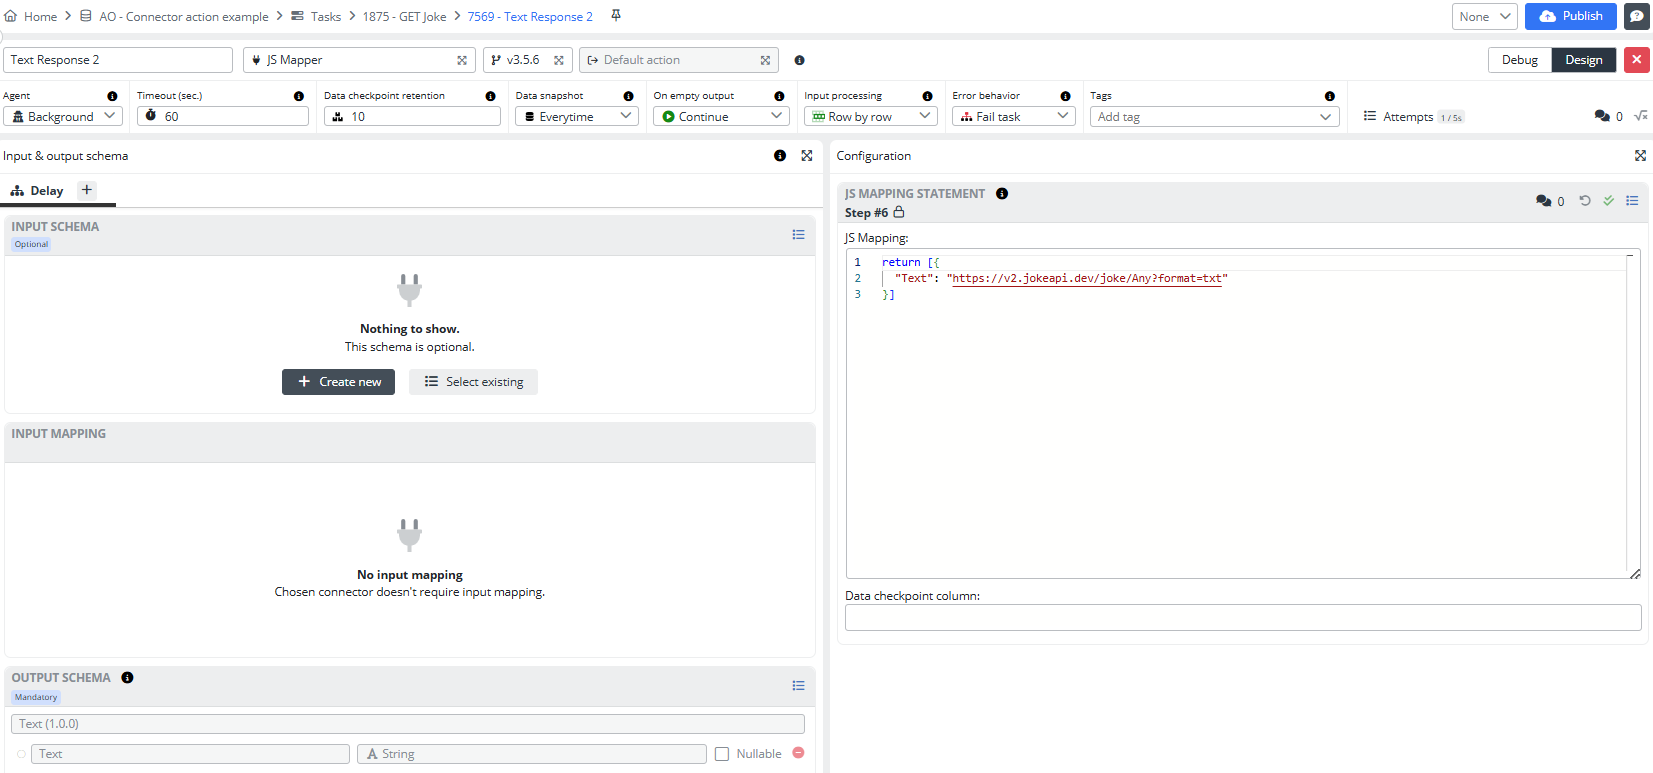
The fourth step will be a complete repeat of the second step. Simply create the fourth step, copy the JS Mapping Statement from the second step and attach it to the JS Mapping Statement of the fourth step. The Output scheme is also the same - Text.
This is how the detail of the fourth step looks.
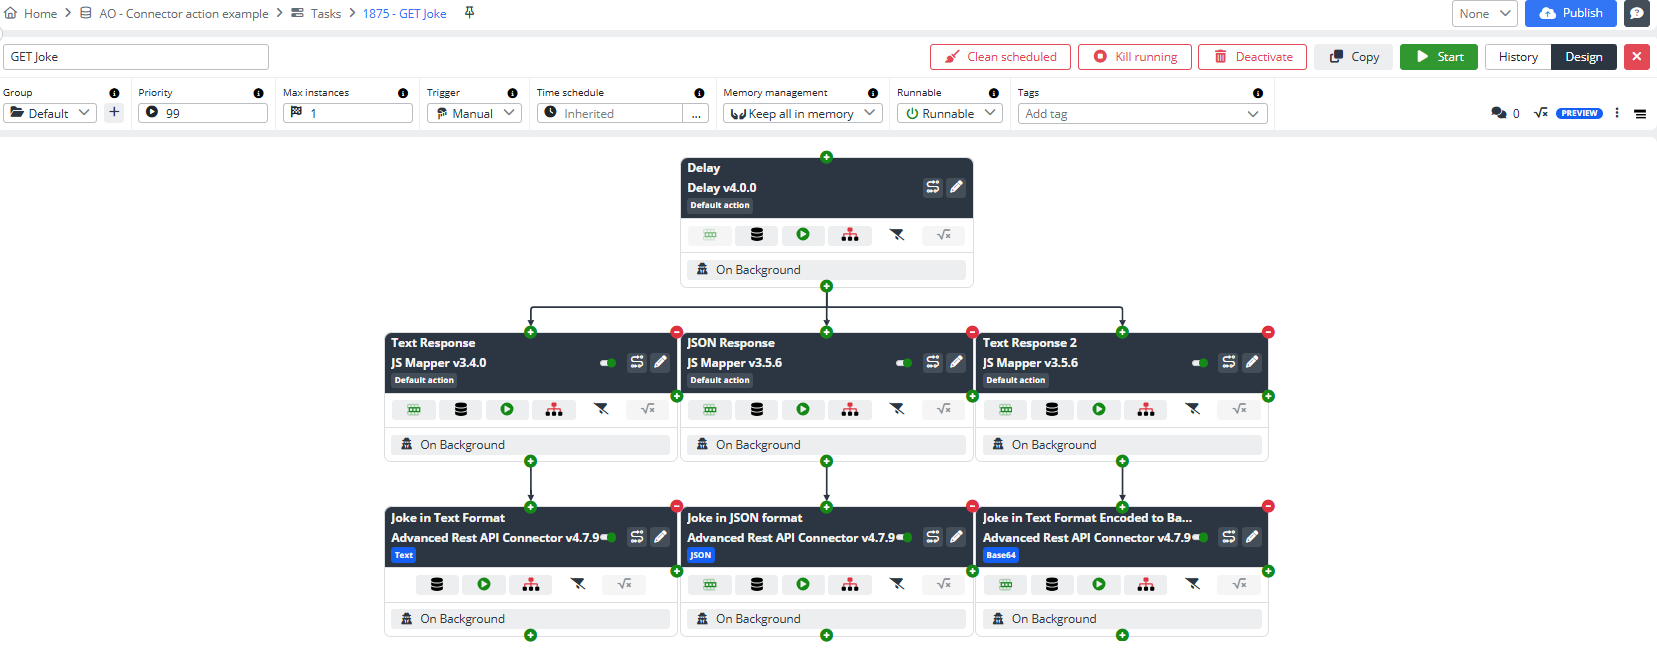
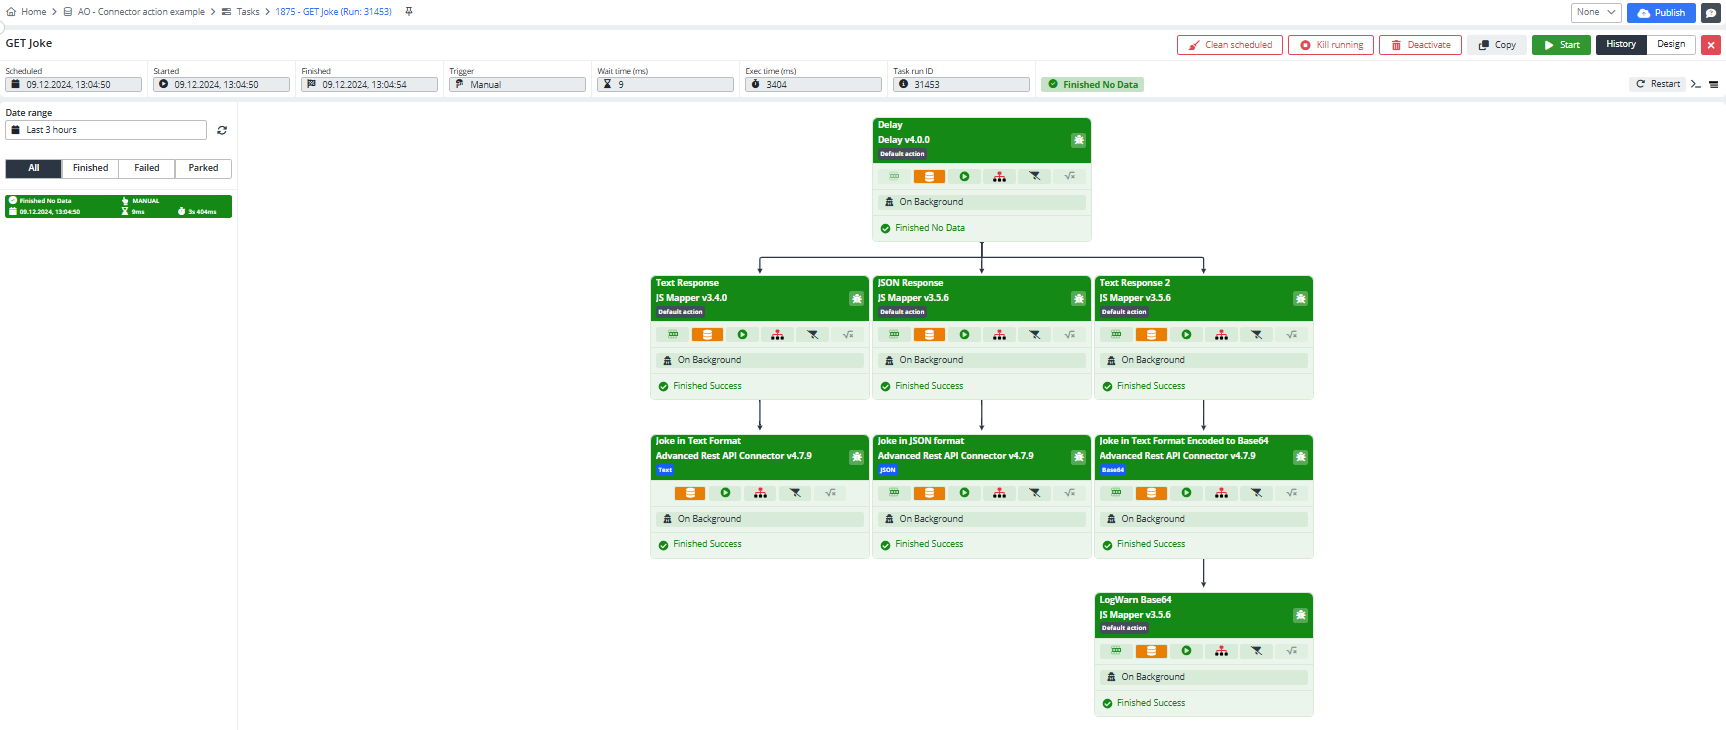
This is how the task detail will look after adding three steps at the second line.
Now let's create the next three steps to retrieve data. We will use the Advanced REST API Connector, where we will link our Task to the Endpoint and set the Connector Action. We will add steps under each of the three branches with the JS Mapper. In the first branch we want to receive the response in the form of Text.
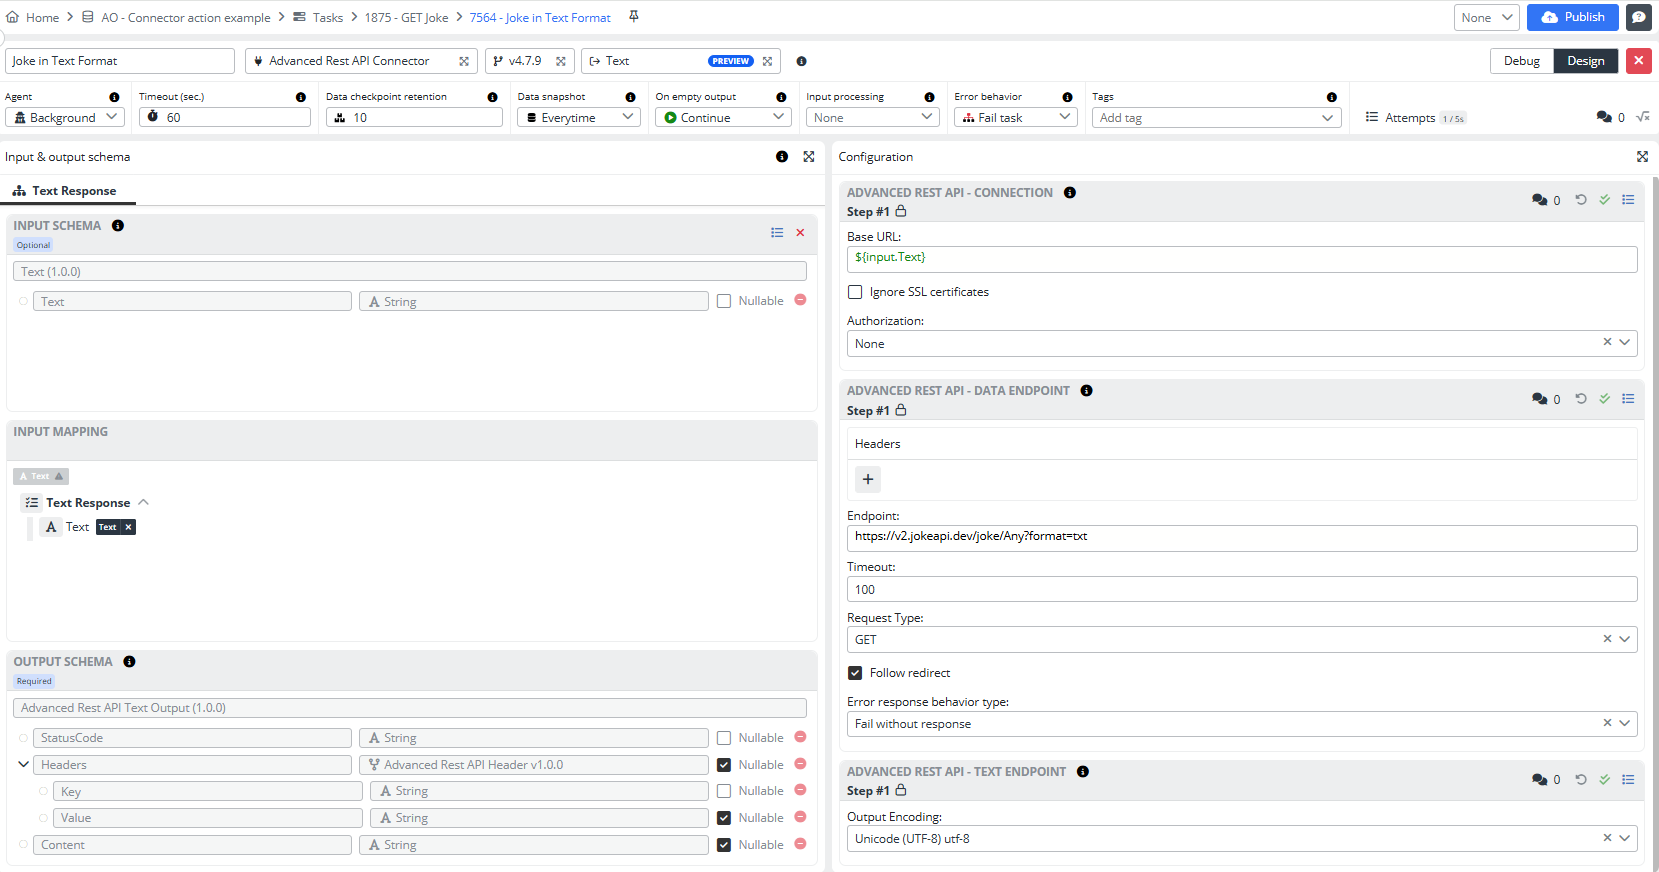
Add a fifth task step:
- Connector: Advanced Rest API Connector v 4.7.9 and above
- Connector action: Text
- Input Schema: Text
Fill in the Advanced Rest API - Data Endpoint configuration fields:
Endpoint- https://v2.jokeapi.dev/joke/Any?format=txtTimeout- 100Request type- GETError response behavior type- select from the dropdown list
Save the configuration.
Fill in the Advanced Rest API - Connection configuration fields:
Base URL- ${input.Text}Authorization- None
Save the configuration. Pin Input Mapping.
This is how the detail of the fifth step looks.
Add a sixth task step:
- Connector: Advanced Rest API Connector v 4.7.9 and above
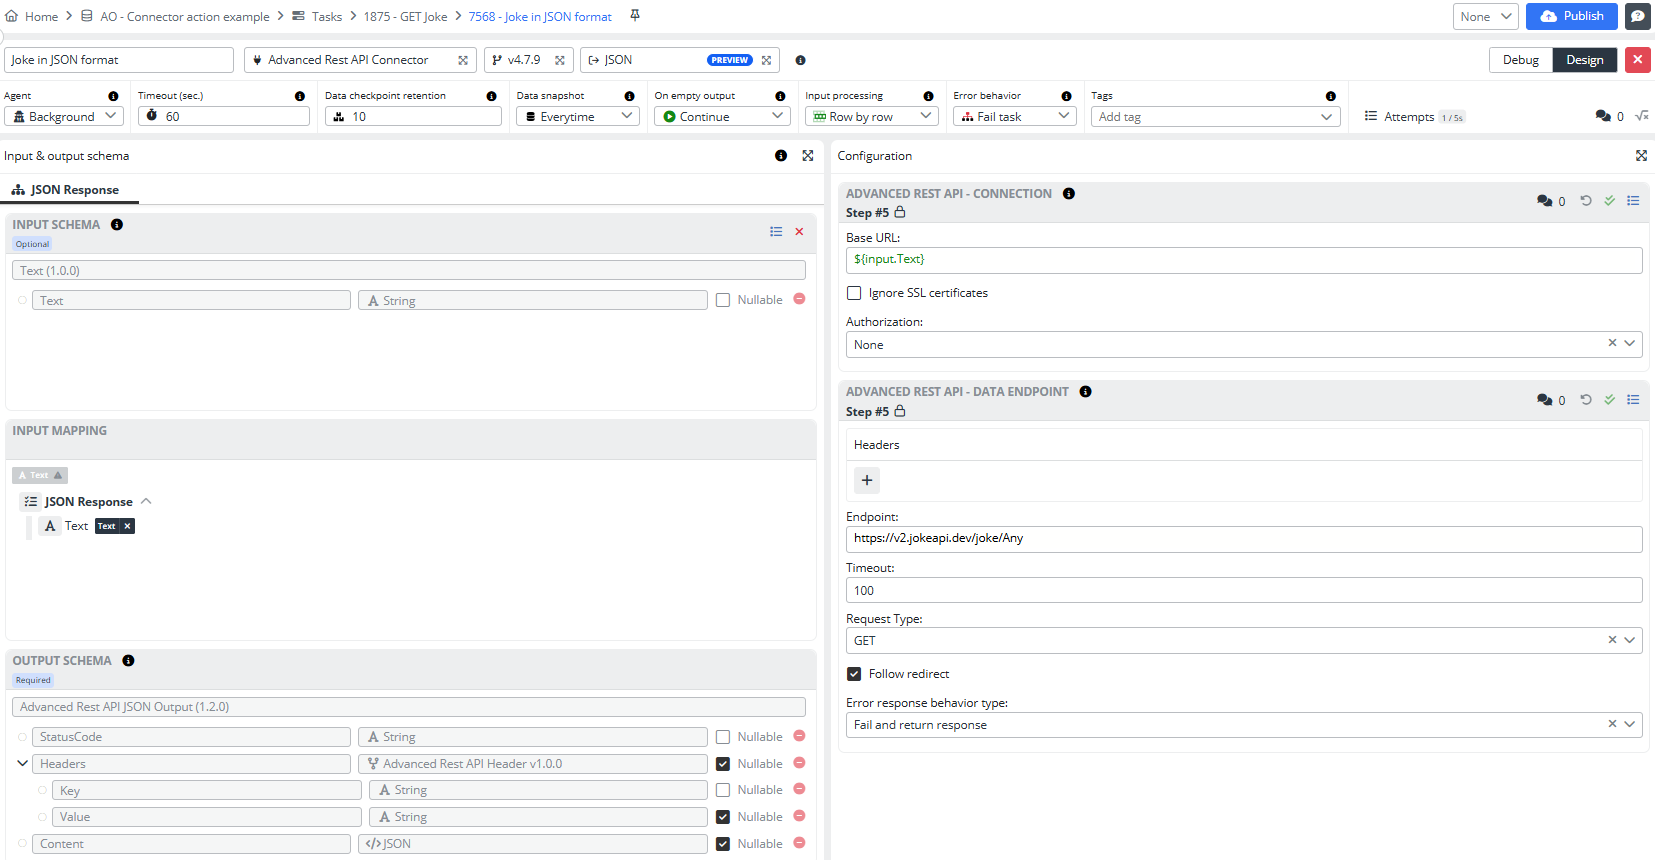
- Connector action: JSON
- Input Schema: Text
Fill in the Advanced Rest API - Data Endpoint configuration fields:
Endpoint- https://v2.jokeapi.dev/joke/AnyTimeout- 100Request type- GETError response behavior type- select from the dropdown list
Save the configuration.
Fill in the Advanced Rest API - Connection configuration fields:
Base URL- ${input.Text}Authorization- None
Save the configuration. Pin Input Mapping.
This is how the detail of the sixth step looks.
Add a seventh task step:
- Connector: Advanced Rest API Connector v 4.7.9 and above
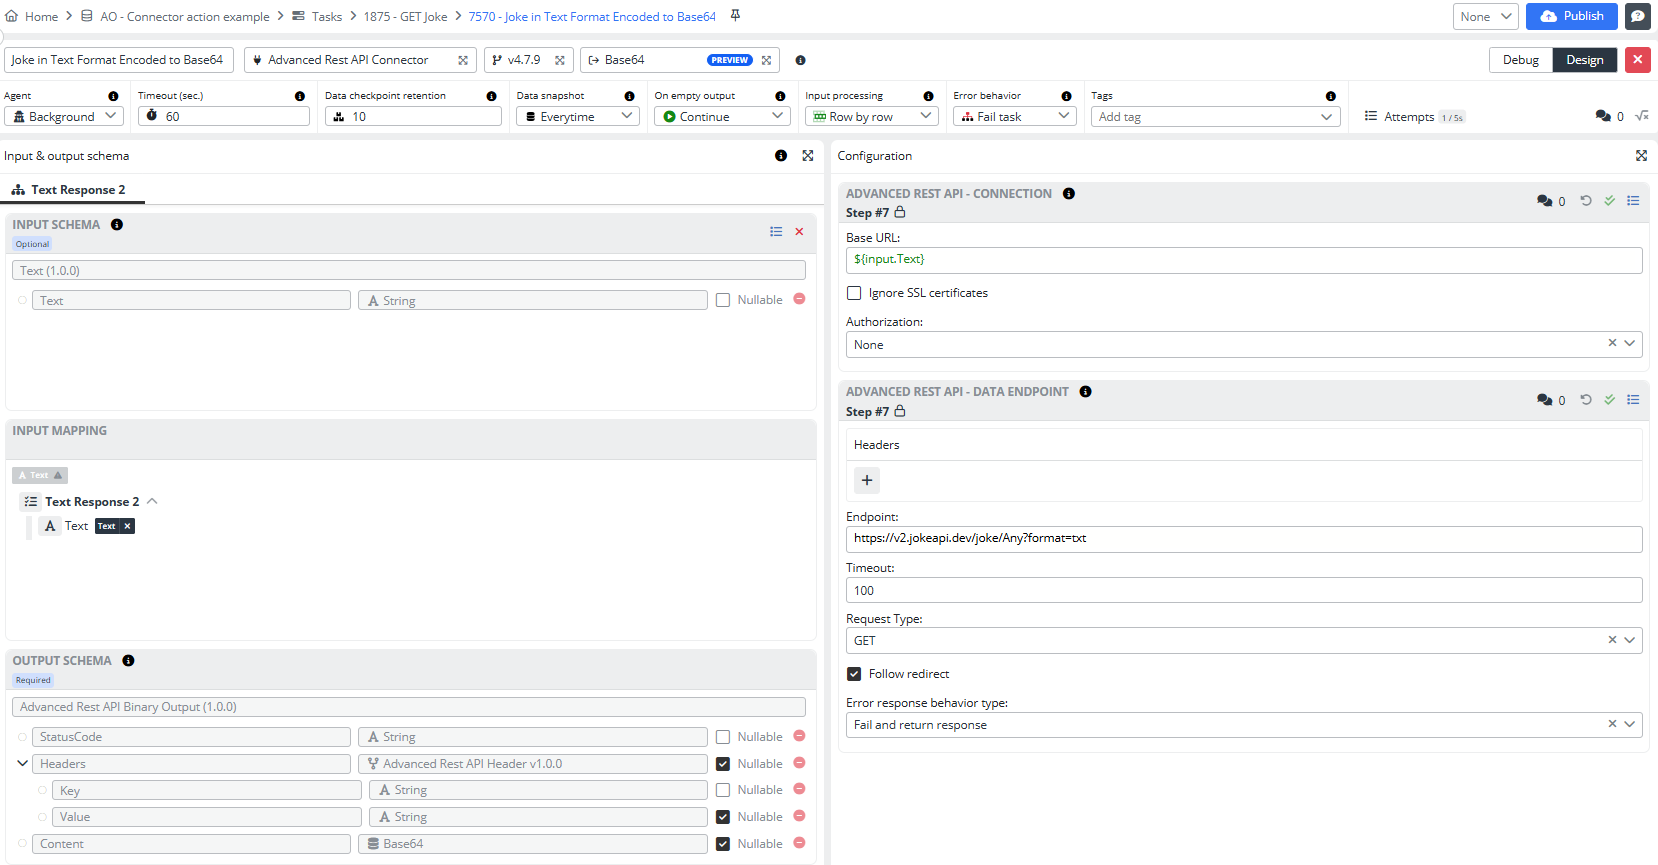
- Connector action: Base64
- Input Schema: Text
Fill in the Advanced Rest API - Data Endpoint configuration fields:
Endpoint- https://v2.jokeapi.dev/joke/Any?format=txtTimeout- 100Request type- GETError response behavior type- select from the dropdown list
Save the configuration.
Fill in the Advanced Rest API - Connection configuration fields:
Base URL- ${input.Text}Authorization- None
Save the configuration. Pin Input Mapping.
And this is how the detail of the seventh step looks.
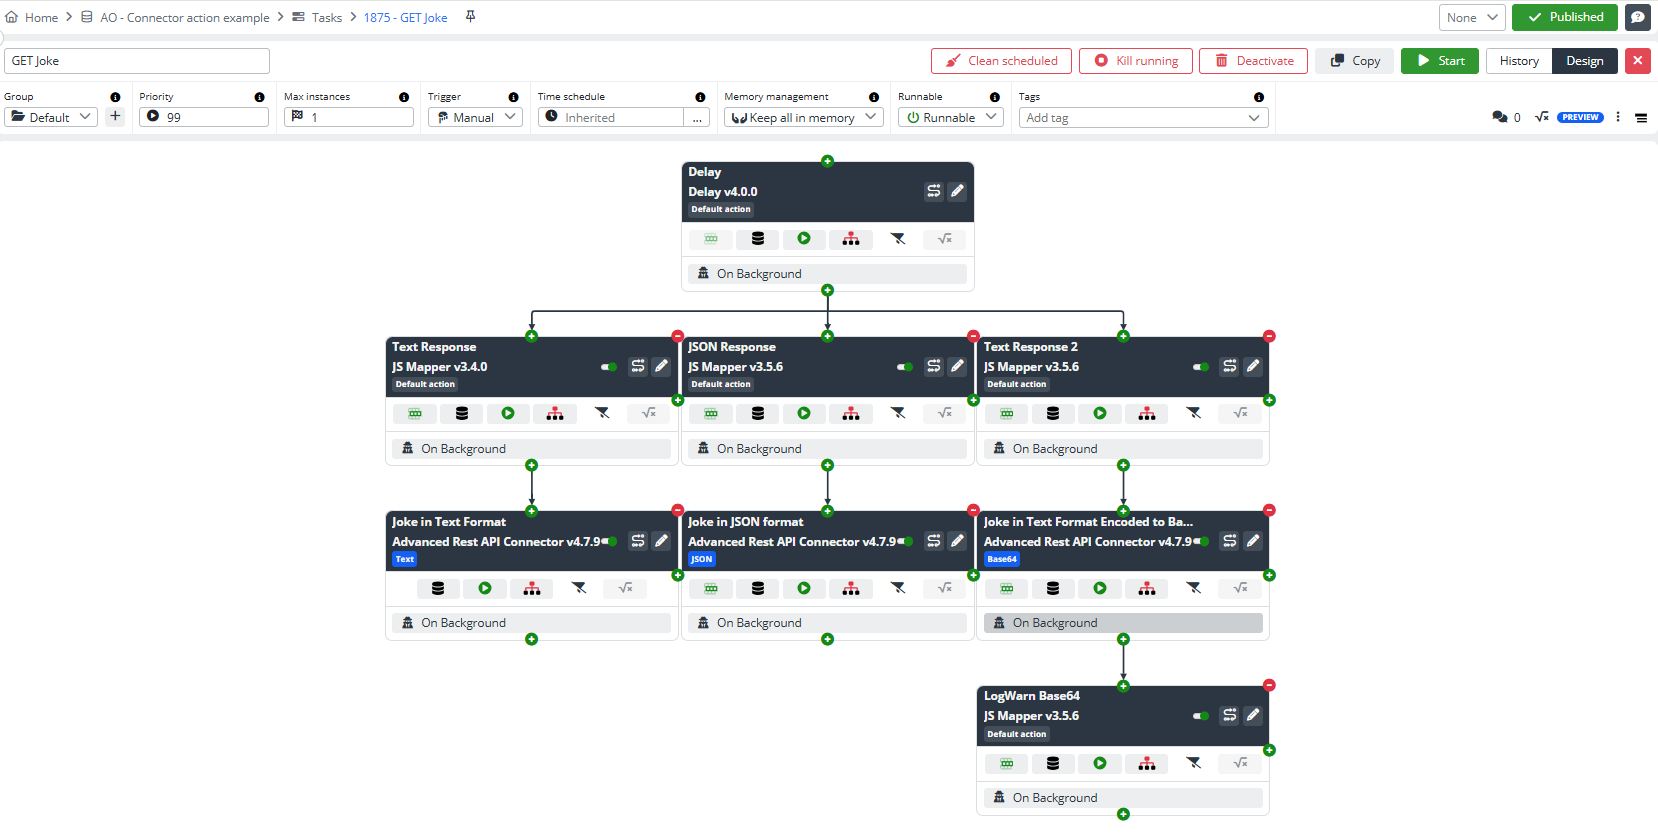
This is how the task detail will look after adding three steps at the third line.
Now we'll log the third branch to make sure we're really getting Base64 data.
Add an eighth step.:
- Connector: JS Mapper
- Input Schema: Data
- Output Schema: Data
- JS Mapping Statement:
log.warn(JSON.stringify(inputData))

return inputData
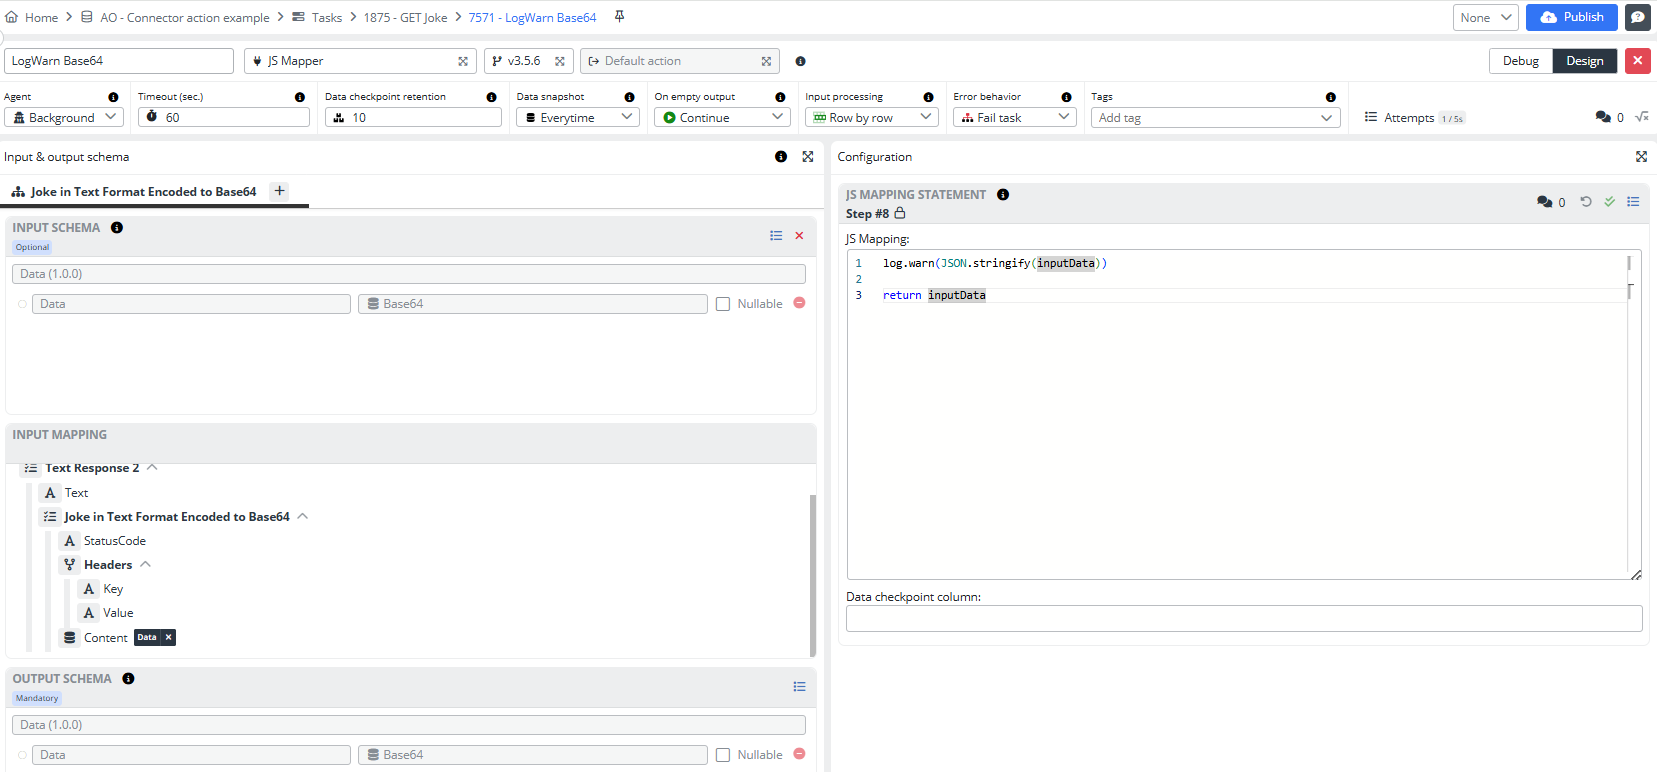
Pin the input mapping. Close the step.
Great! The task is created; now, all that's left is to publish it and run it.
Result
As a result, we have a successfully completed task.
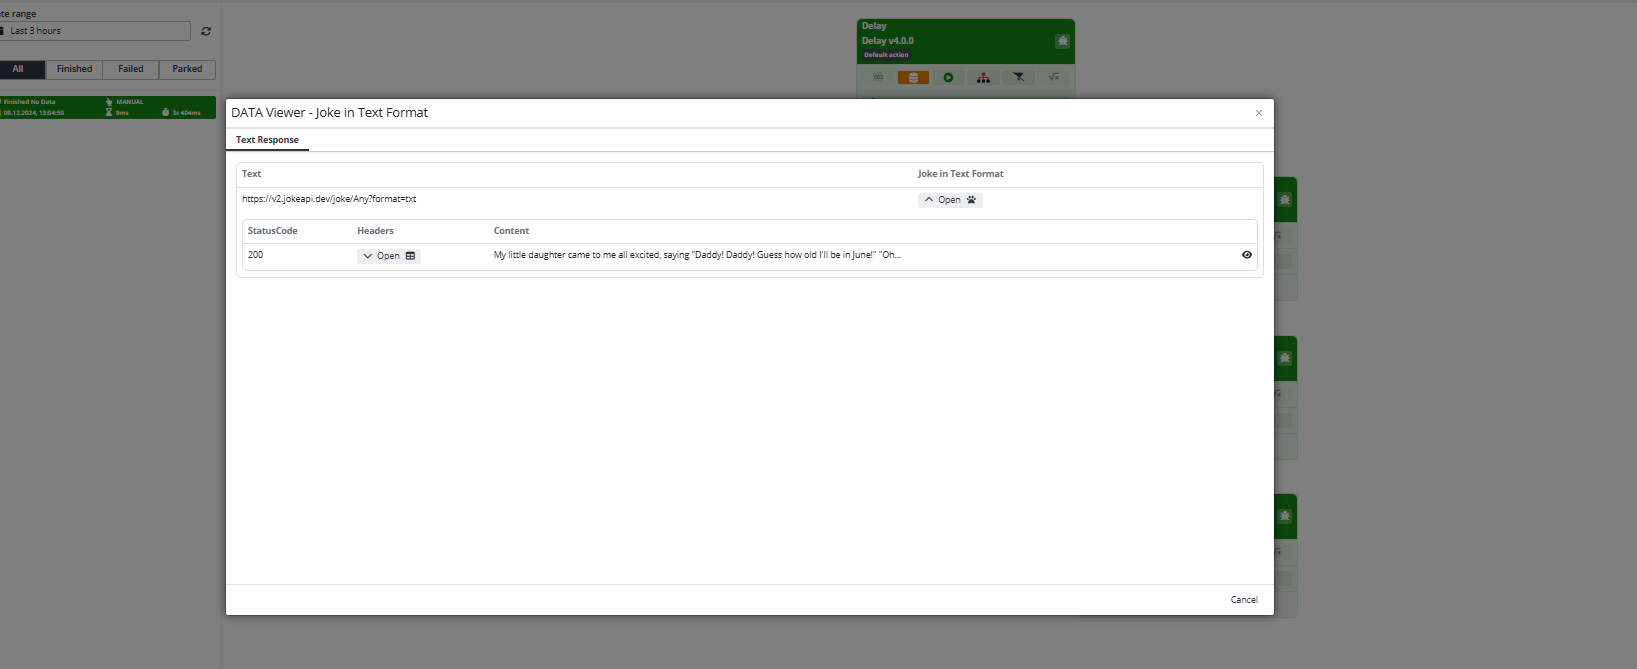
Let's open the Data snapshot of the fifth step, and open the Joke in Text Format. As you can see, we received a response from the Endpoint in the form of Text.
Read it and smile.
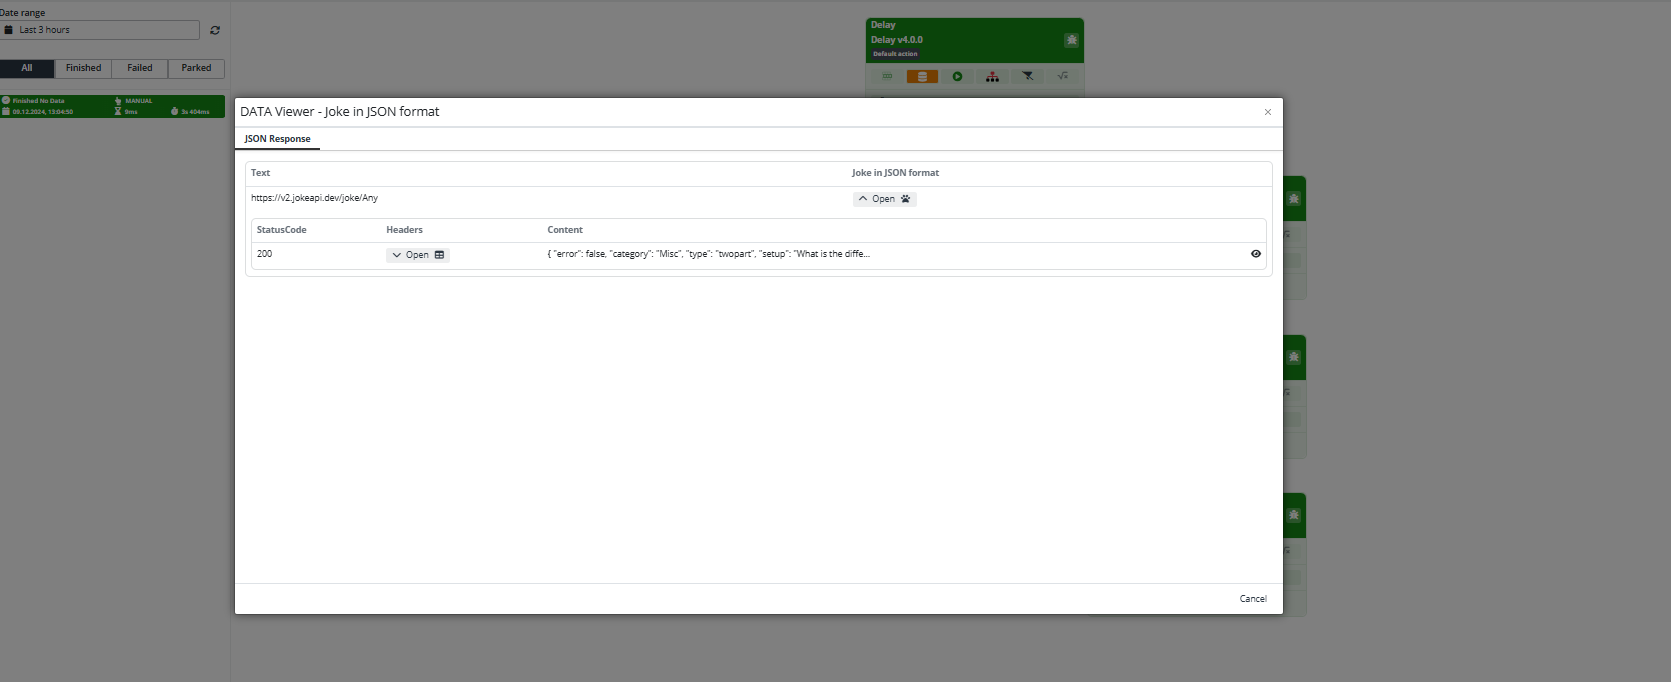
In the sixth step we can see the Joke in JSON format.
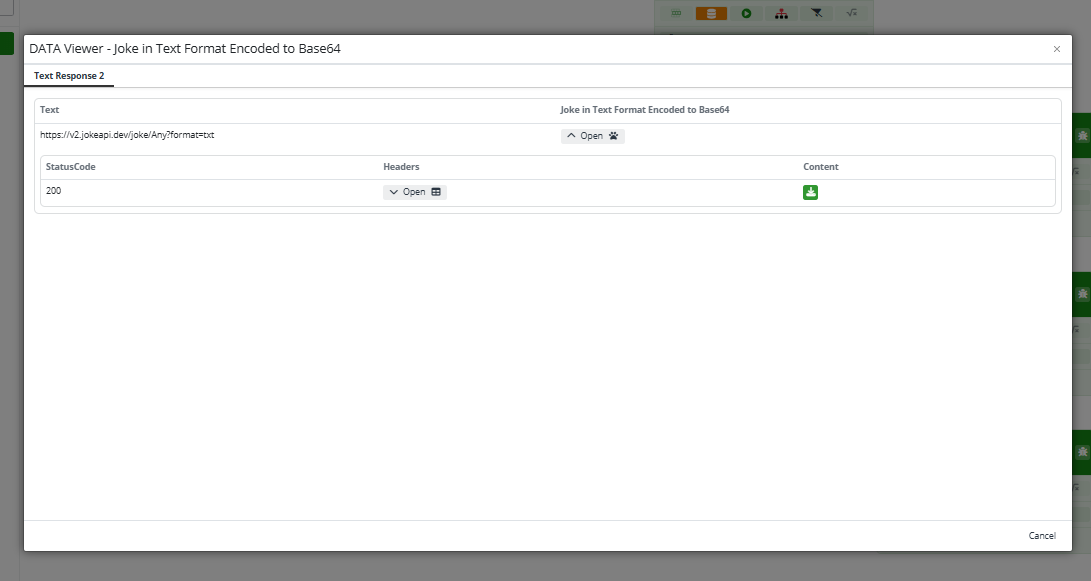
In the seventh step, we have a file that we can download.
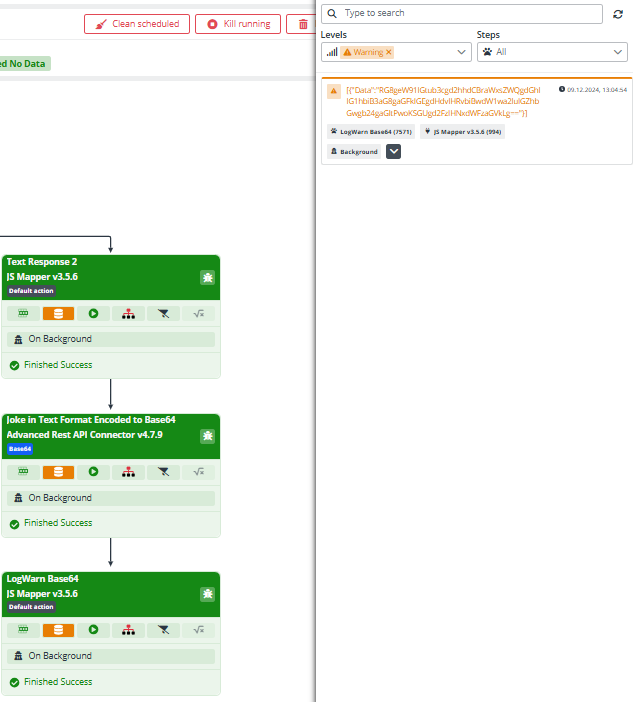
But, if you remember, we loged the last step, and now if we go into the Logs and filter on Warning, we can see that the text is indeed encrypted in Base64 format.
What we wanted to demonstrate with this example, using different Connector Action functions, is the flexibility and versatility of our API integration. By showcasing how various actions can be configured and how they affect the data retrieval and processing in each step, we highlight the ability to handle different data formats and workflows. This allows for tailored responses based on specific requirements, illustrating how different configurations can optimize the interaction with APIs and improve overall functionality.
That's all from this example.

