

Pinning
One of the important aspects of effective usage of Integray is a well-organized user interface that minimizes the time spent switching between different sections of the system. The feature that facilitates easier and quicker navigation within the system is Pinning. This functionality has been designed to enhance user productivity and facilitate access to frequently used configurations and information within Integray. Pinning allows you to select commonly used elements and pin them to the left sidebar, where they will remain visible and easily accessible.
Each user creates their list of pinned sections. Pinned items are always linked to the selected Company and it is possible to pin the following sections for easier and faster access:
-
Task: single task, task step, history tab, specific task run, debug.
-
Endpoint: single endpoint or tab: POST, GET, Tokens.
-
Configurations: all configurations for the respective connector or a selected single configuration.
-
Data schemas: selected custom or system data schema.
Example of pinning the selected Endpoint on the GET tab
Use these steps to pin a specific Endpoint on the GET tab for easier and faster access and ensure quick access to important endpoints whenever you need them:
-
Open your Company and navigate to the Endpoints section
-
There you can see the list of available endpoints. Find the specific endpoint that you want to pin for easier access and open it
-
Switch to the GET tab
-
In the upper navigation bar, click the button with the pin symbol
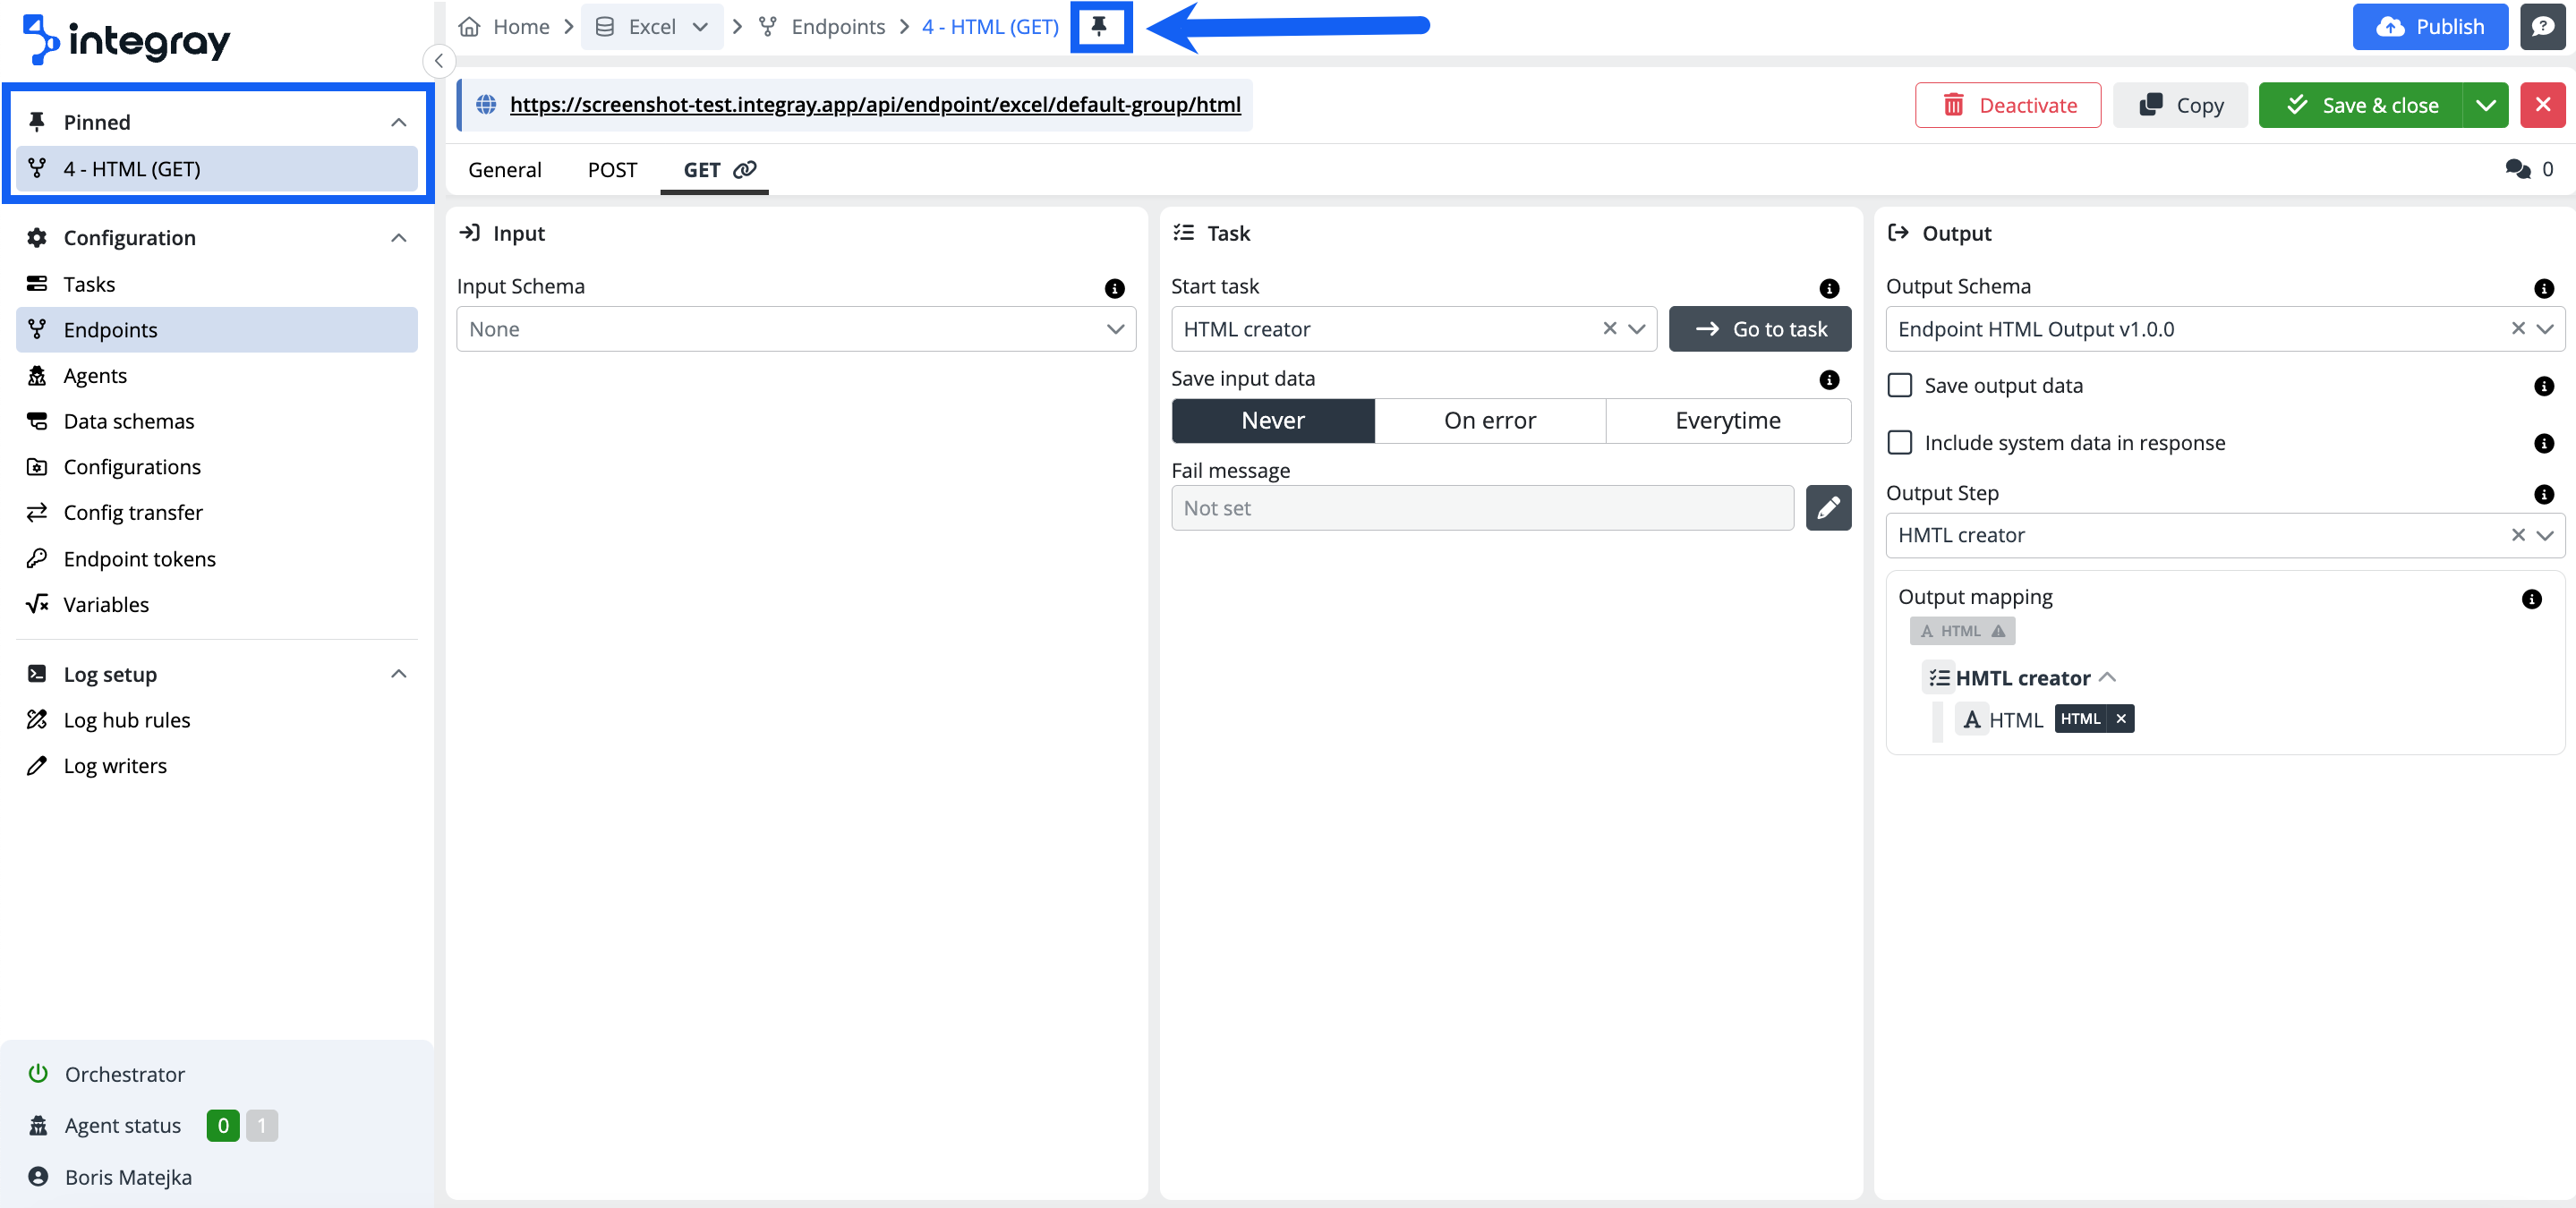
The pin icon has changed (it's all black) and the selected endpoint will now be added to your pinned items list, located in the sidebar for quick access.
Example of pinning the selected task run
-
Open your Company and navigate to the Tasks section
-
In the Tasks section, you will see a list of all the available tasks. Find the specific executable and runnable task that you want to pin for easier access and open it
-
Click the Start button to start the task
-
Switch to the History tab and click on the displayed Task run
-
In the upper navigation bar, click the button with the pin symbol
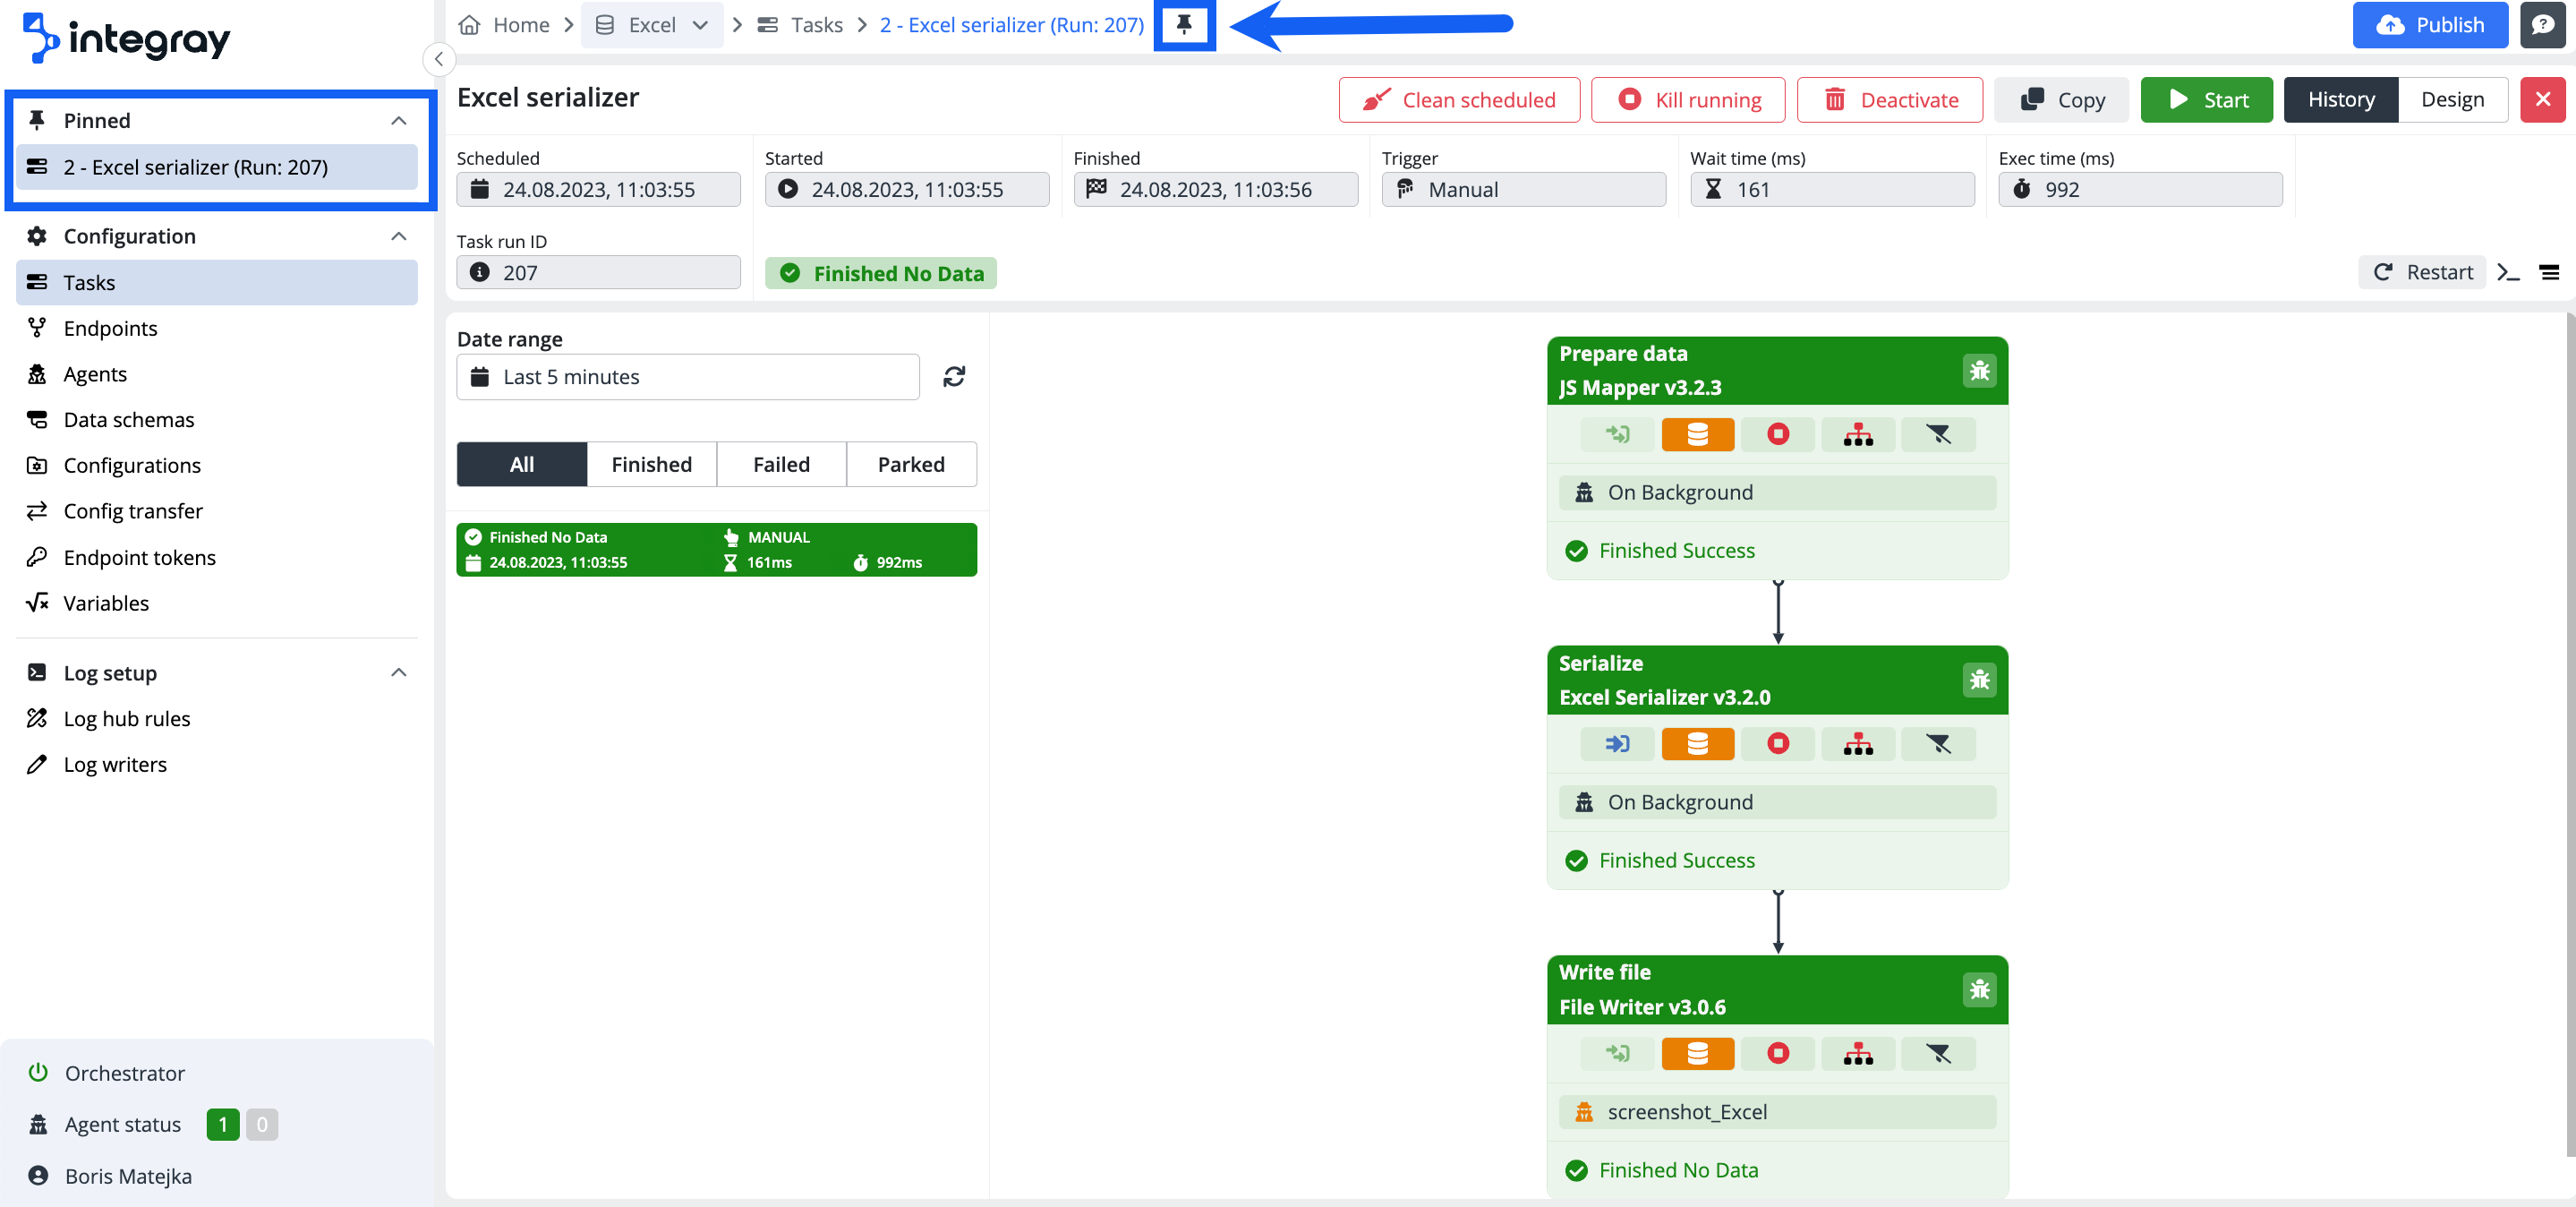
The pin icon has changed (it's all black) and the selected task run will now be added to your pinned items list, located in the sidebar for quick access.
Wherever in the system you notice a button with a pin symbol in the top navigation bar, you can pin the corresponding item to the left sidebar in the same way for convenient and quick access to frequently used sections or functions.
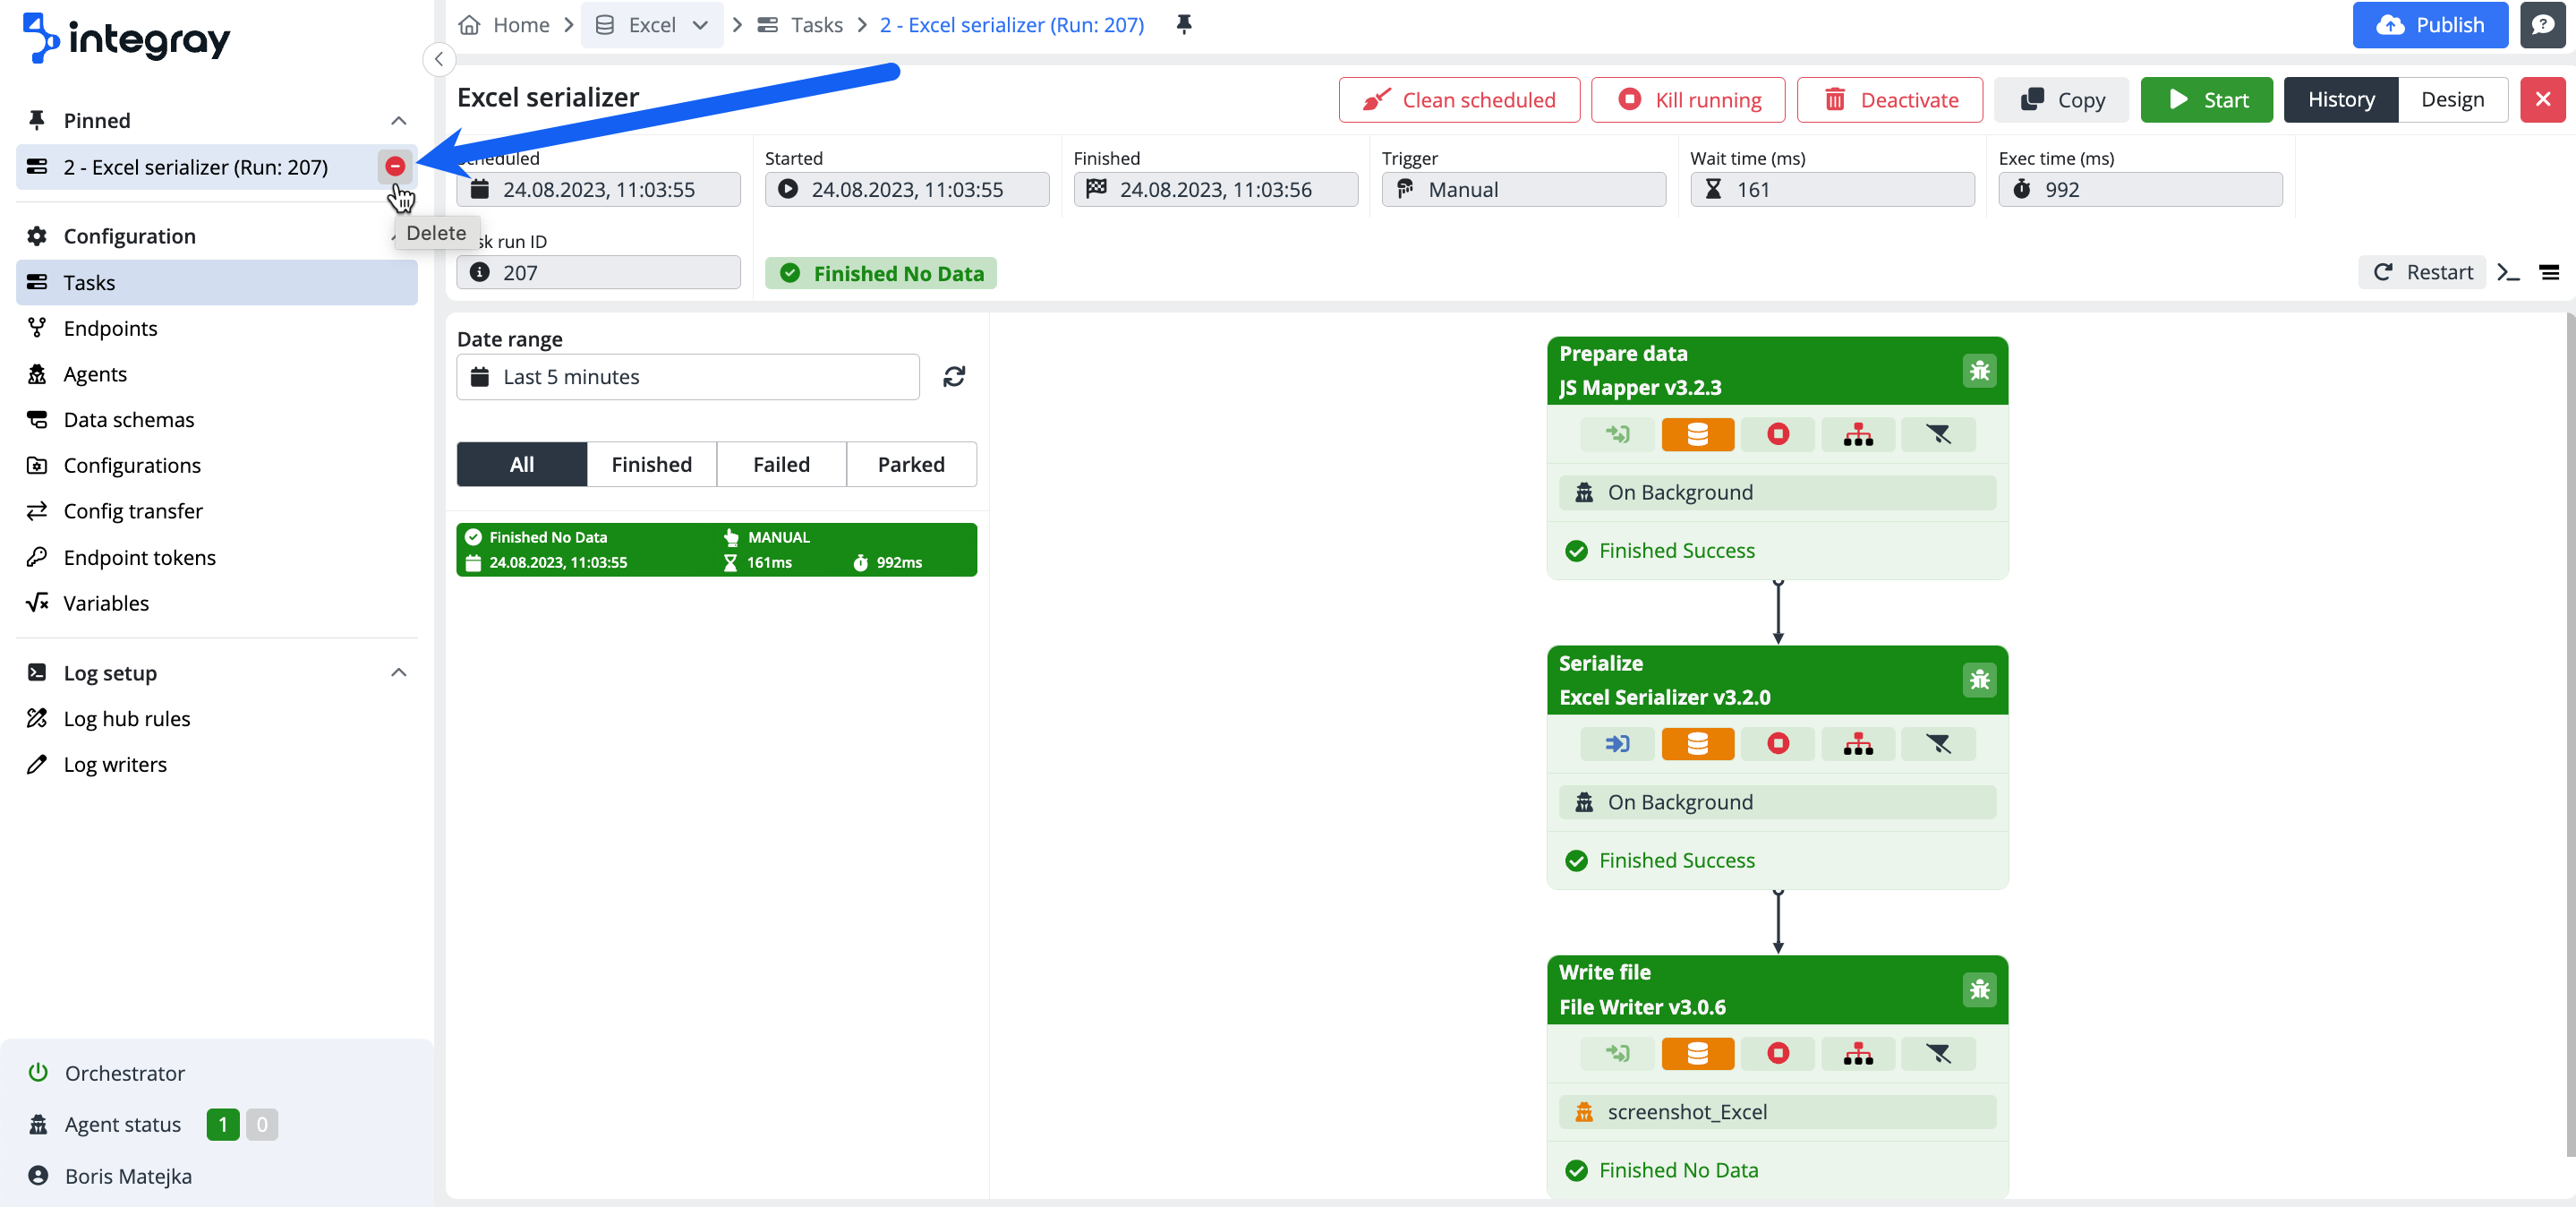
To remove a pinned item, hover your cursor over the pinned item in the left sidebar. Upon hovering, a red button will appear. Clicking on this button will remove the pinned item from your list of pinned items. The other way to remove a pinned item you can simply to click again on the pin symbol button associated with that item.
The list of pinned items is initially sorted based on the order in which the items were added to the list. However, for even better customization of your workspace and frequently used items, you have the option to set a custom order. By hovering your cursor over a pinned item (focus on the icon next to the name), you can rearrange the items by using the drag-and-drop feature. Simply click and hold on the item, then drag it to the desired position within the list. This allows you to prioritize and organize the pinned items according to your specific preferences.