

Generic OAuth2
For general authorization, instead of selecting a specific predefined provider, you choose the OAuth 2.0 option. This selection allows you to configure custom authorization settings, providing flexibility to define the necessary parameters and scopes according to your requirements.
This approach is ideal for integrating with services that do not have predefined settings in the system, giving you complete control over the authorization process.
We’ll demonstrate this process using authorization through GitHub(for more info see this GitHub document).
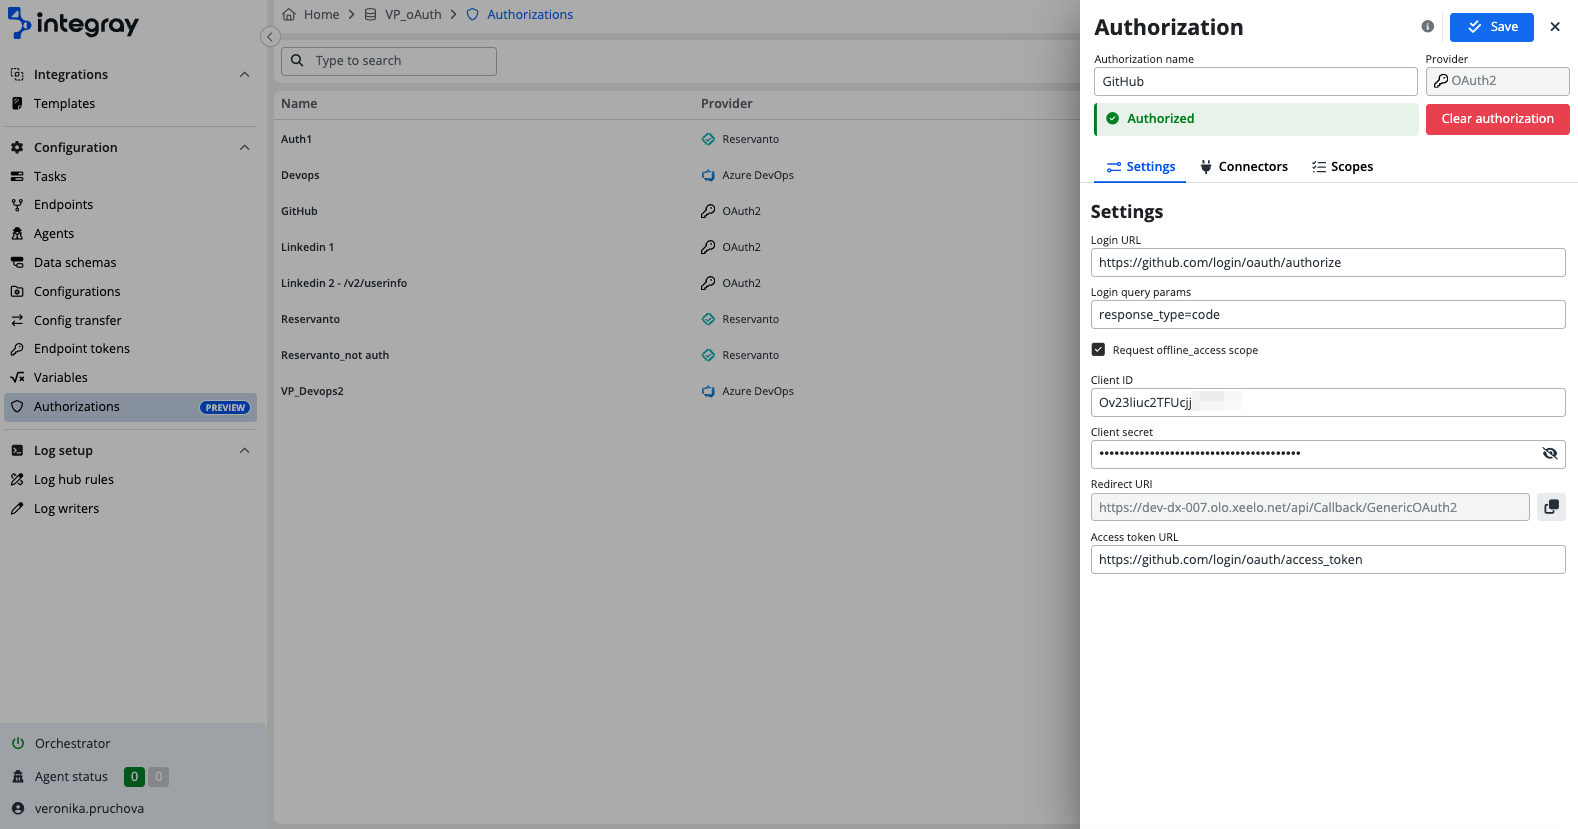
Settings
For a generic provider, you need to configure several items in the Settings tab:
-
Login URL: This is the URL where you will be directed to authenticate their authorization.
-
Login query params: Indicates the authorization server will return an authorization code, commonly used in OAuth2 flows.
-
Request offline_access scope: Allows the app to refresh tokens even when the user is offline. Some providers like
Linkedindo not support this scope -
Client ID: A unique identifier assigned to your application by the authorization server, used to identify the client making the request.
-
Client Secret: A confidential string used by the application to authenticate itself to the authorization server, ensuring secure communication.
-
Redirect URI: Predefined to the endpoint
api/Callback/GenericOAuth2, where the authorization server redirects the flow after successful authorization. -
Access Token URL: The URL endpoint is used to obtain the access token, which grants the application access to the user’s resources.
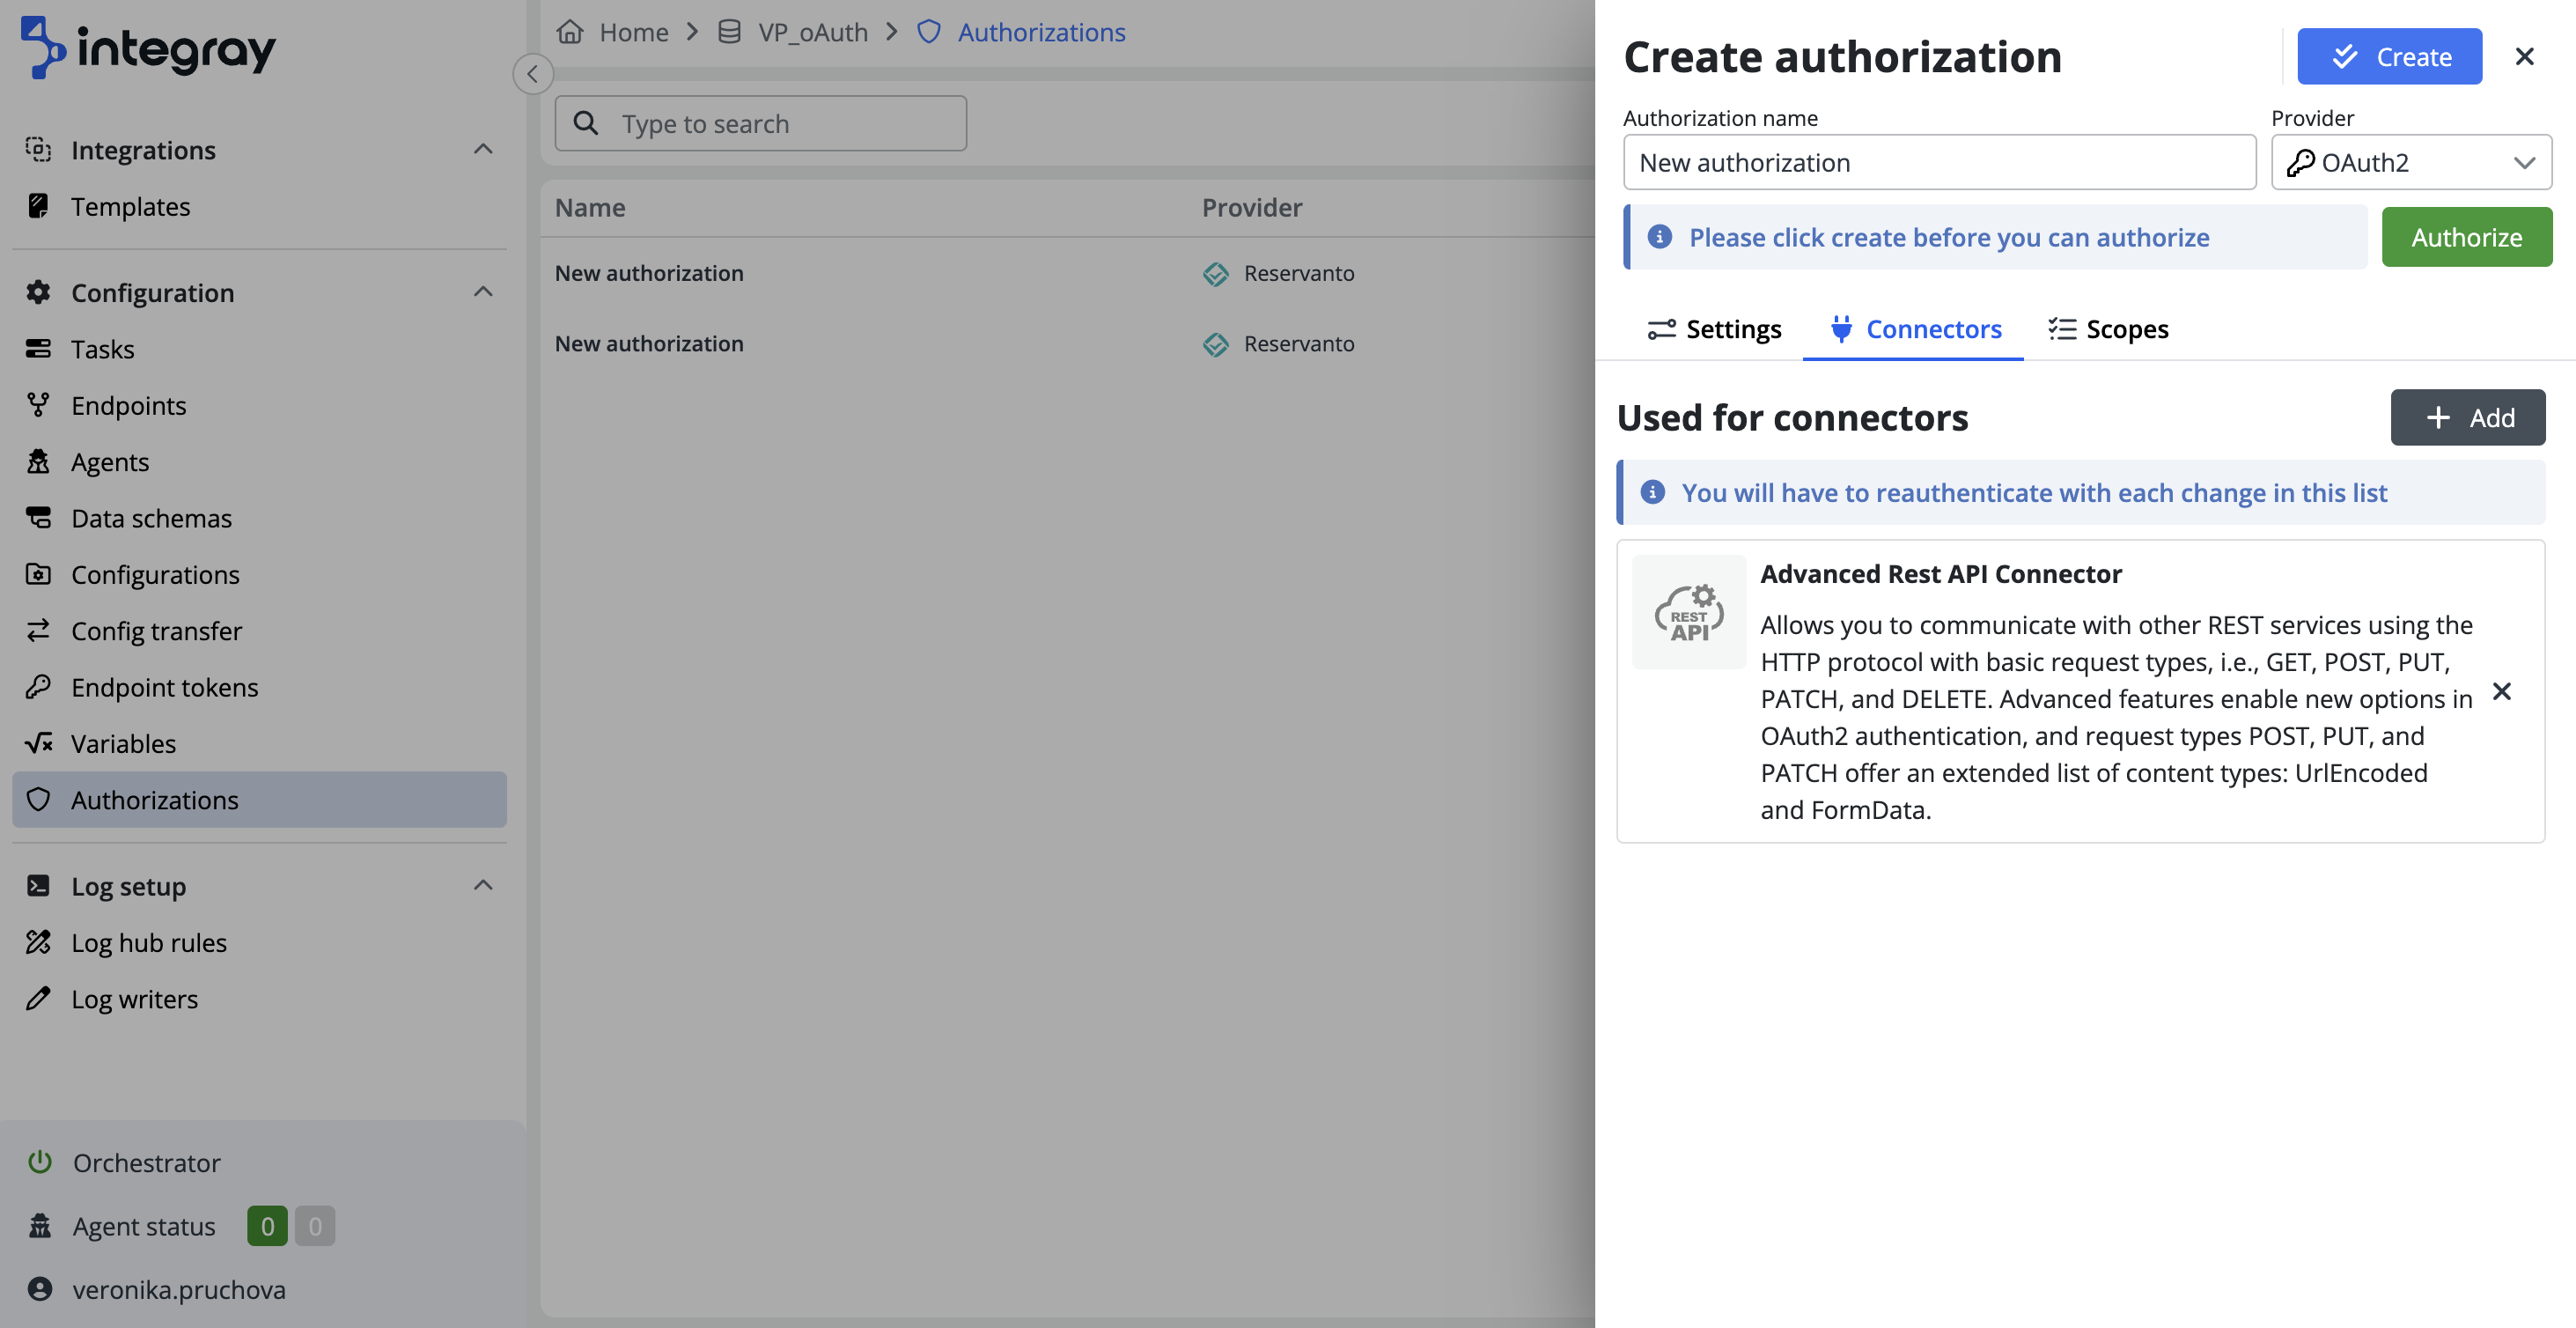
Configuring connectors
Here, you can select the desired connector from the dropdown menu by clicking + Add. This step links the authorization to specific services, with the system automatically handling the integration using the predefined settings, ensuring a seamless setup. For demonstration purposes, we will use the Advanced Rest API connector.
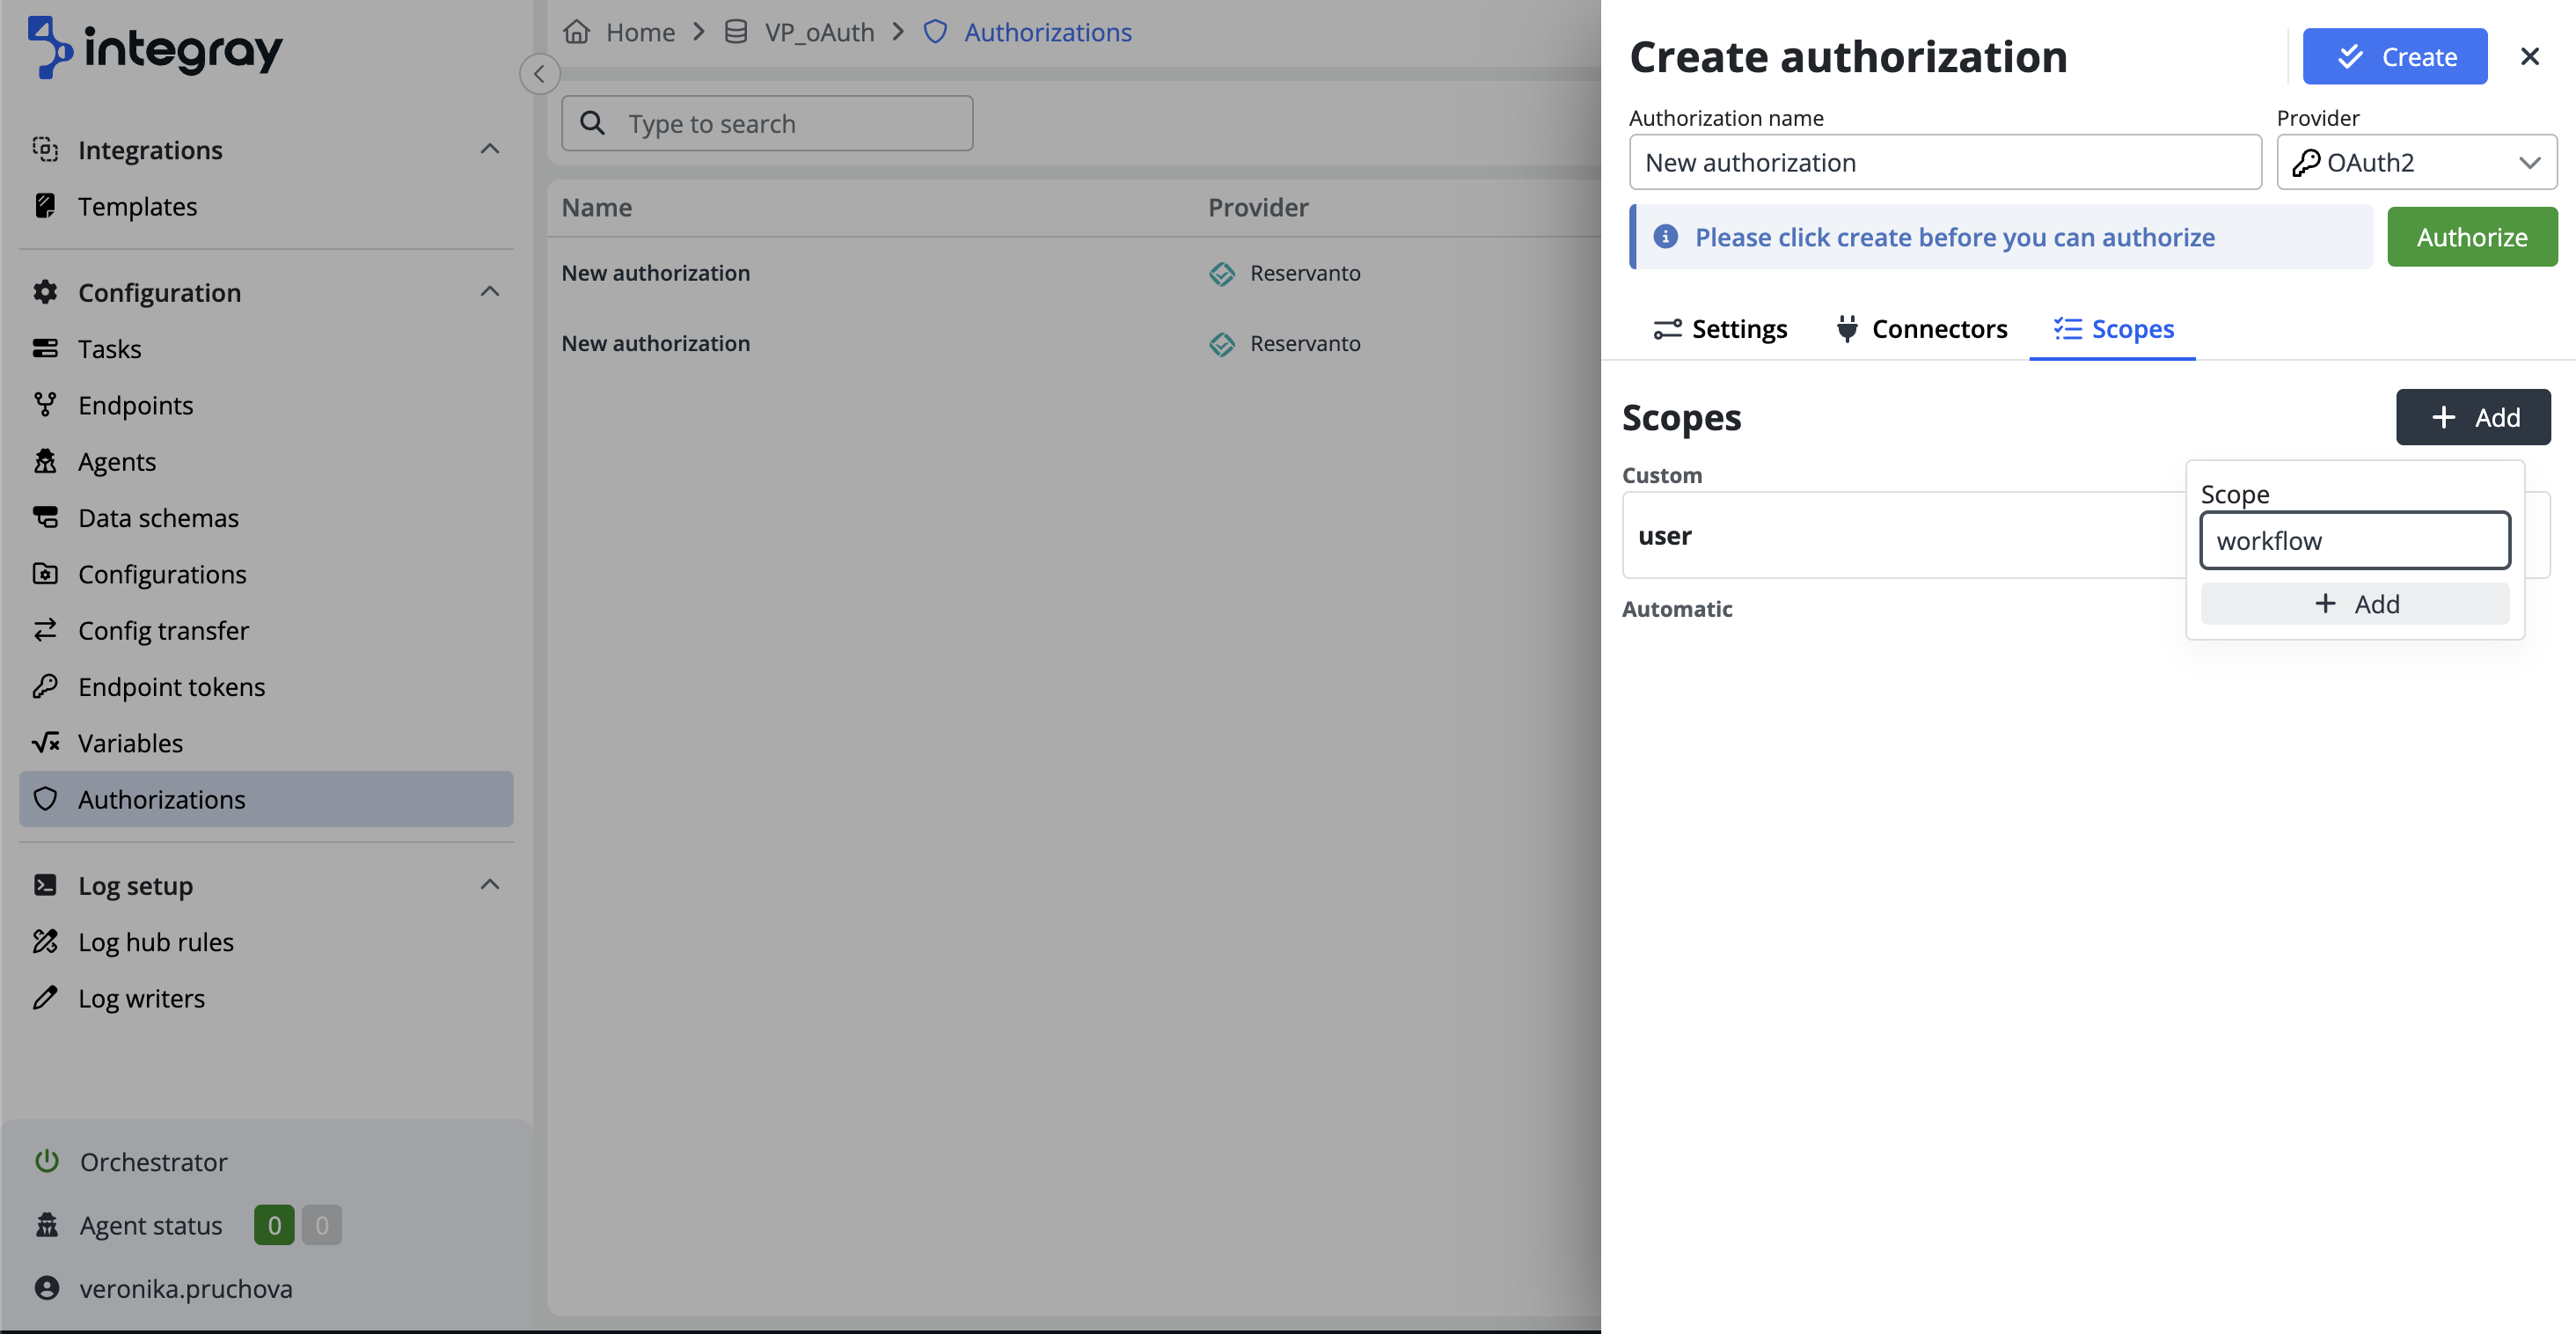
Customizing scopes
For a generic provider, no scopes are automatically set. You need to research and determine the scopes offered by the selected provider. For GitHub, the relevant information is available here. You can easily add a scope by clicking the + Add button.
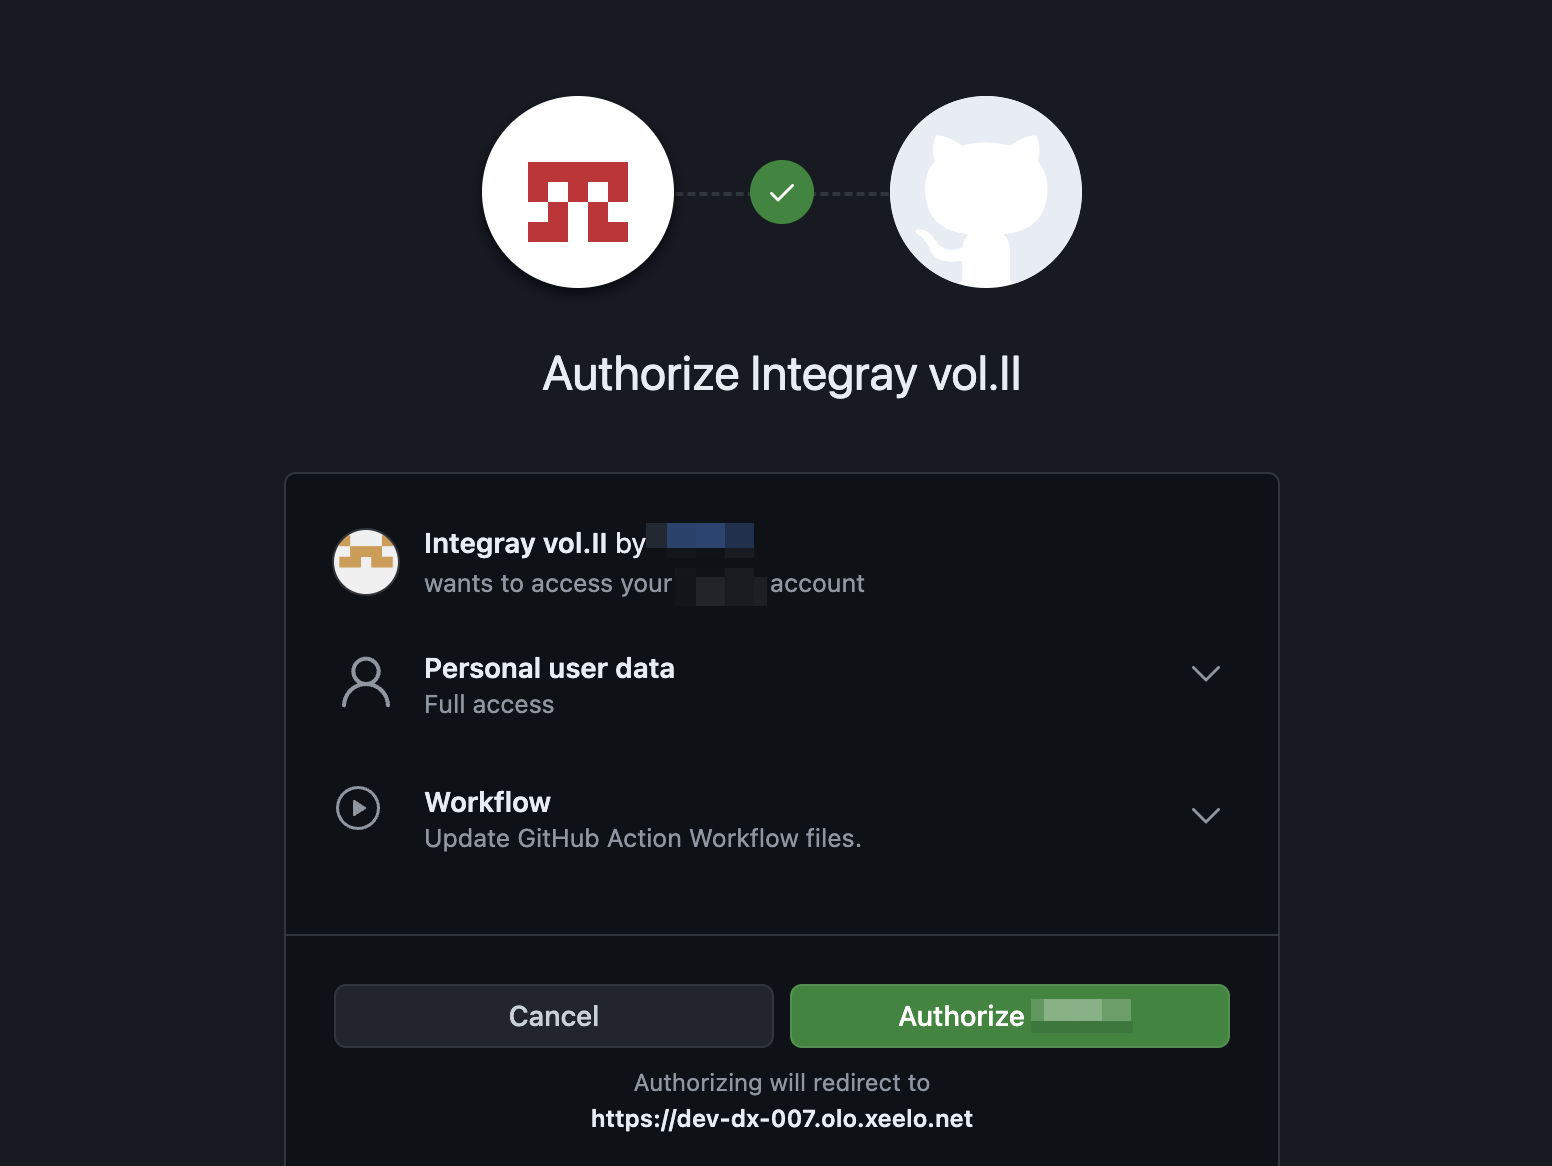
Once connectors and scopes are configured, the authorization setup is complete. The system is ready for secure interactions, click the Authorize button. This action will redirect you to the provider’s login page, where you will enter your credentials to sign in.
Risks of using a personal account for authorization
If the authorization uses a user’s own account credentials and that account is deactivated, the authorization will be canceled, and the integration will stop working.
After successful authentication, the status indicator in the upper left corner of the screen will change from Not authorized to Authorized, confirming the authorization. Finally, click the Save button to store the new authorization.
Publish needed
After authorizing or deauthorizing, it’s necessary to publish these new changes to the cache.
Authorization with multiple providers
In addition to GitHub, you can configure generic OAuth2 authorization using multiple providers. The process follows the same steps outlined above, with specific URLs, scopes, and settings provided by the respective platforms.
Supported providers
-
Microsoft OAuth2: You can configure the authorization using Microsoft’s endpoints and request scopes such as
user.readoroffline_accessdepending on the permissions needed. For more details, refer to Microsoft's OAuth2 documentation. -
LinkedIn OAuth2: LinkedIn offers OAuth2-based authorization but does not support the
offline_accessscope, so make sure to adjust your settings accordingly when using this provider. You can find more information in LinkedIn's OAuth2 documentation.