

Azure DevOps
When you use authorization with a predefined provider in Integray, such as Azure DevOps, the setup process is efficient and straightforward due to the pre-configured settings.
Settings
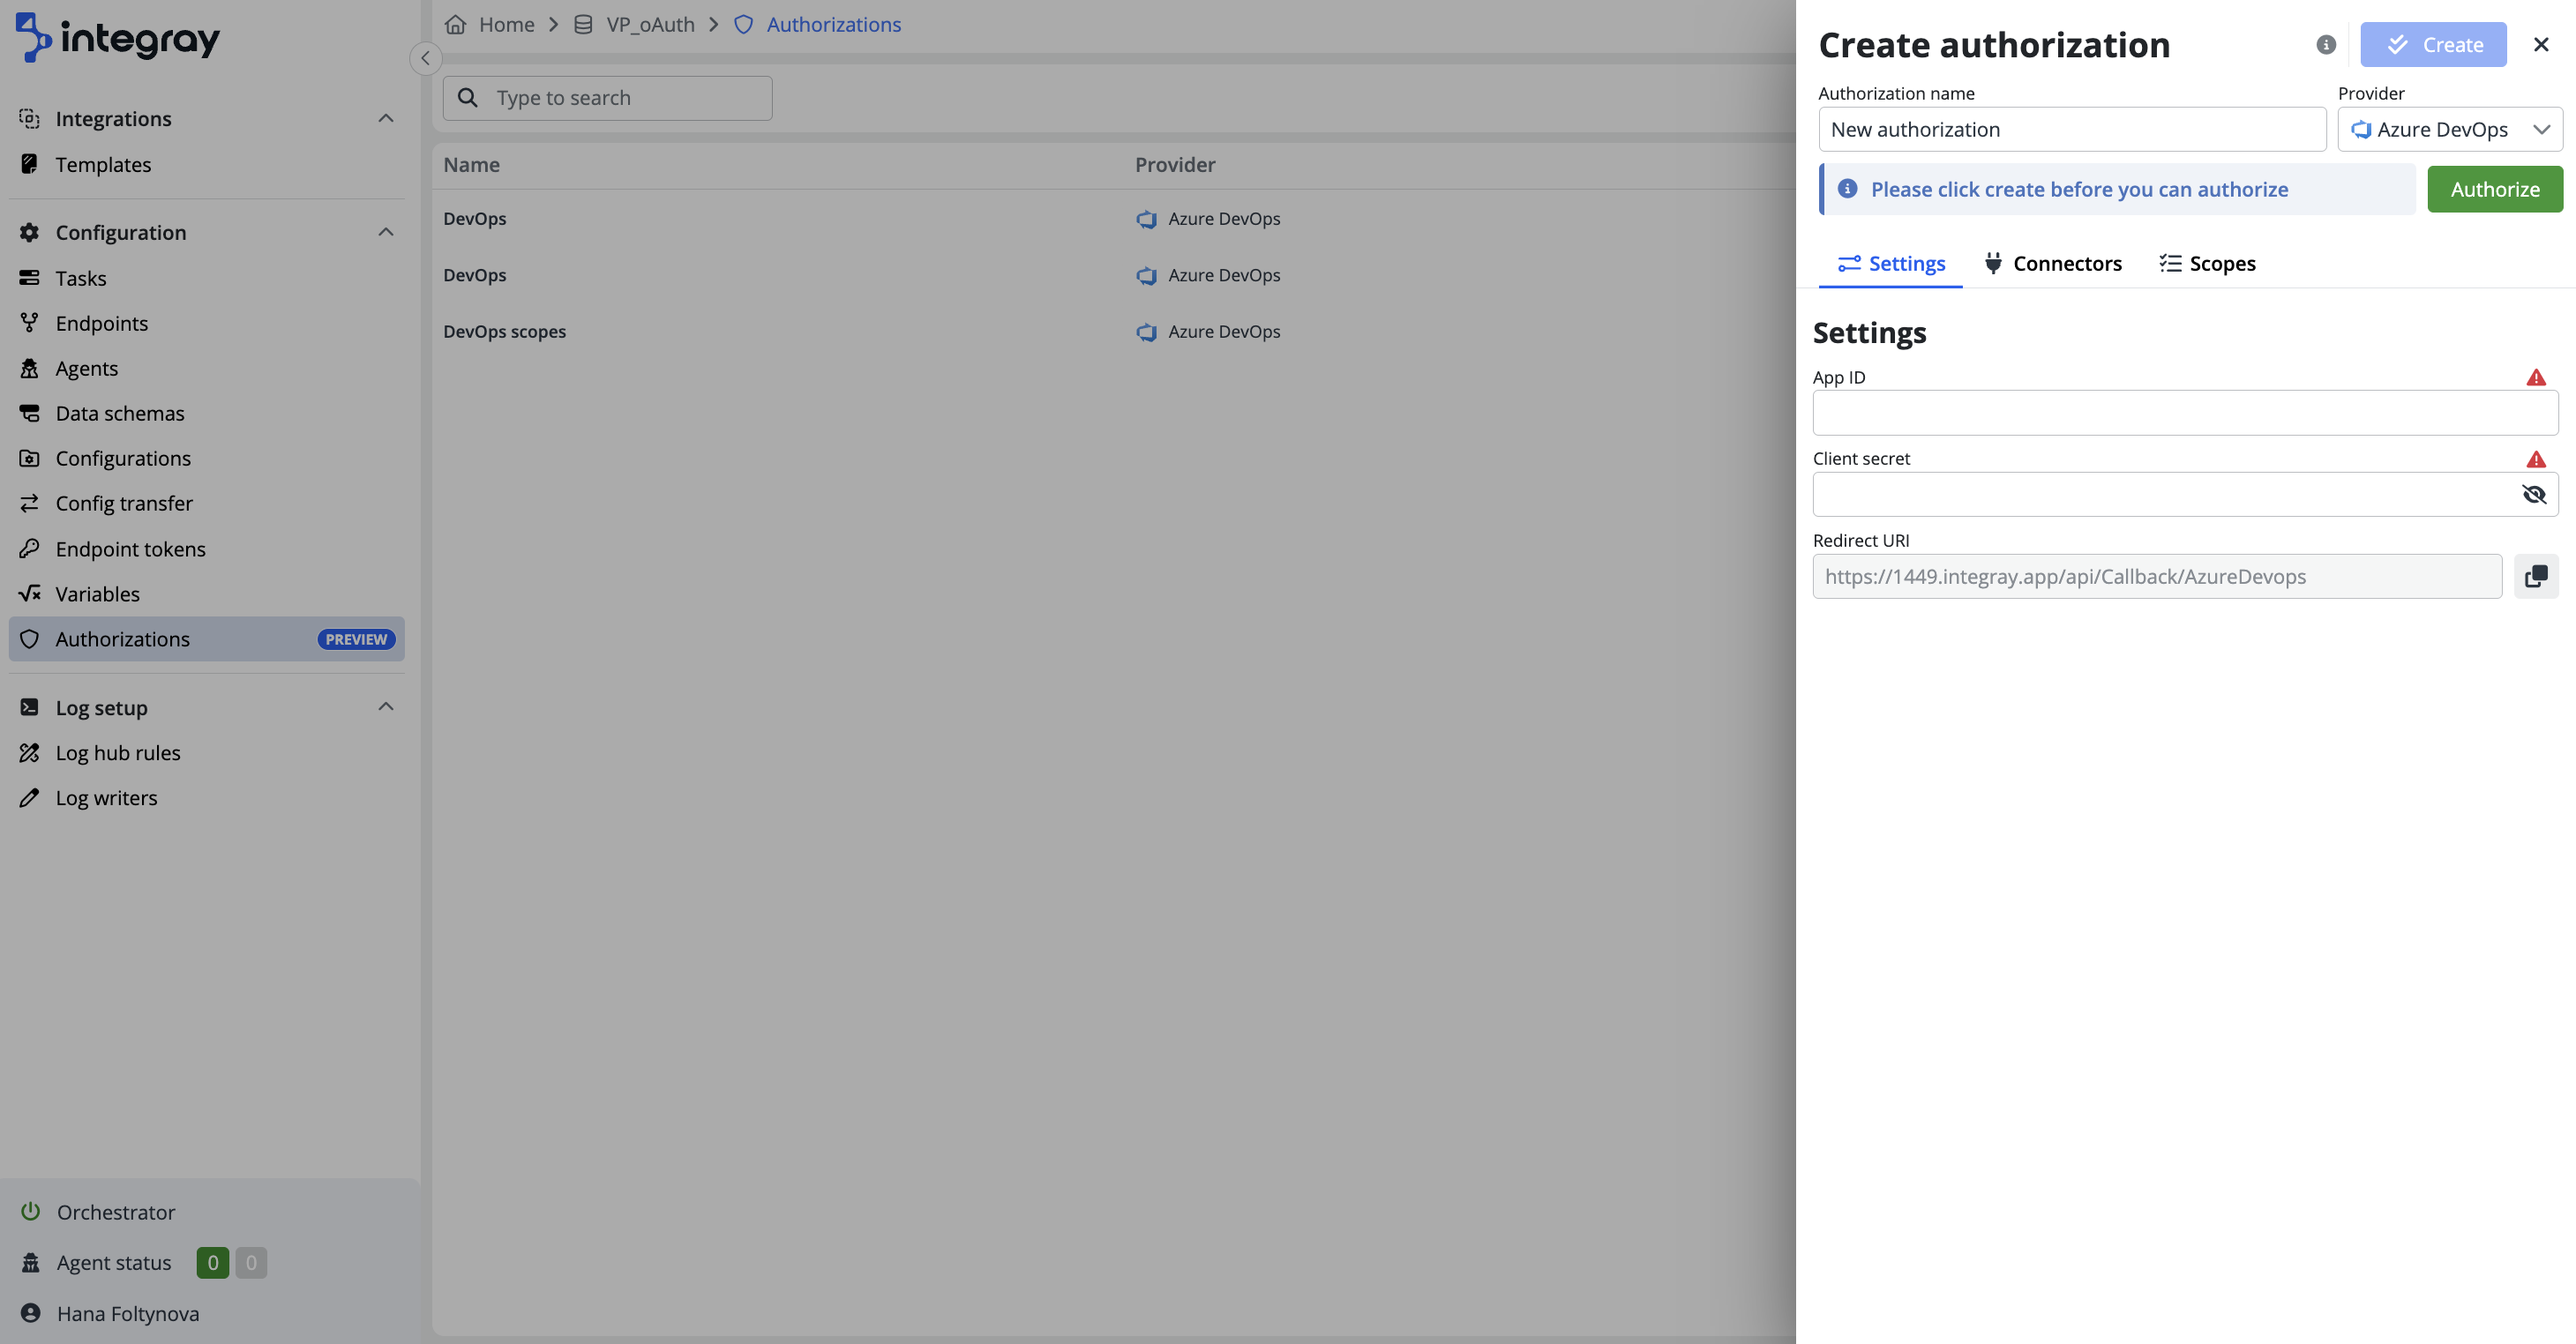
In the first tab, Settings, you will find fields that are necessary for configuring the authorization:
-
App ID: This is the unique identifier for your Azure DevOps app. You need to input the App ID here.
-
Client secret: This is the secret key for your app. Ensure you enter the correct secret for the authorization to work.
-
Redirect URI: The redirect URI is pre-configured for you. It specifies the endpoint to which Azure DevOps will redirect after the authorization.
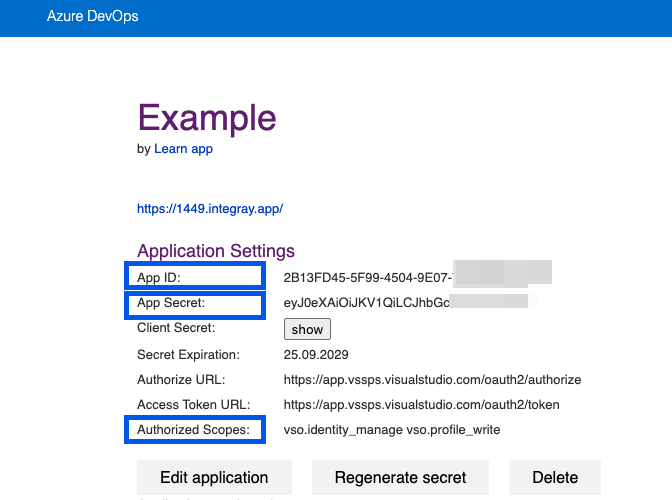
To get the App ID, Client Secret, and set up Scopes, you must first create your own company by registering it. After registering, you will be able to generate the necessary credentials. The Scopes you configure will depend on the level of access you require for your integration.
Configuring connectors
After confirming the settings, move to the Connectors tab. Here, you can select the desired connector from the dropdown menu. This step links the authorization to specific services, with the system automatically handling the integration using the predefined settings, ensuring a seamless setup.
Currently, it is recommended to use this authorization with the Advanced Rest API Connector. For more details and specifications of endpoints, you can refer to the documentation here.
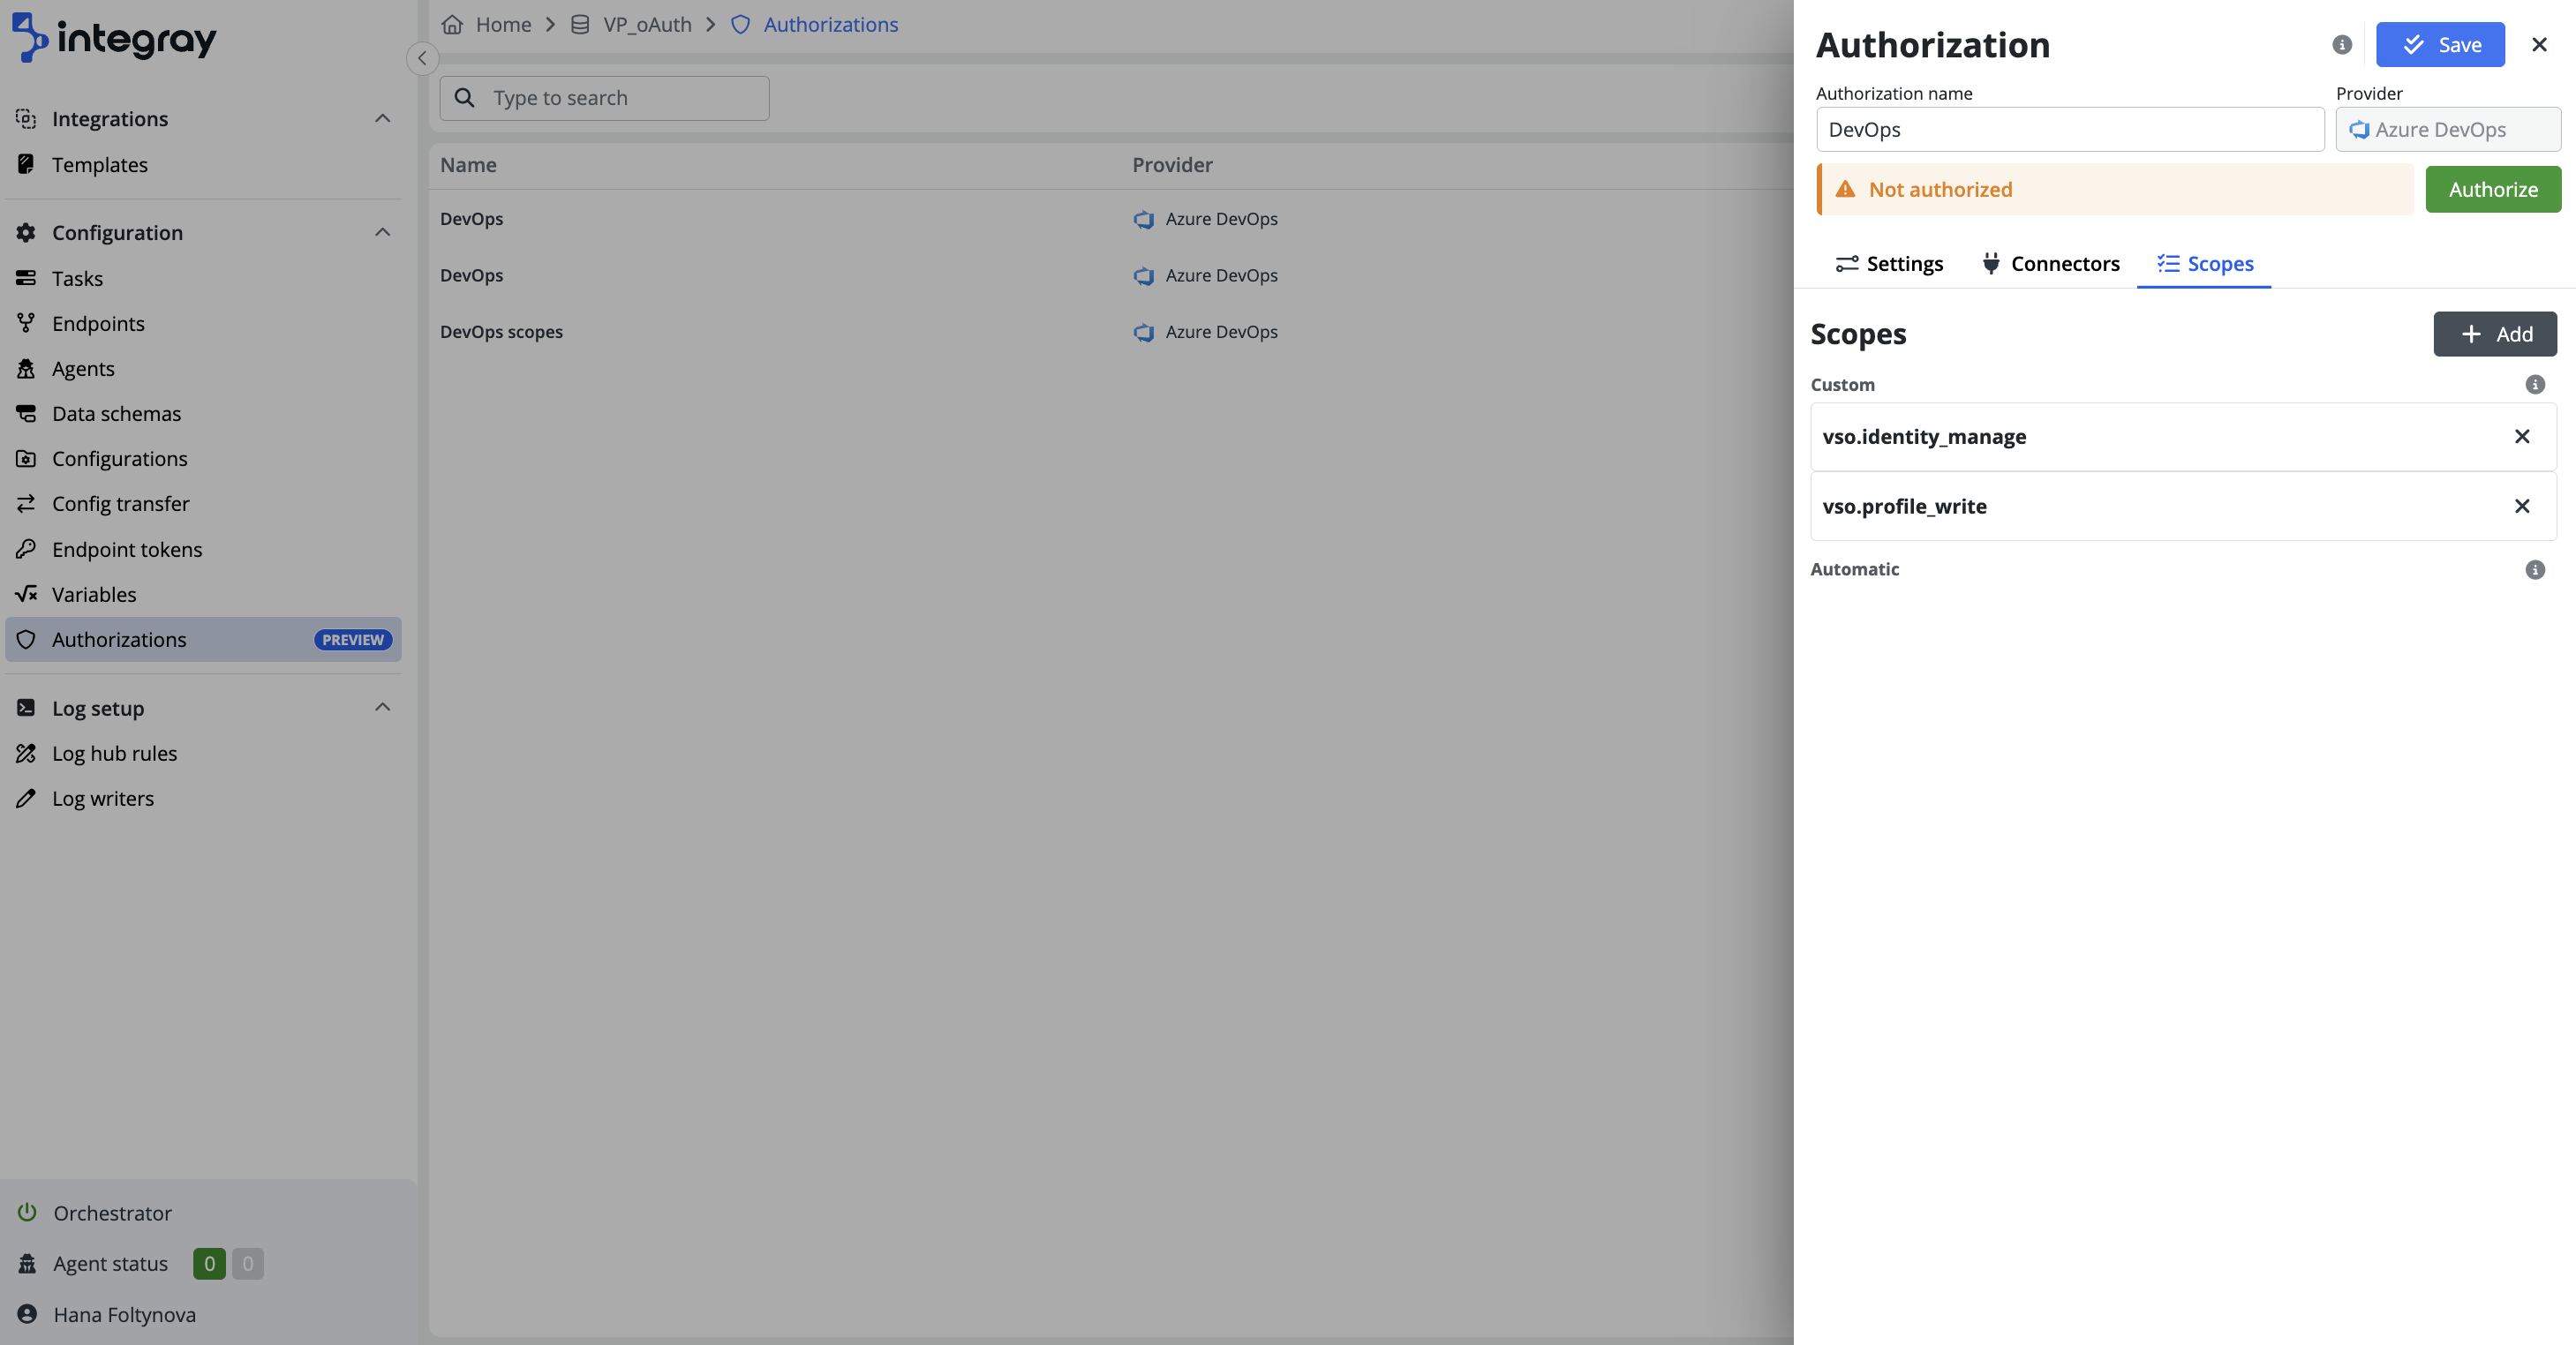
Reviewing and Customizing scopes
In the Scopes tab, you must define custom scopes to specify permissions according to your company's needs, adhering to the principle of least privilege for enhanced security. More about Scopes to see article here.
Once connectors and scopes are configured, the authorization setup is complete. The system is ready for secure interactions, click the Authorize button. This action will redirect you to the provider’s login page, where you will enter your credentials to sign in.
Risks of using a personal account for authorization
If the authorization uses a user’s own account credentials and that account is deactivated, the authorization will be canceled, and the integration will stop working.
During the login process, you must approve the User consent screen, which is a dialog or webpage presented to you by the authorization server. This screen informs you about the specific permissions or Scopes the application requests access to. You must review these permissions and provide their consent to allow the application to access their data within the specified scope.
After successful authentication, the status indicator will change from Not authorized to Authorized, confirming the authorization.
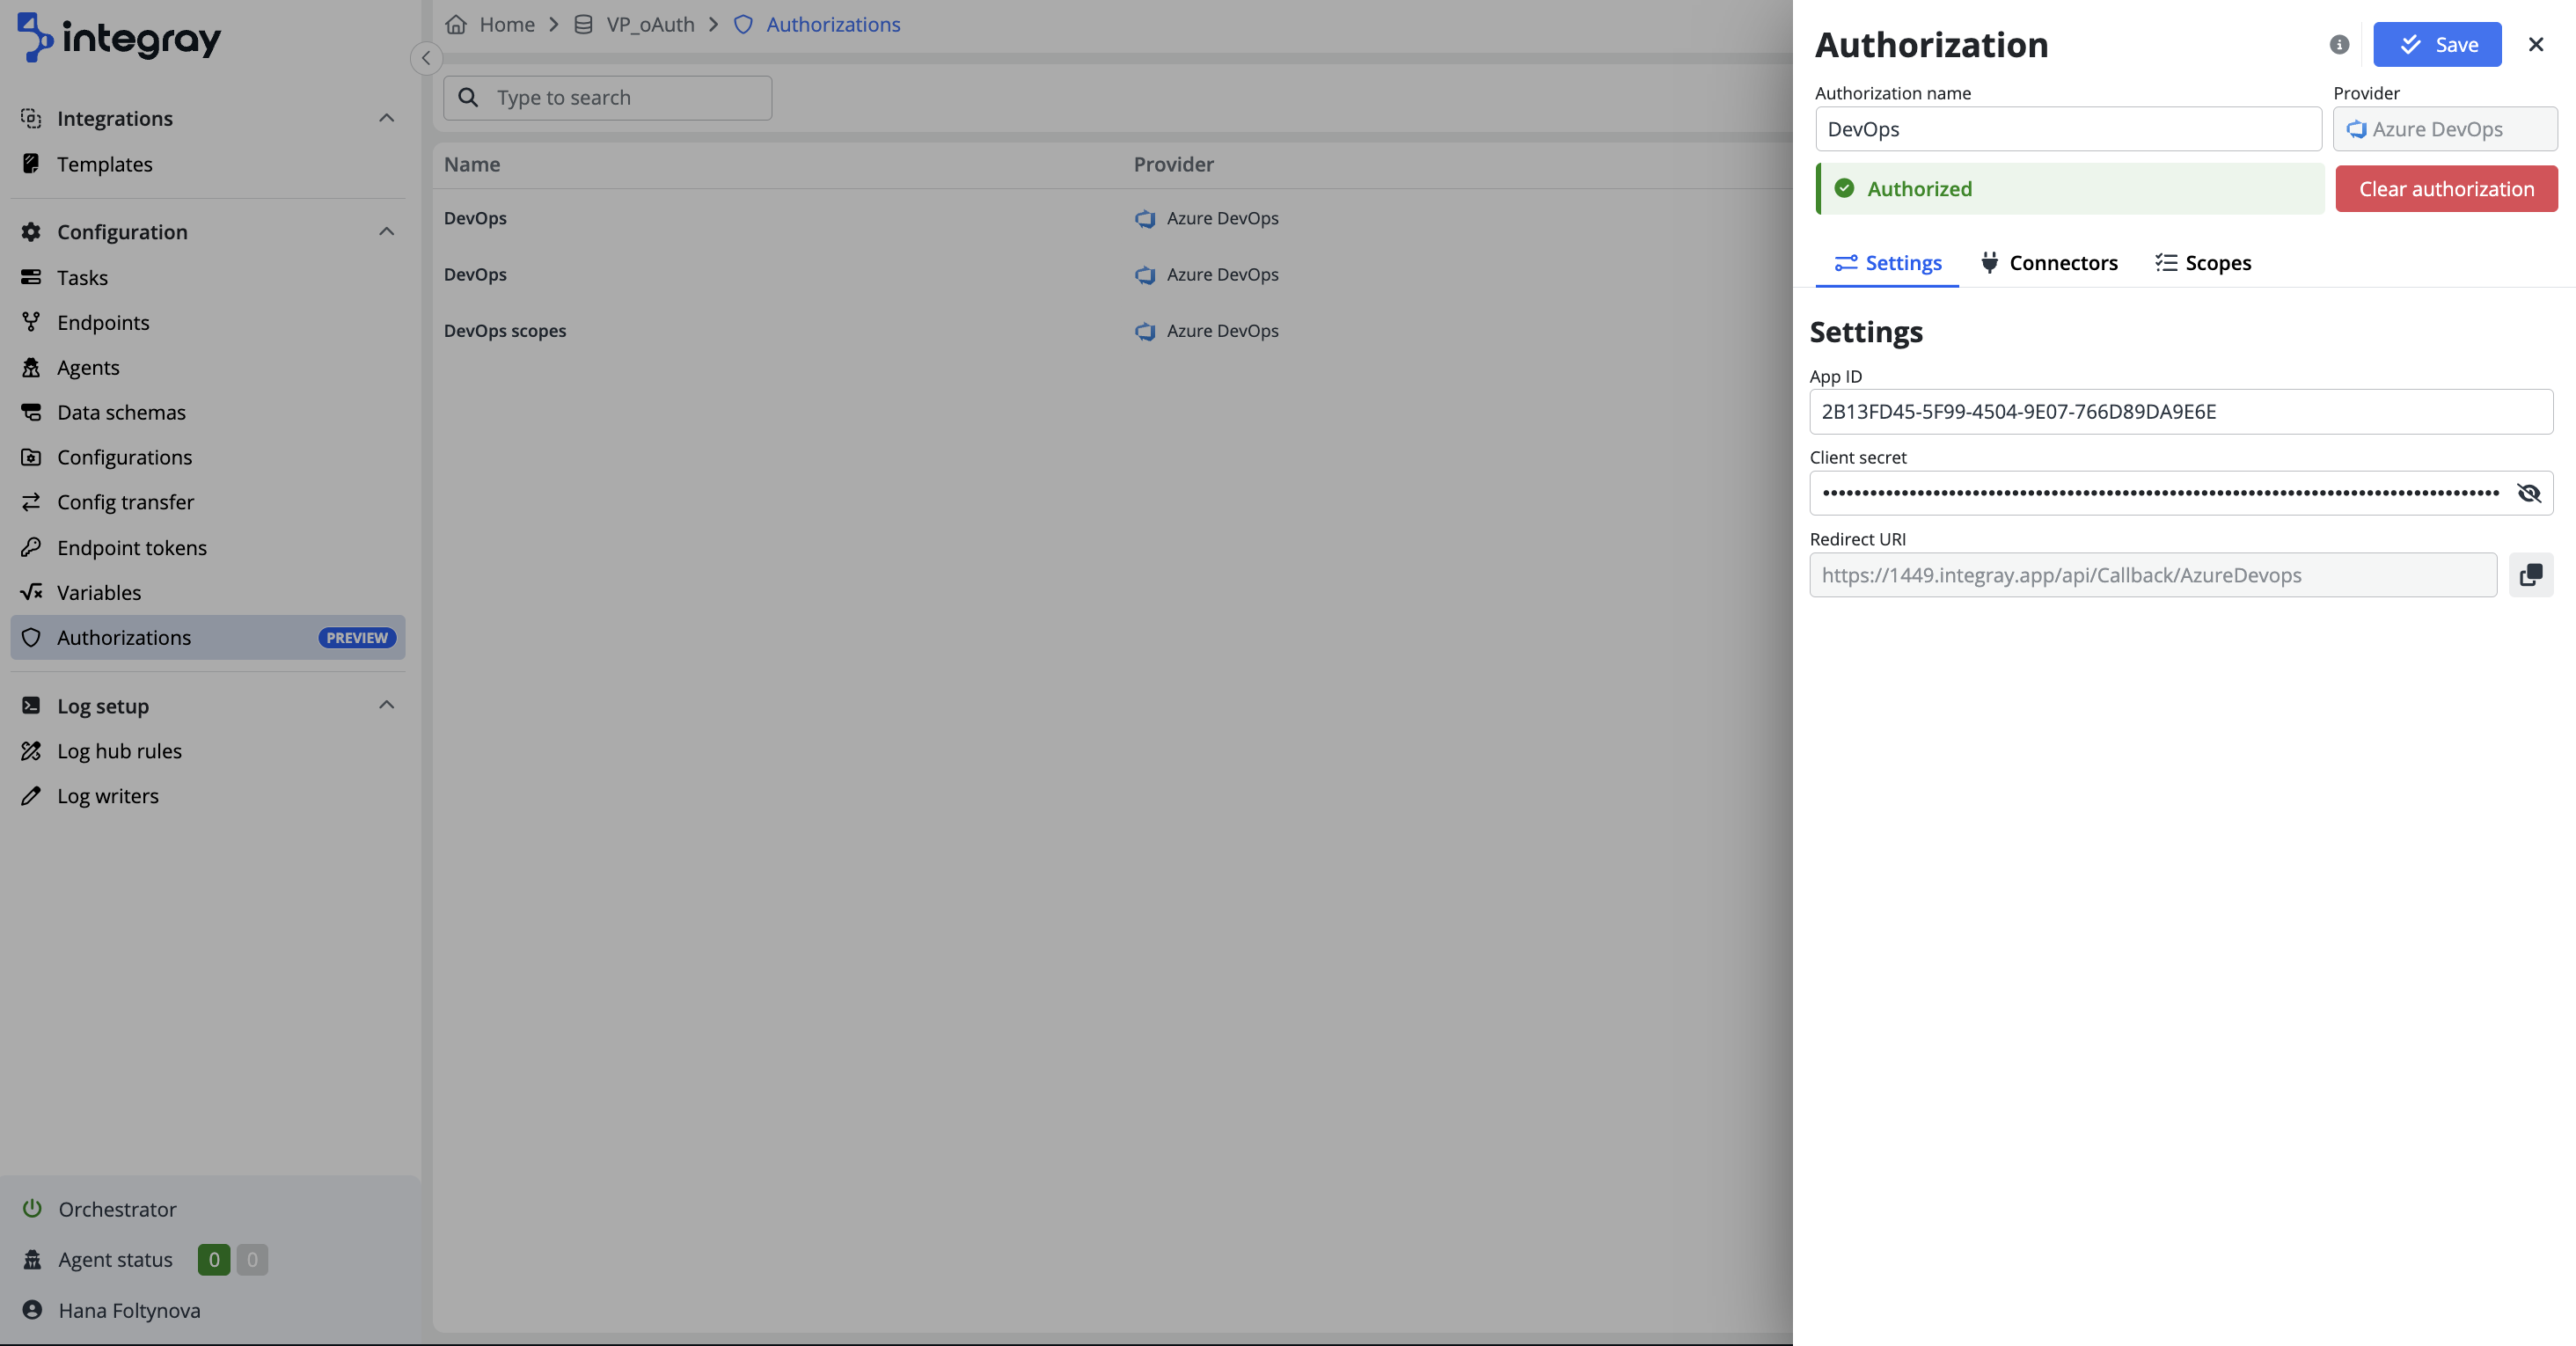
Finally, click the Save button to store the new authorization.
Publish needed
After authorizing or deauthorizing, it’s necessary to publish these new changes to the cache.