

PUT
The PUT method is used to update or replace an existing resource at a specific endpoint. When using the PUT method with an Integray endpoint, you can effectively update records, replace data, and configure how data is mapped and handled during the update process. The PUT method ensures that the data being sent completely replaces the target resource, providing a clear, consistent approach to resource management.
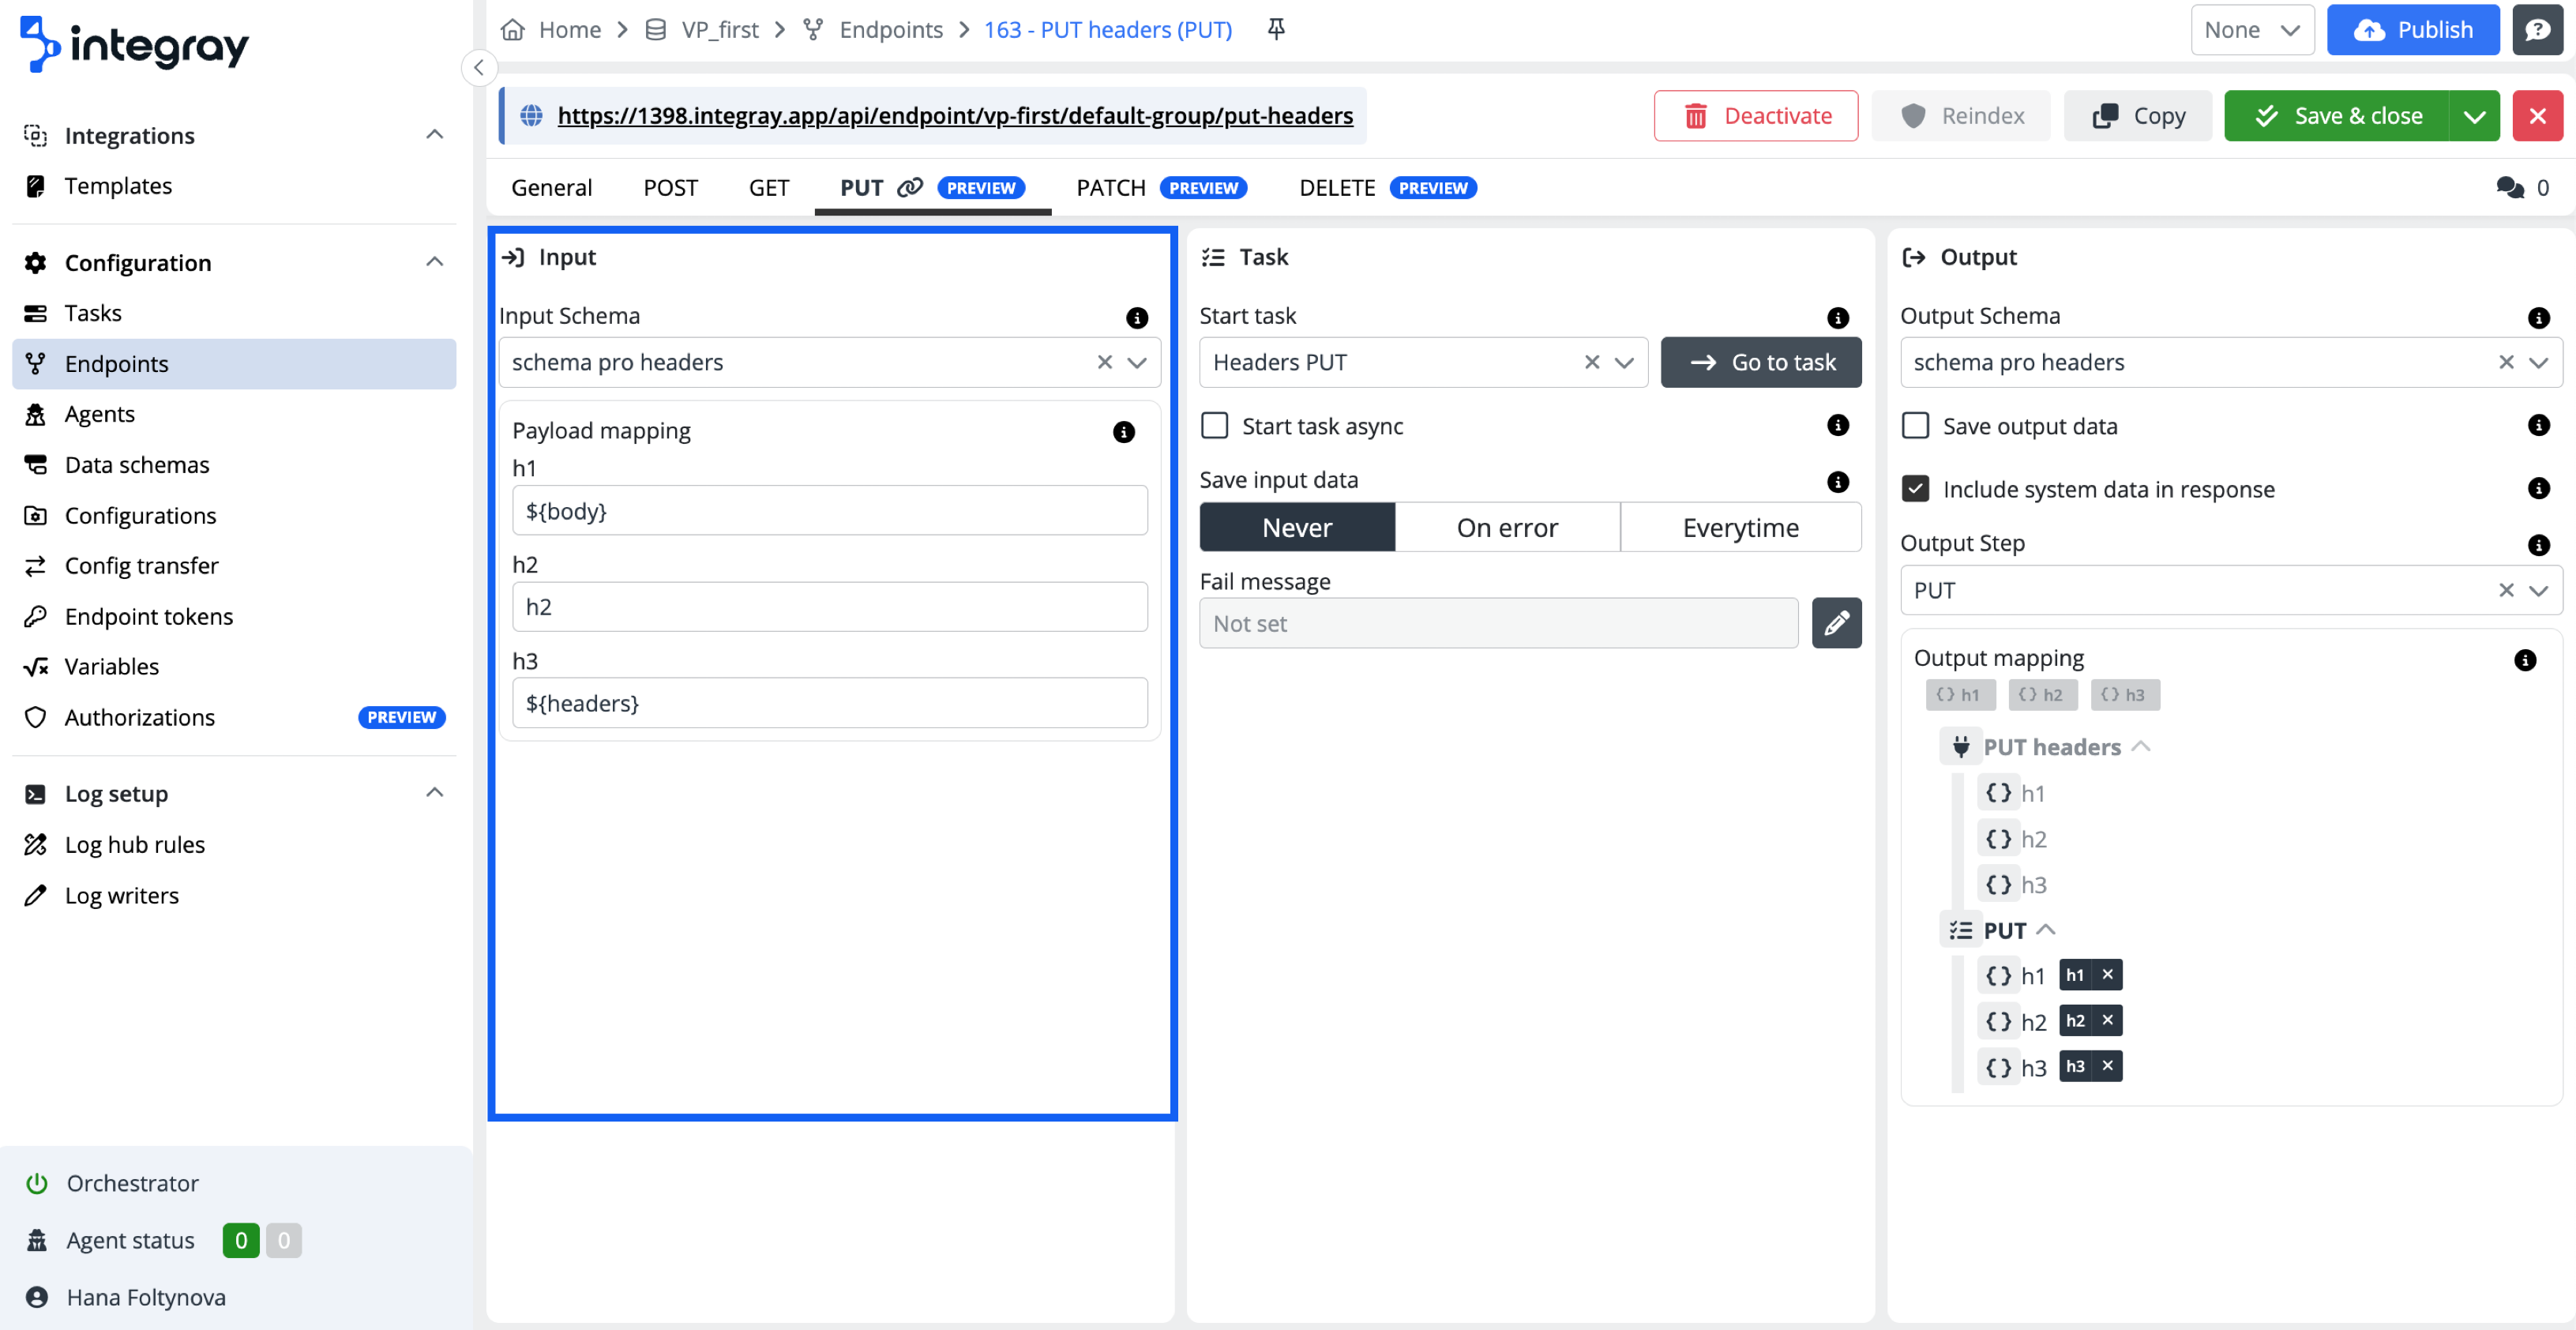
Configure the method PUT for the created endpoint. The PUT tab is divided into 3 sections: Input, Task, and Output.
The expected behavior:
-
Complete Replacement: The PUT method fully replaces the existing resource with the data provided in the request. Any fields not included in the request are removed from the resource.
-
Idempotent: Repeatedly sending the same PUT request should always result in the same resource state, ensuring consistency and predictability.
-
Validation and Error Handling: The server should validate the incoming request to ensure that it matches the expected schema and structure. If the request fails validation, the server should return appropriate error codes like
400 Bad Requestor409 Conflict. -
Success Response: A successful PUT request typically results in a
201 Createdresponse with the updated resource or a204 No Contentif the update is successful but no content is returned. -
Data Integrity: The PUT method should ensure that the updated resource is stored correctly and that any previous data is fully replaced with the new data, maintaining the integrity of the resource.
Expected behavior
PUT {companySlug}/{endpointGroupSlug}/{endpointSlug} - with task - Executes task
PUT {companySlug}/{endpointGroupSlug}/{endpointSlug} - without task - Not found
PUT {companySlug}/{endpointGroupSlug}/{endpointSlug}/{id:guid} - without task - Rewrites entire data
Input
-
Input schema - Defines the structure of the data that will be passed from the endpoint to the input of the task. Ensure that the data structure aligns with the existing resource format. If needed, refer to the Data schemas or define a custom schema.
-
Payload mapping - Specifies how the incoming JSON data will be parsed and mapped to the input schema of the task. Each pair binds an element of the input schema to a corresponding property in the JSON payload.
The following special placeholders can be utilized:
Placeholder Description ${body}The entire parsed JSON body. ${headers}All request headers serialized into a JSON object. ${bodyBase64}The entire parsed JSON as a Base64 string. ${fixed:<value>}A predefined constant value. <token_name>Path to a local token. <token_name>.<nested_token_name>Path to a nested token. $.<JSONPath_expression>A JSONPath expression.
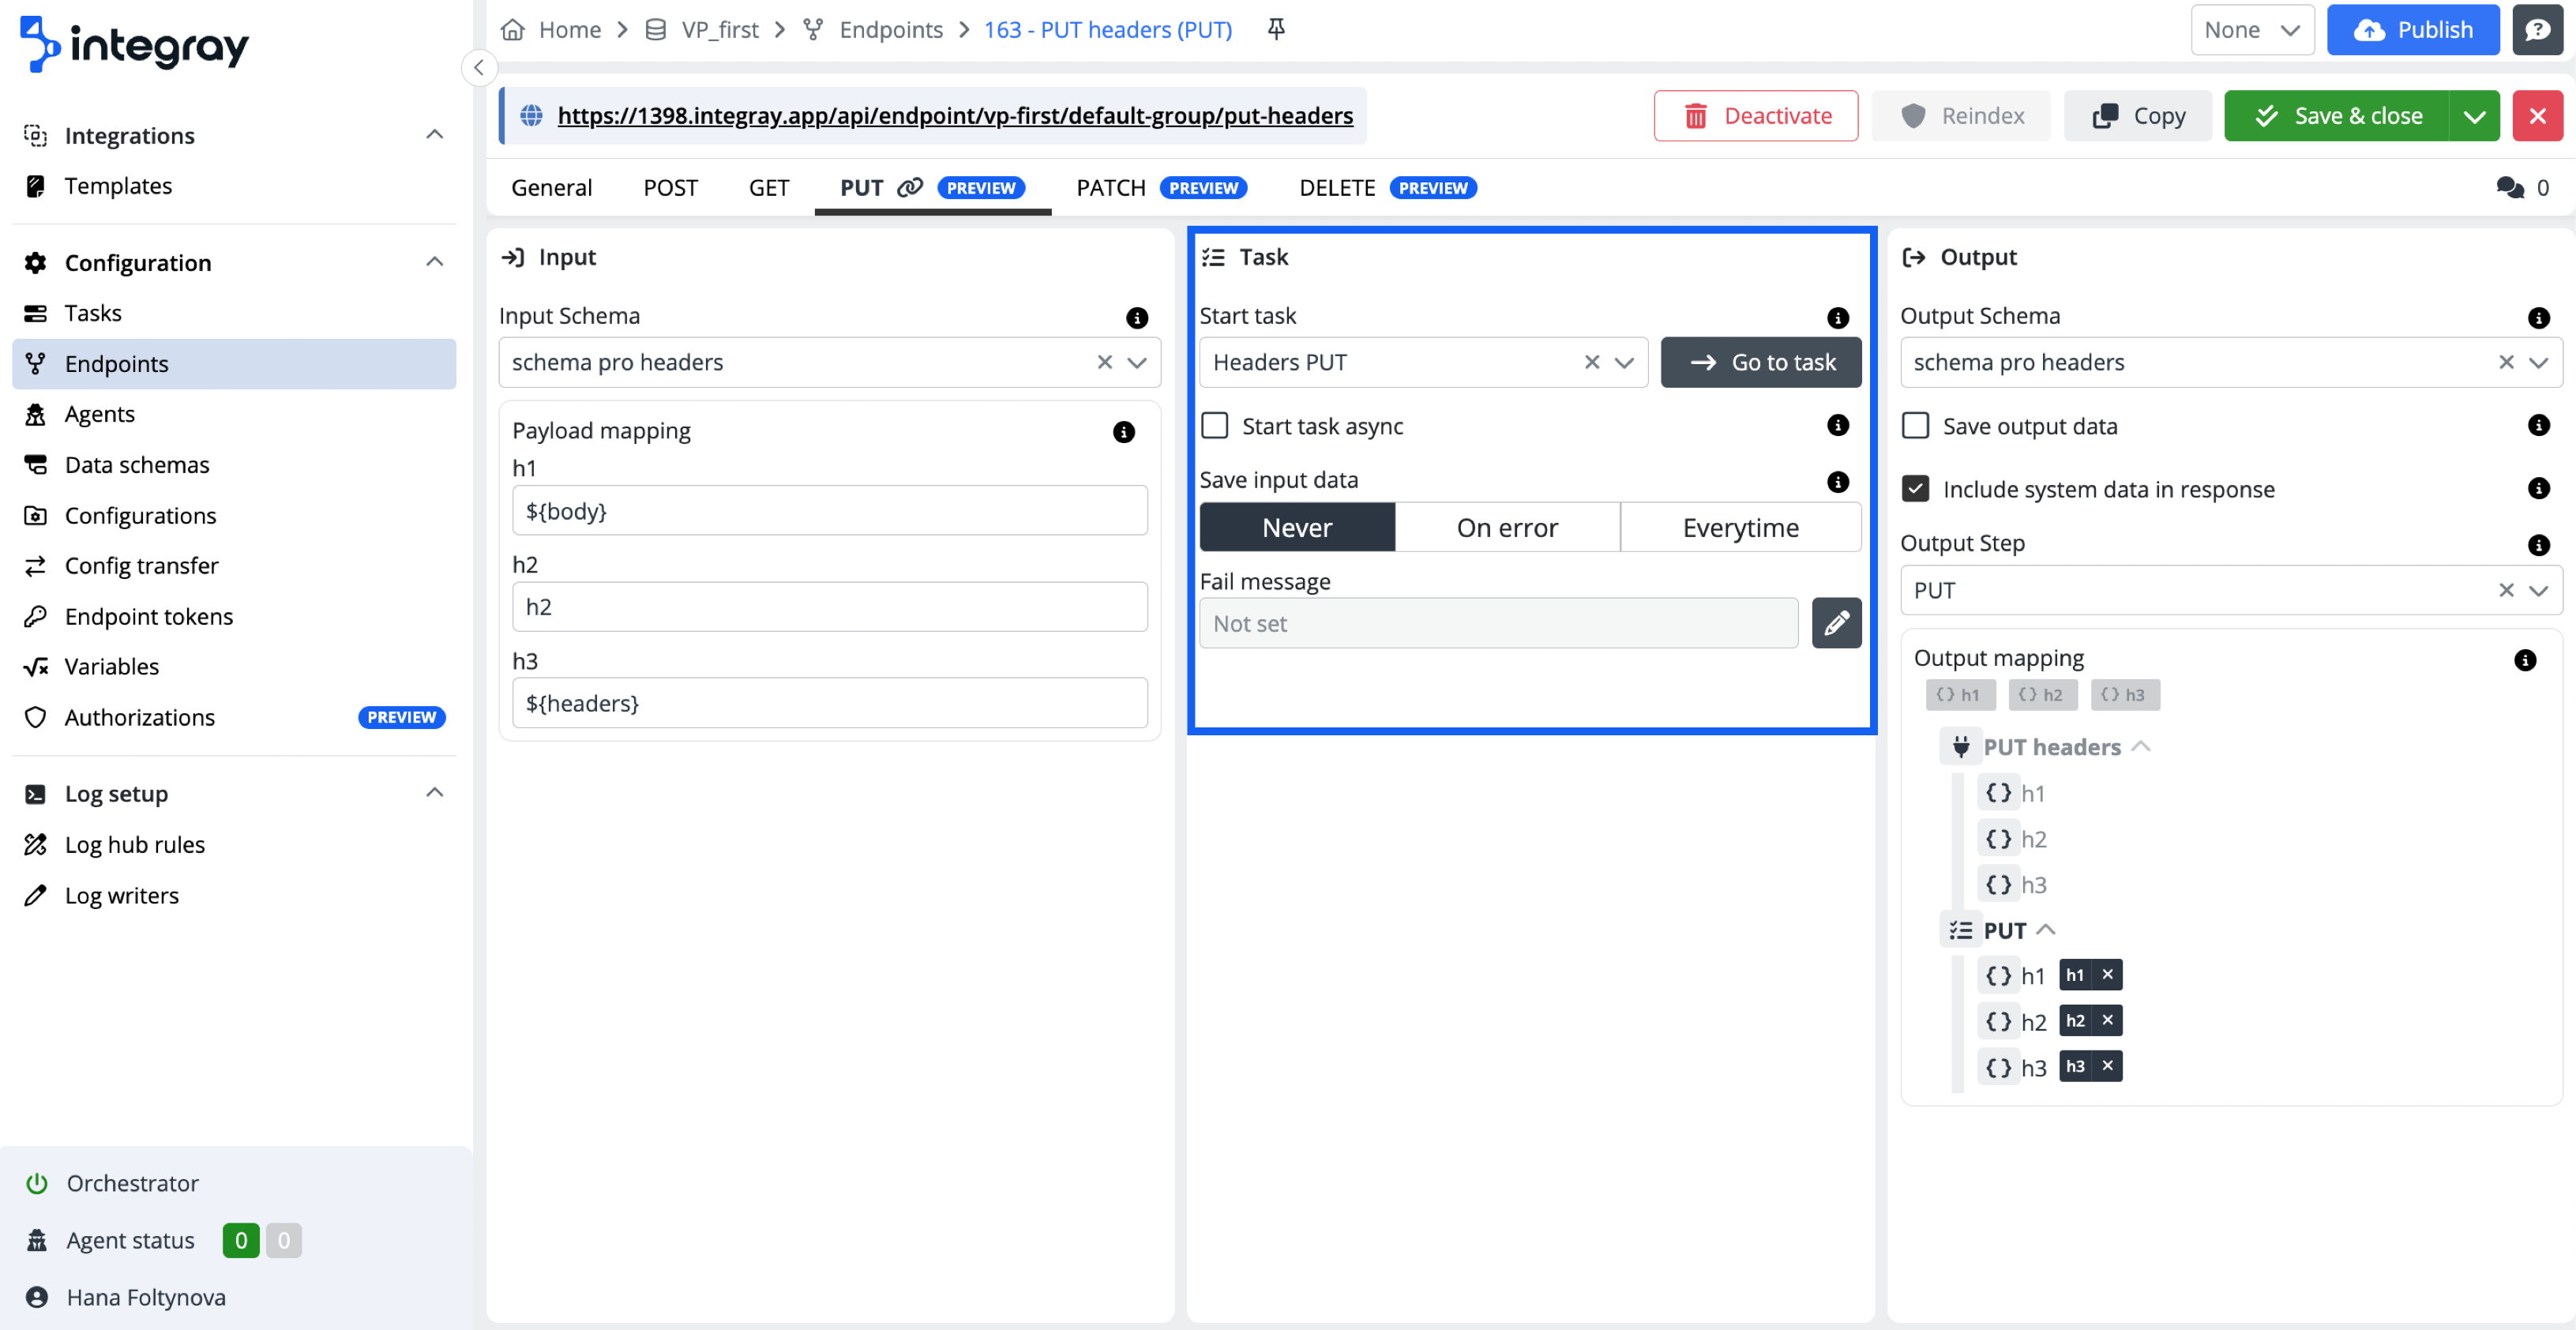
Task
-
Start task - Initiates the task when a PUT request is received at the specified endpoint. The task processes the input data, updating or replacing the existing resource as defined by the input schema and payload mapping.
-
Start task async - Determines if the endpoint waits for the task to complete before responding.
- OFF - The task is started synchronously.
- ON - The task runs asynchronously.
Synchronous task execution
The endpoint responds with
201 Createdafter the task is completed, ensuring that the resource is successfully updated.Property Description IDGUID of the updated resource. StatusStatus of the completed task. MessageAny error messages if the task failed. ResultThe output data of the task. Example
{
    "ID": "e1d68685-dd93-ec11-8708-c89402b99bb6",
    "Status": "FinishedSuccess",
    "Message": null,
    "Result": {
        "updated_field": "new_value"
    }
}
Expected Behavior: The synchronous task ensures immediate feedback on the success or failure of the update. If the task fails, the response includes error details, and the resource remains unchanged.
Reaching timeout
If a timeout occurs, the request terminates with HTTP status code
408 Request Timeout, and the task status is set toFailedTimeout.{ "ID": "2373a025-de93-ec11-8708-c89402b99bb6", "Status": "FailedTimeout", "Message": "Task execution timed out.", "Result": null }Expected Behavior: If the task exceeds the execution time, the resource update will not occur, and a timeout error is returned to the client.
Asynchronous task execution
The endpoint responds with
202 Acceptedimmediately after receiving the PUT request. The response includes:Property Description IDGUID of the received resource data. StatusAlways returns as "Scheduled". MessageAlways null. ResultAlways null. Example
{
    "ID": "bed9e935-d993-ec11-8708-c89402b99bb6",
    "Status": "Scheduled",
    "Message": null,
    "Result": null
}
Expected Behavior: The asynchronous task allows the system to handle the update in the background. The client can later check the status of the update using the provided
ID.To retrieve the result of the running task later, send an
HTTP GETrequest with theIDto.../<endpoint_slug>/<ID>. Ensure theSave output dataoption is enabled for the task. -
Save input data - Input data can be saved to the database based on the selected settings.
- Never - Input data is deleted after processing.
- On error - Input data is saved only if the task fails.
- Always - Input data is always saved.
-
Fail message - Define custom messages to be displayed in case of failure. By default, Fail message is set to Not set.
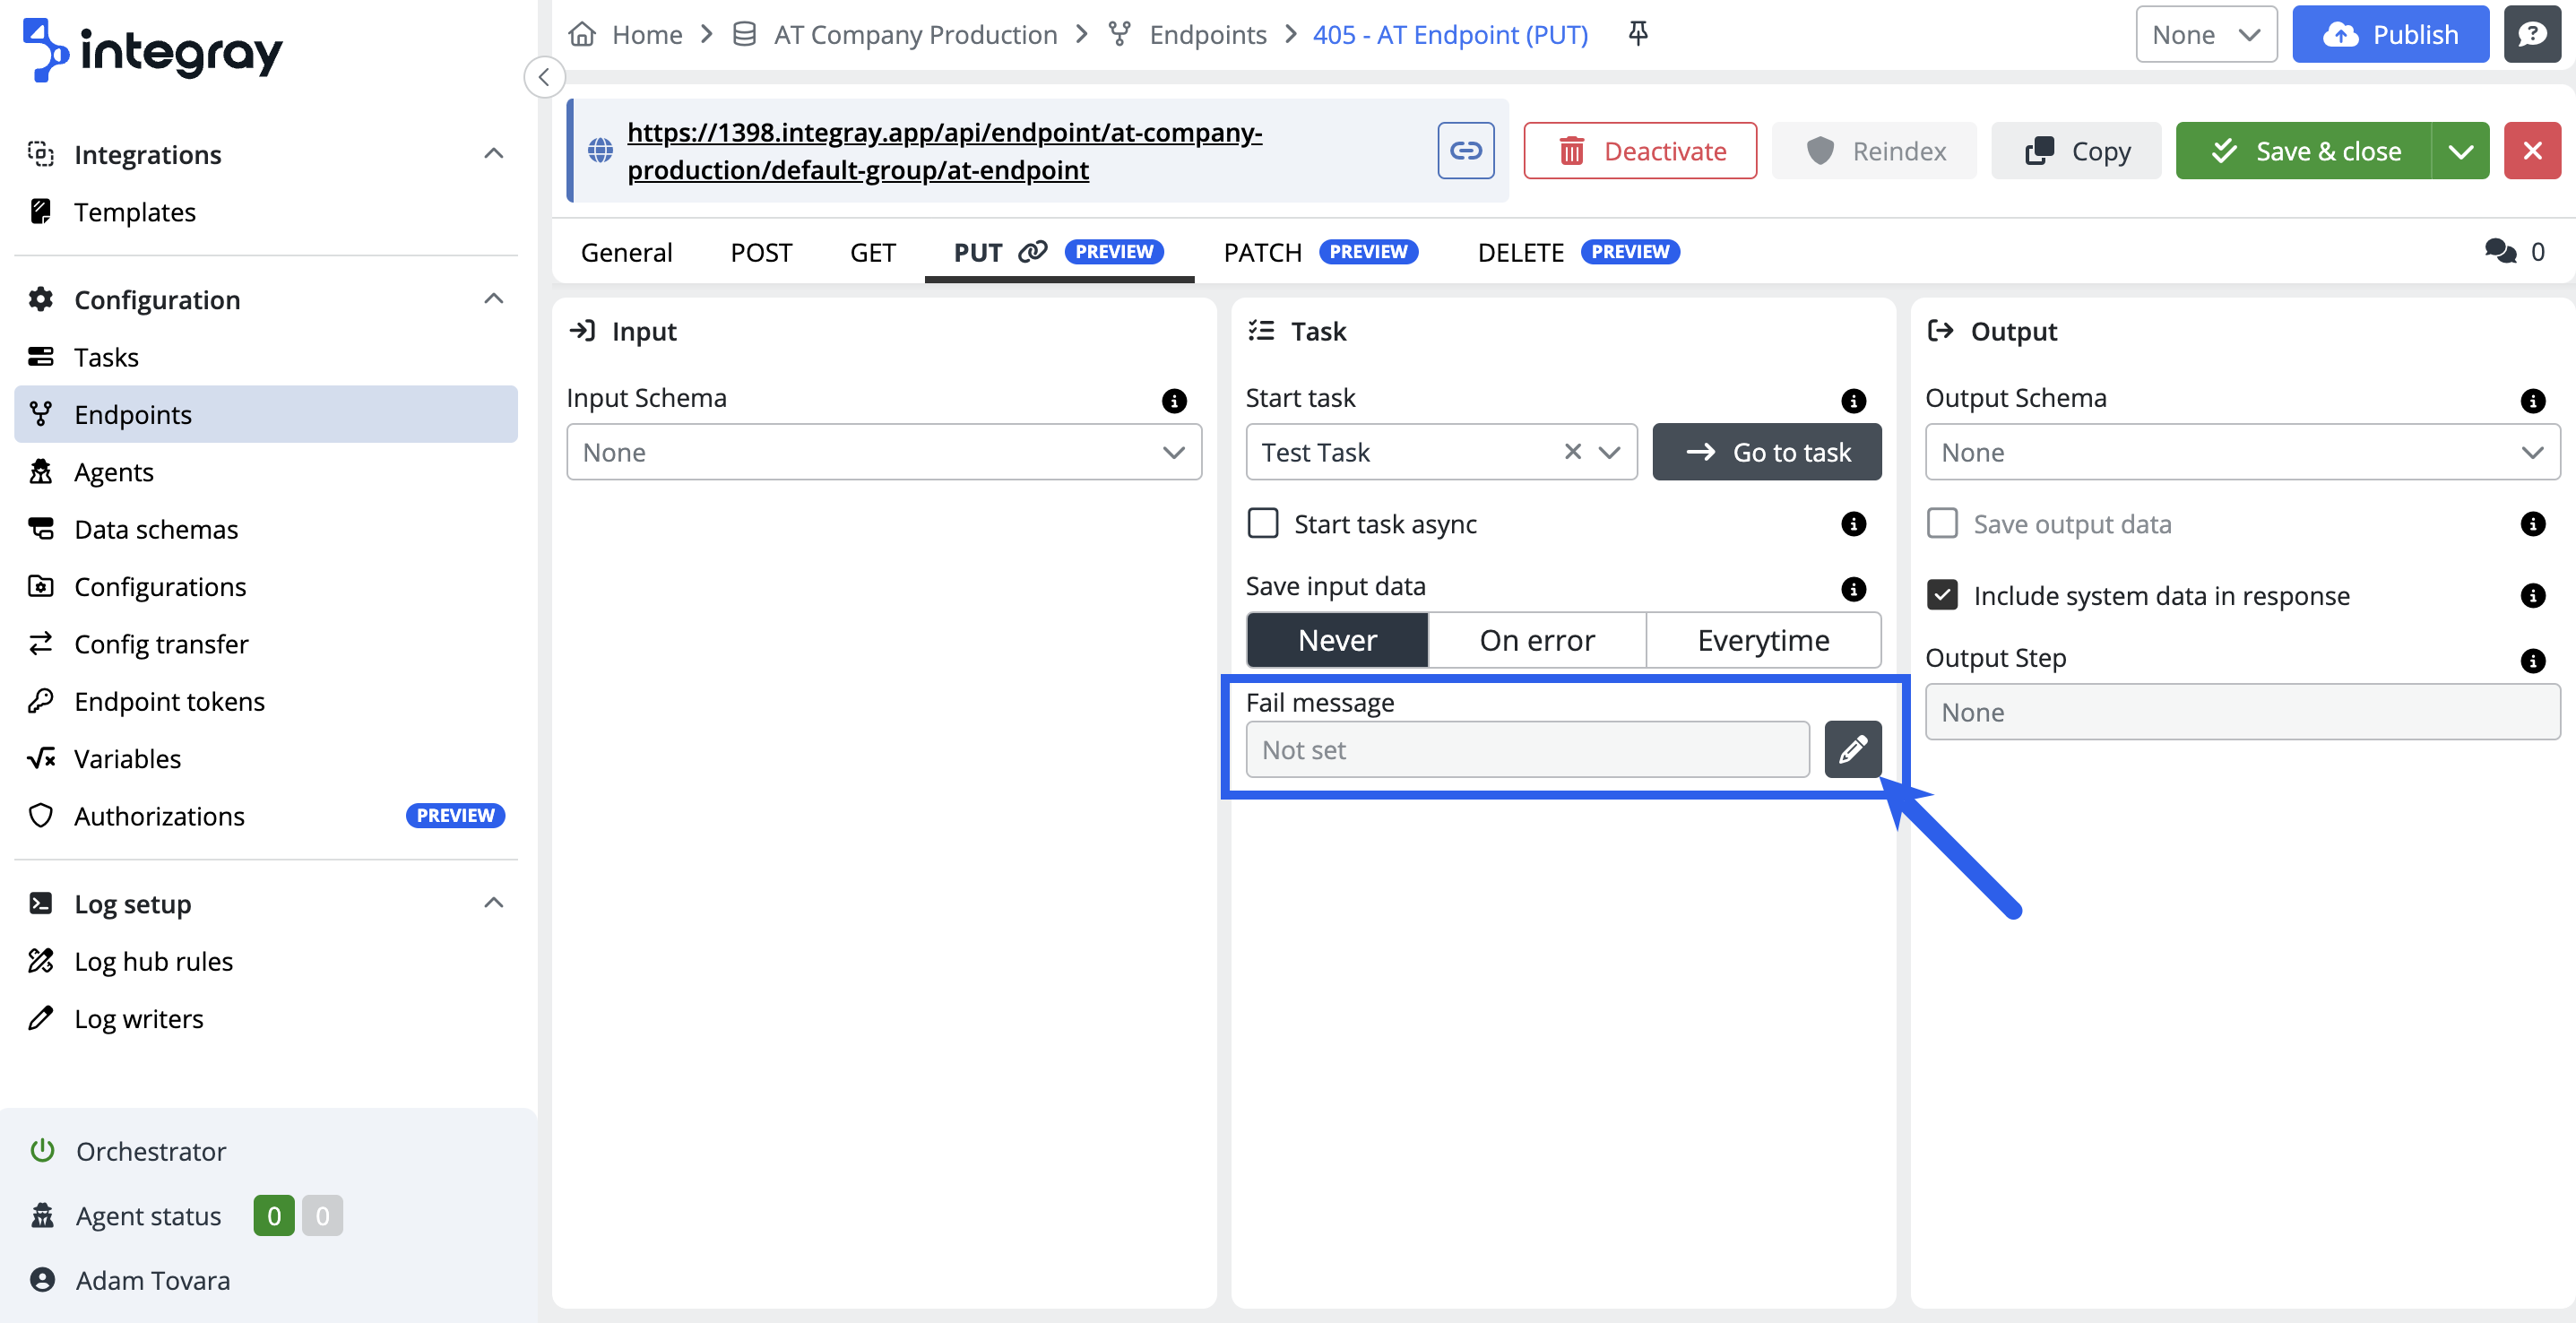
If configured, the status will change to Configured.
Click the pencil icon to customize fail messages.
+ Set default action
Set a default action to be executed if no other fail message rules are met. This action typically replaces the standard platform fail message.

Configure the default action in the Fail message rules dialog by entering your custom message and confirming.
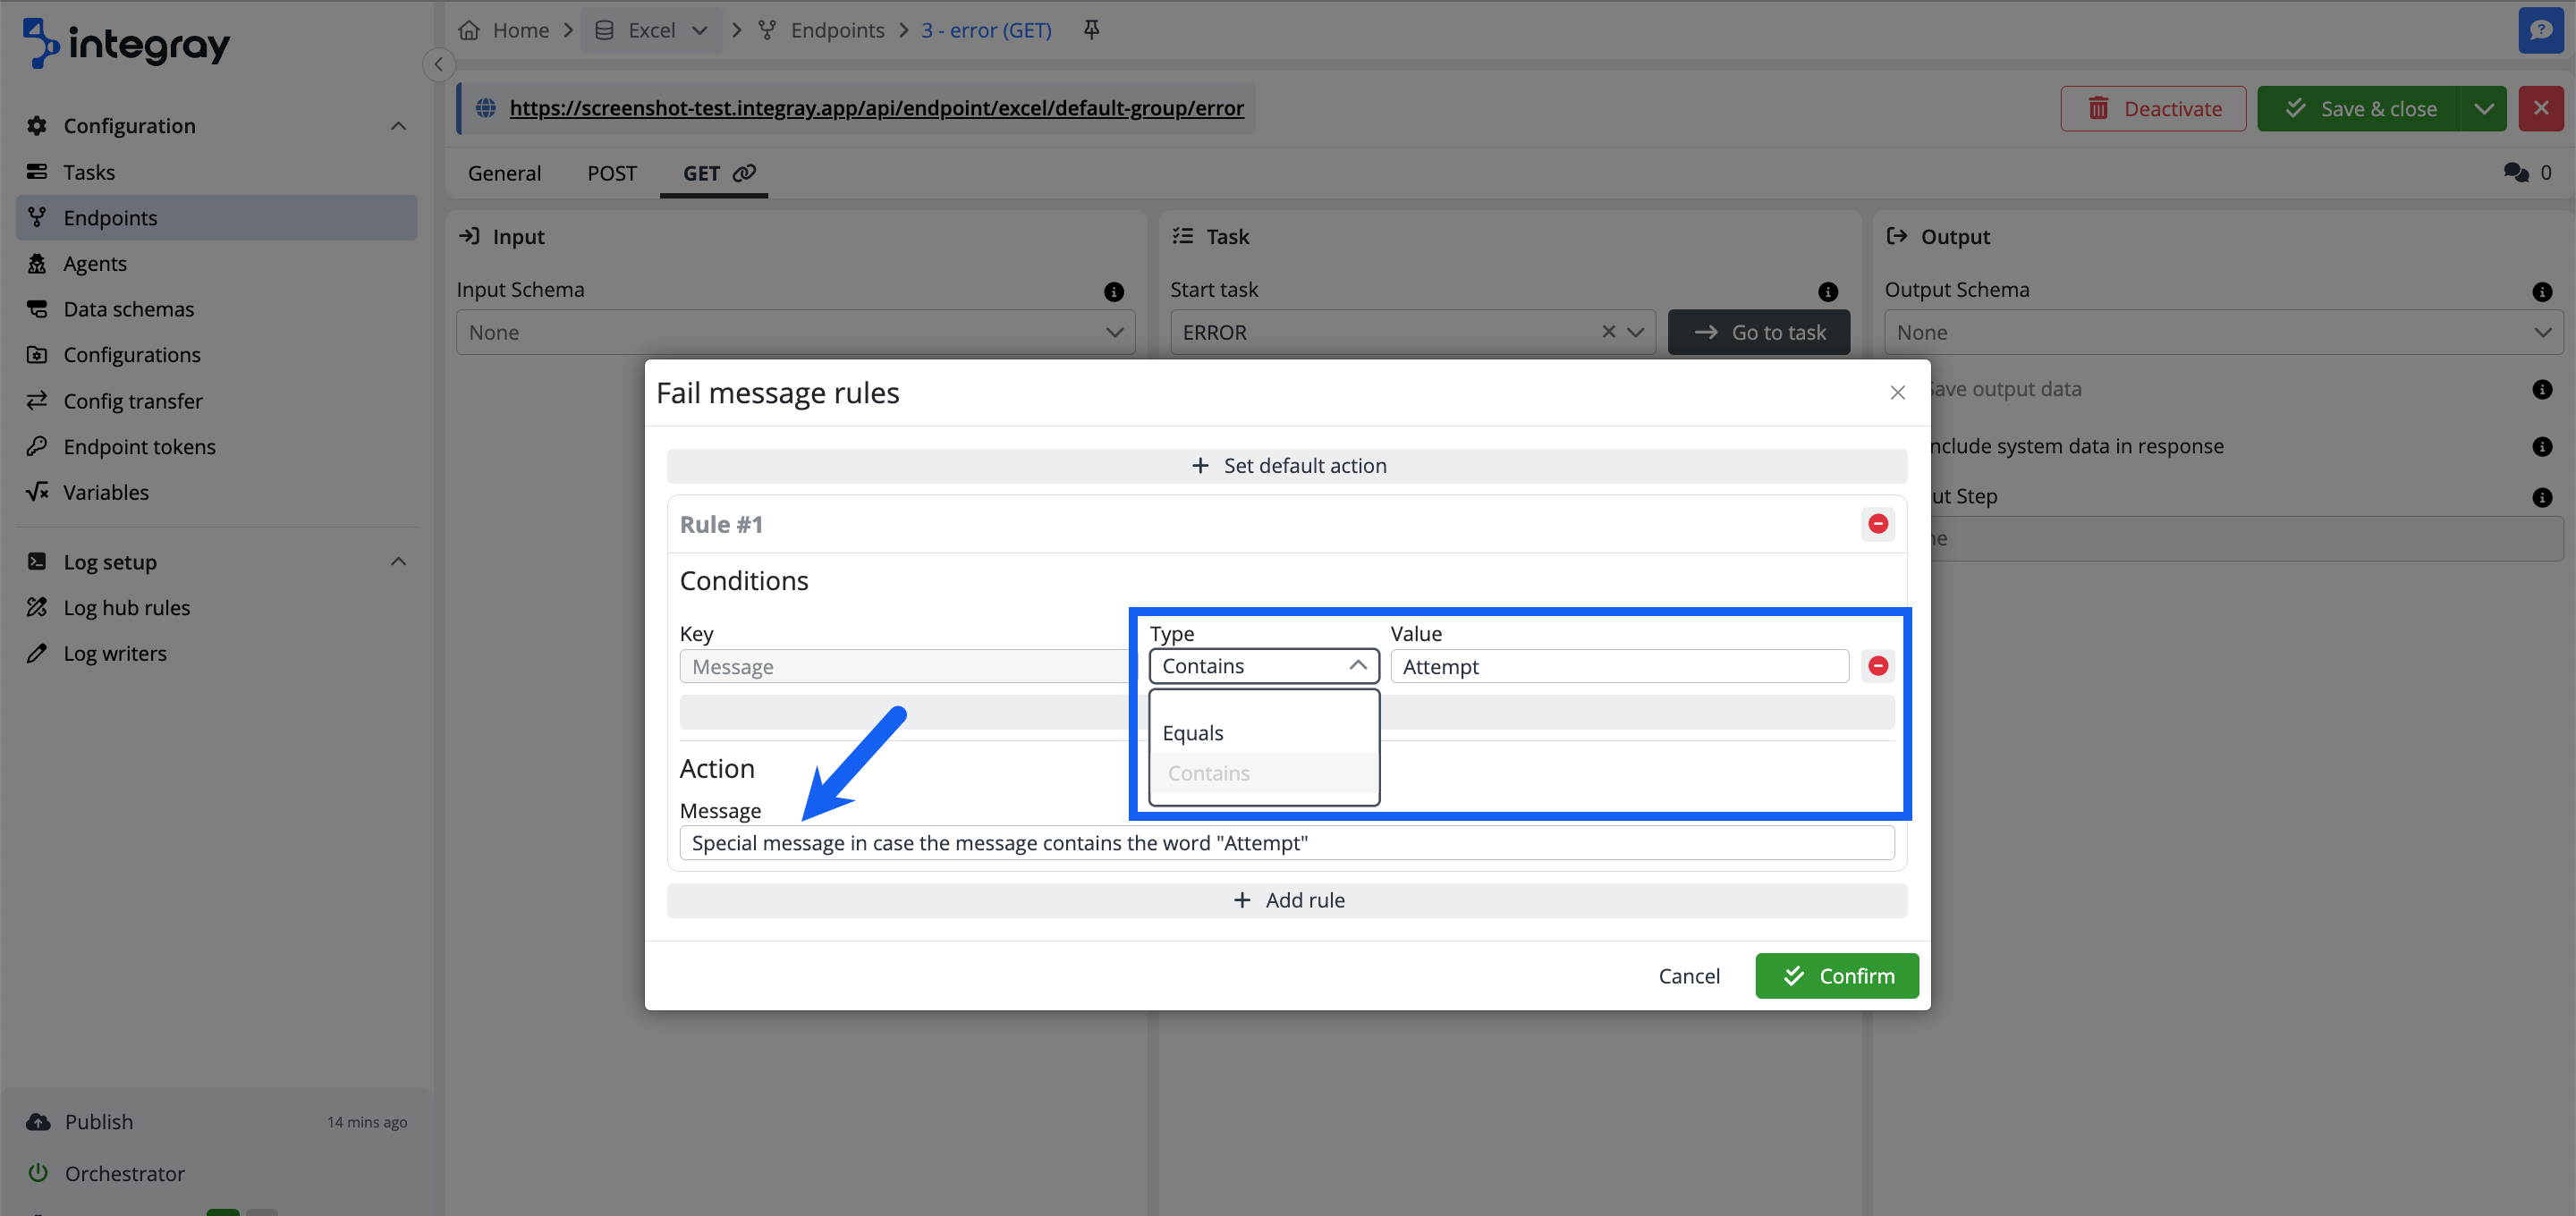
+ Add rule
Add custom rules to display specific messages based on the fail message content or type.
Condition
Select the condition type:
EqualsorContains
Specify the condition value and the action to be taken when the condition is met.
Example:
Customized fail message:
{
    "ID": "1fa2bd26-b1b0-4514-a81e-9b4eb78499e1",
    "Status": "FailedConnector",
    "Link": "https://screenshot-test.integray.app/home/company/2/task/4?taskRunID=102#history",
    "Message": [
        "Custom message triggered when the word 'Attempt' is found."
    ],
    "Result": null
}
Rule conditions
You can use more than one condition. The logical operator among the configured conditions is AND i.e. all set conditions must be met to trigger the action.
You can also define as many custom rules as you require. In case there are custom rules set and conditions are not met, the default action is triggered. In case the default action is not defined, the standard platform fail message will be returned.
Rule for non sensitive messages only
You have the ability to configure a custom error message; however, these rules are not applied to error messages containing sensitive information, such as connector configuration scripts in JavaScript, SQL, Node.JS, Python, or PowerShell.
Output

-
Output schema - Defines the structure of the data returned by the endpoint.
-
Save output data - If enabled, the result of the task is saved to the database in addition to being returned as the endpoint response.
-
Include system data in response - If selected, the system adds additional fields to the response.
Include system data in response - ON
  {
    "ID": "364fe099-ed93-ec11-8708-c89402b99bb6",
    "Status": "FinishedSuccess",
    "Message": null,
    "Result": {
        "updated_field": "new_value"
    }
    }
{
    "updated_field": "new_value"
}
-
Output step - Step, after which data will be selected from the data structure to be used as endpoint response.
-
Output mapping - Incoming data is transformed and then routed to specific fields based on predefined rules.