Endpoints
An API endpoint is a specific digital location, URL (Uniform Resource Locator) or URI (Uniform Resource Identifier), where requests for information are sent by one program to retrieve the digital resource that exists there. Endpoints specify where APIs can access resources and help guarantee the proper functioning of the incorporated software.
API endpoints serve as the entry points for clients (such as applications or systems) to interact with the API and perform various operations. Each endpoint is typically associated with a specific HTTP method, such as GET, POST, PUT, PATCH, DELETE, which determines the type of action performed on the resource.
In integray, the endpoints are created and maintained in the Configuration screen > Company > Endpoints.
You can choose how you want to learn about Endpoints by watching the accompanying video or reading the detailed documentation below. Pick the format that best suits your learning style.
Endpoint list
The content navigation menu item Endpoints navigates you to the Endpoint list, where all the configured endpoints are listed.
By default, the endpoint list displays endpoints that any users have configured. If you want to view endpoints based on an applied Template, look to the upper right corner, next to the Publish button, where you'll find the Template selector. You can choose a specific template, and based on that selection, endpoints from the applied template will be displayed in the endpoint list. This feature lets you quickly switch between different sets of endpoints.
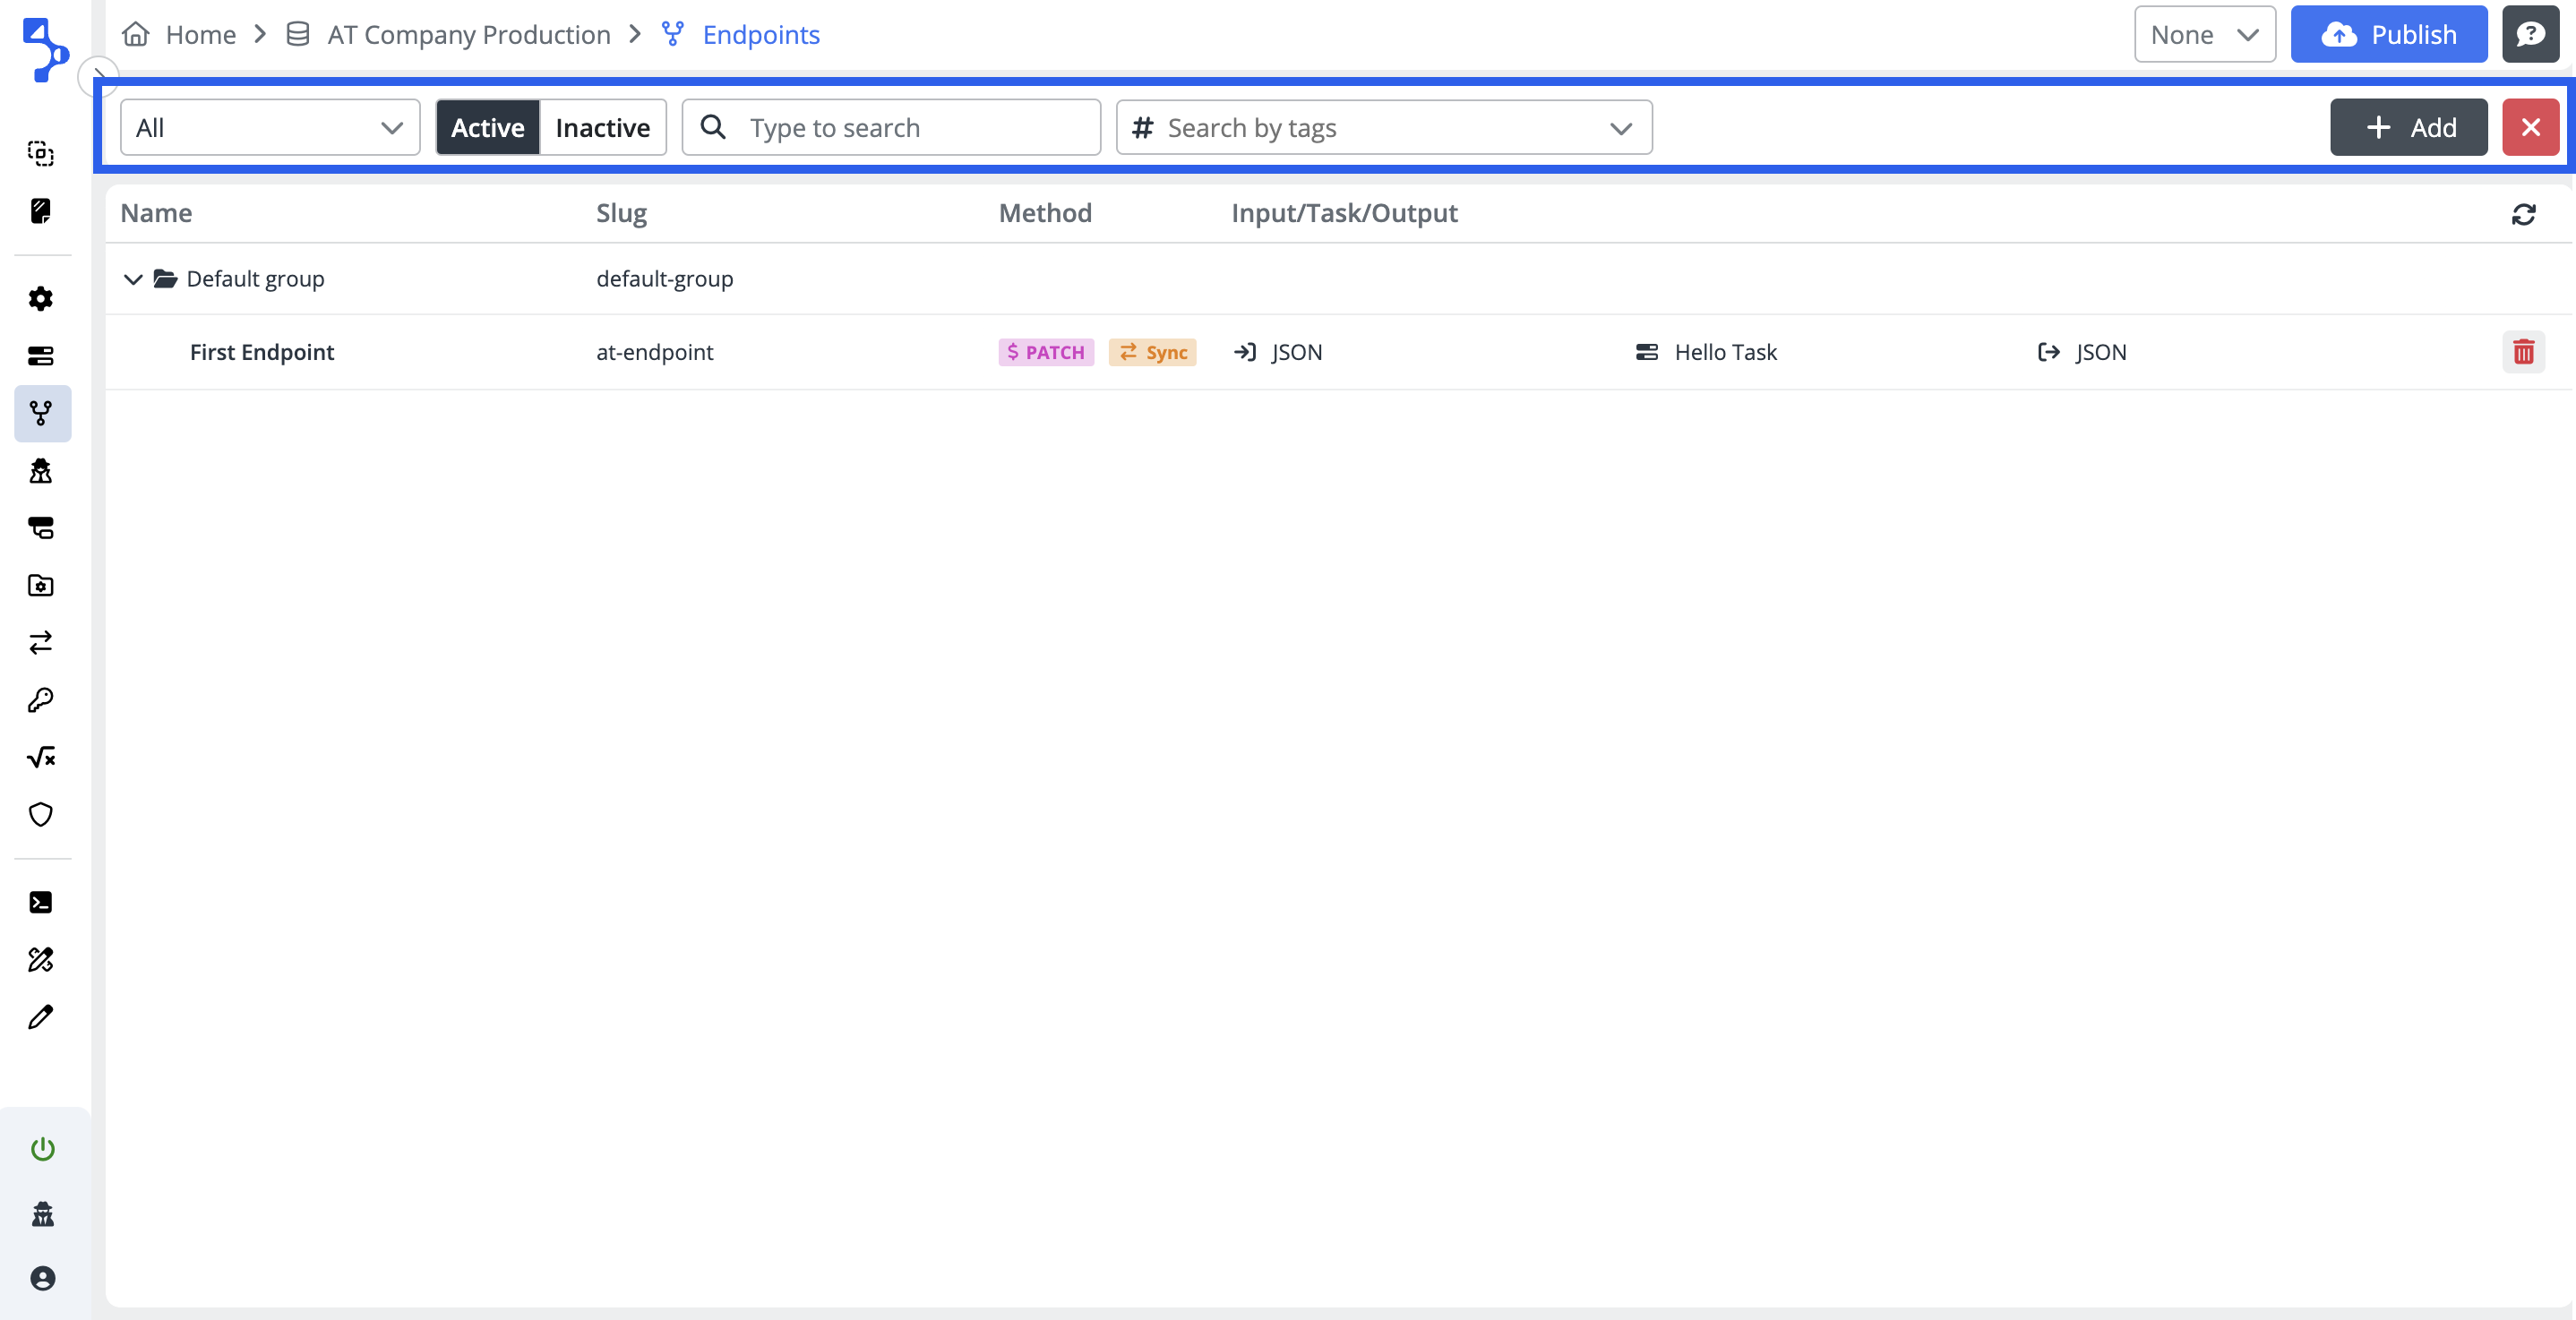
In the upper section of the Endpoint List interface, you will find buttons for filtering endpoints according to the utilized methods—be it ALL, GET, POST, PUT, DELETE, PATCH. Moreover, there's a filter option for displaying Active or Inactive endpoints. The interface also provides a user-friendly search field, enabling you to locate specific endpoints quickly. Next to the search field, there is also an option to search by tags, making it even easier to find and manage your endpoints based on specific criteria.
On the right side of the screen, there are two additional buttons: the +Add button initiates the configuration of a new endpoint, opening the endpoint editor for further customization. And the Close button (depicted as a red square with a cross) facilitates exiting the endpoint editor and returning to the Task list.
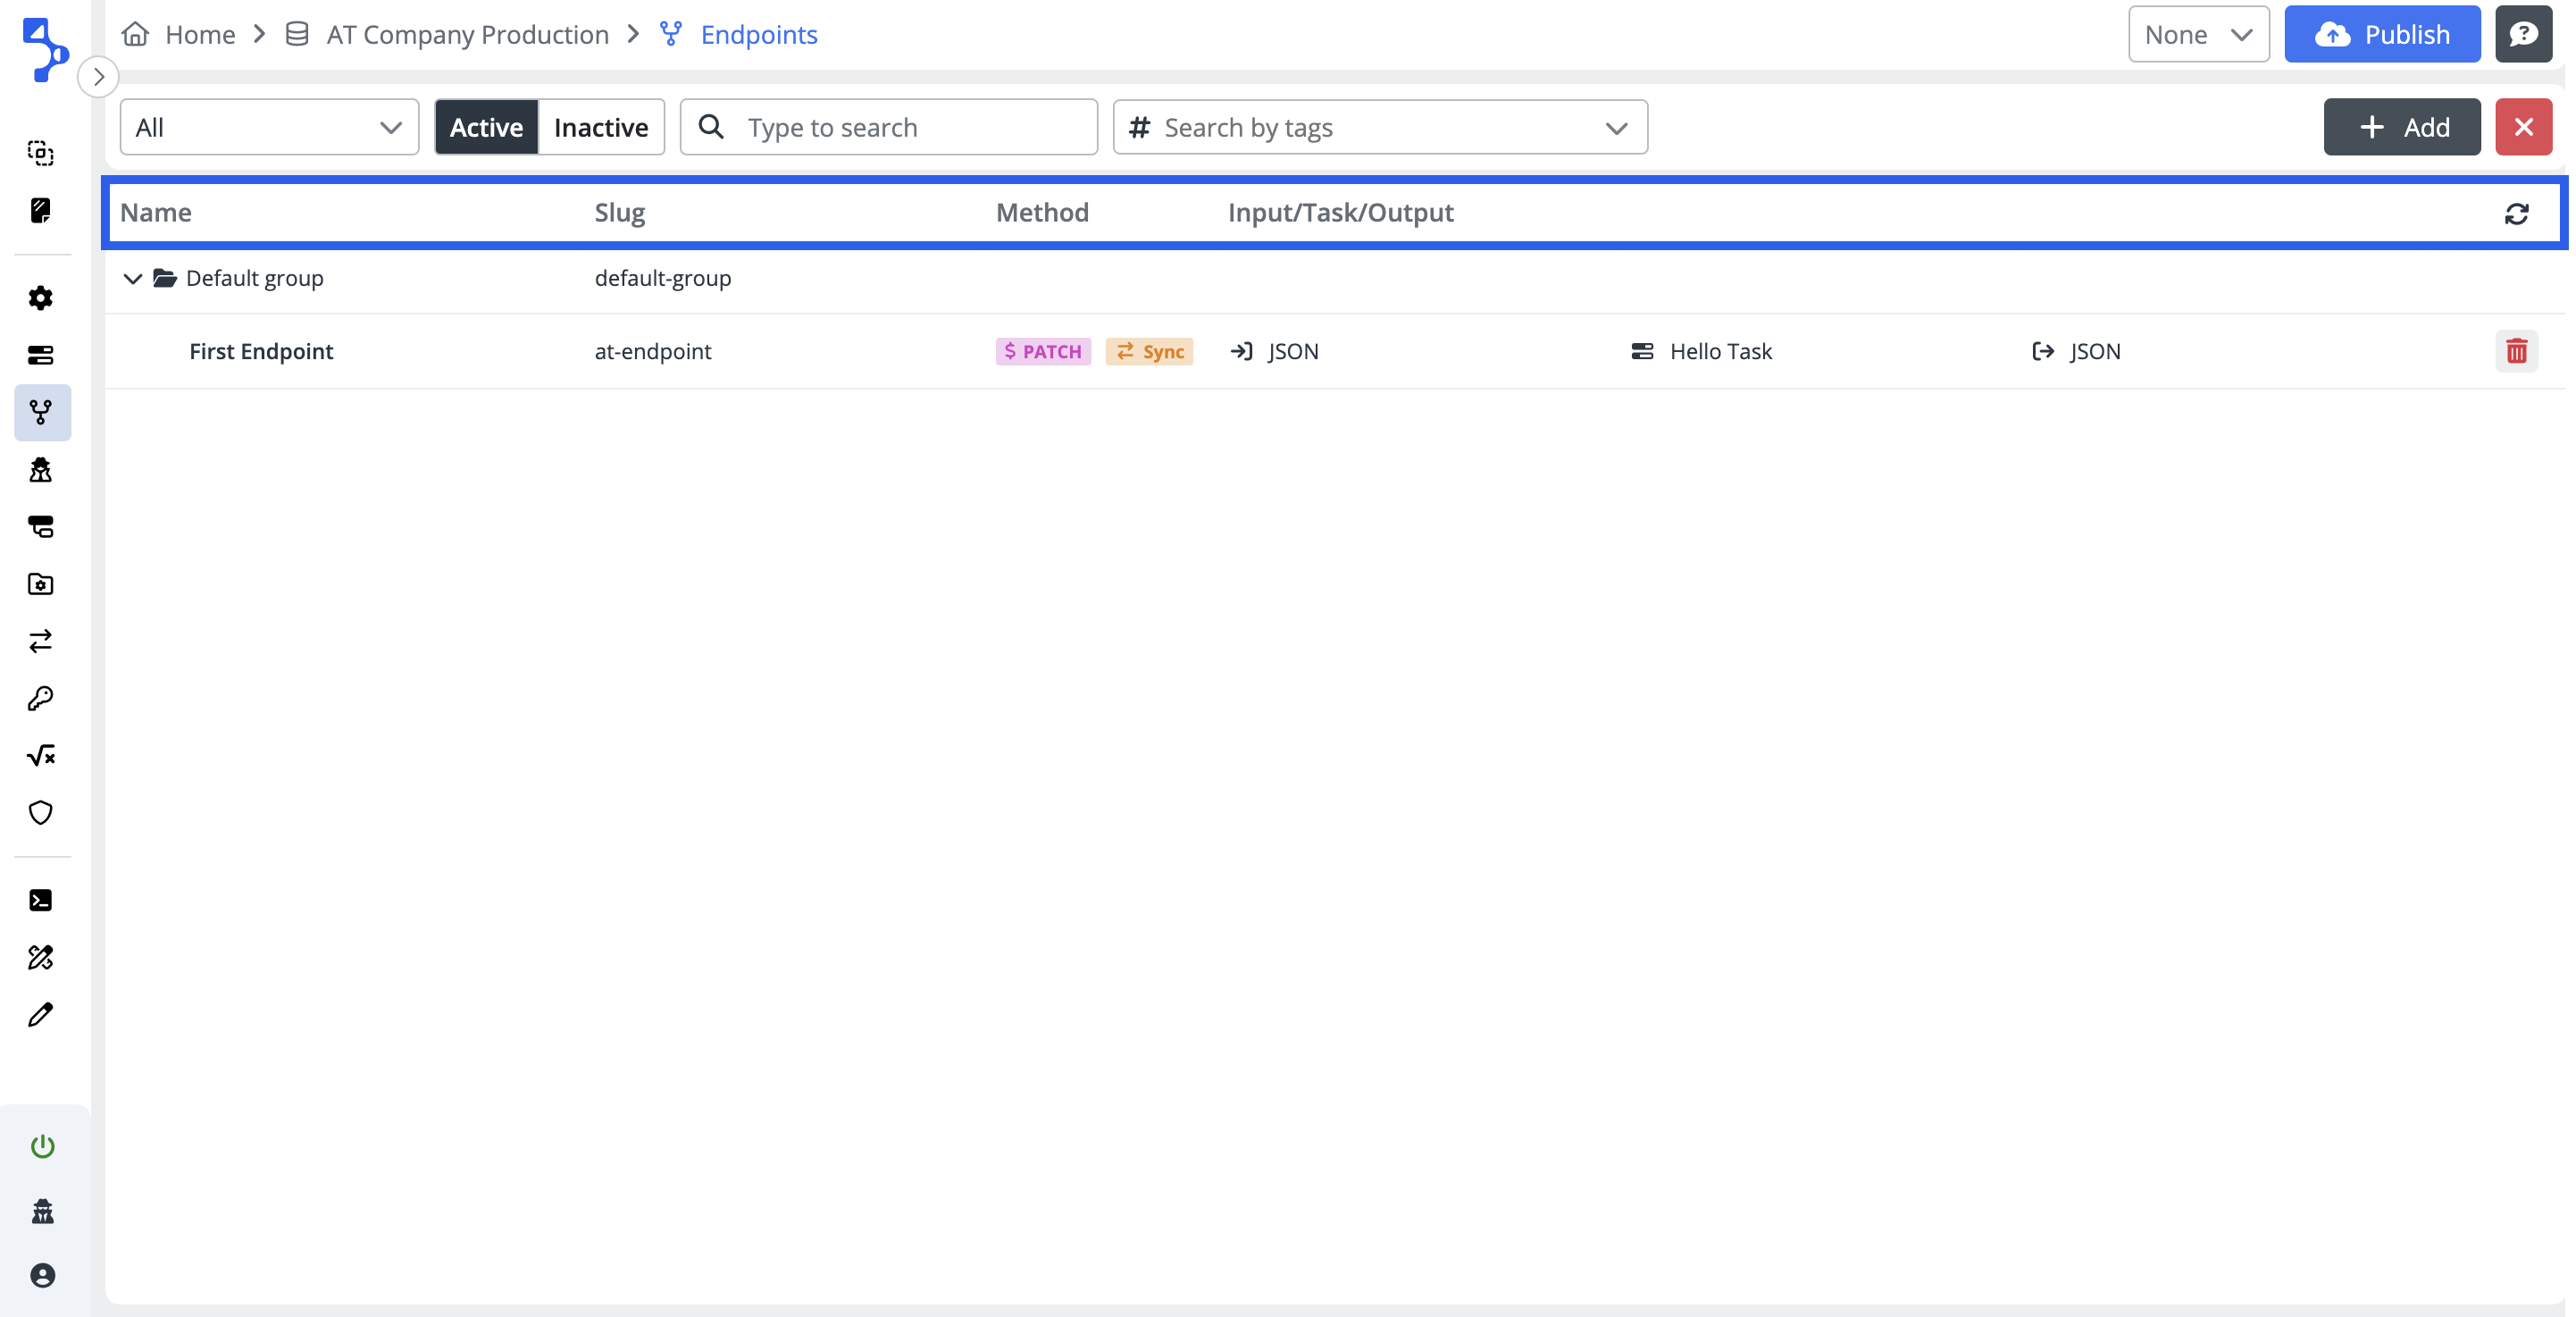
The Endpoint list view provides the user with essential information about the Endpoints:
-
Name - The group name and the Endpoint name.
-
Slug - The endpoint slug name. Click here for more informations about the Slug.
-
Method - Displays the method configured and used for the respective endpoint (
POST,GET,PATCH,PUT,DELETE). In the case of connection to Task, it shows the execution of the task synchronously (Sync) or asynchronously (Async). -
Input/Task/Output - Here you can see the input schema, the integration Task name and the output schema.
-
Refresh button - Clicking this button initiates the list view refresh, updating the displayed information to reflect the most current data.
The endpoint records in the Endpoint list are grouped by the endpoint groups for overal better navigation.
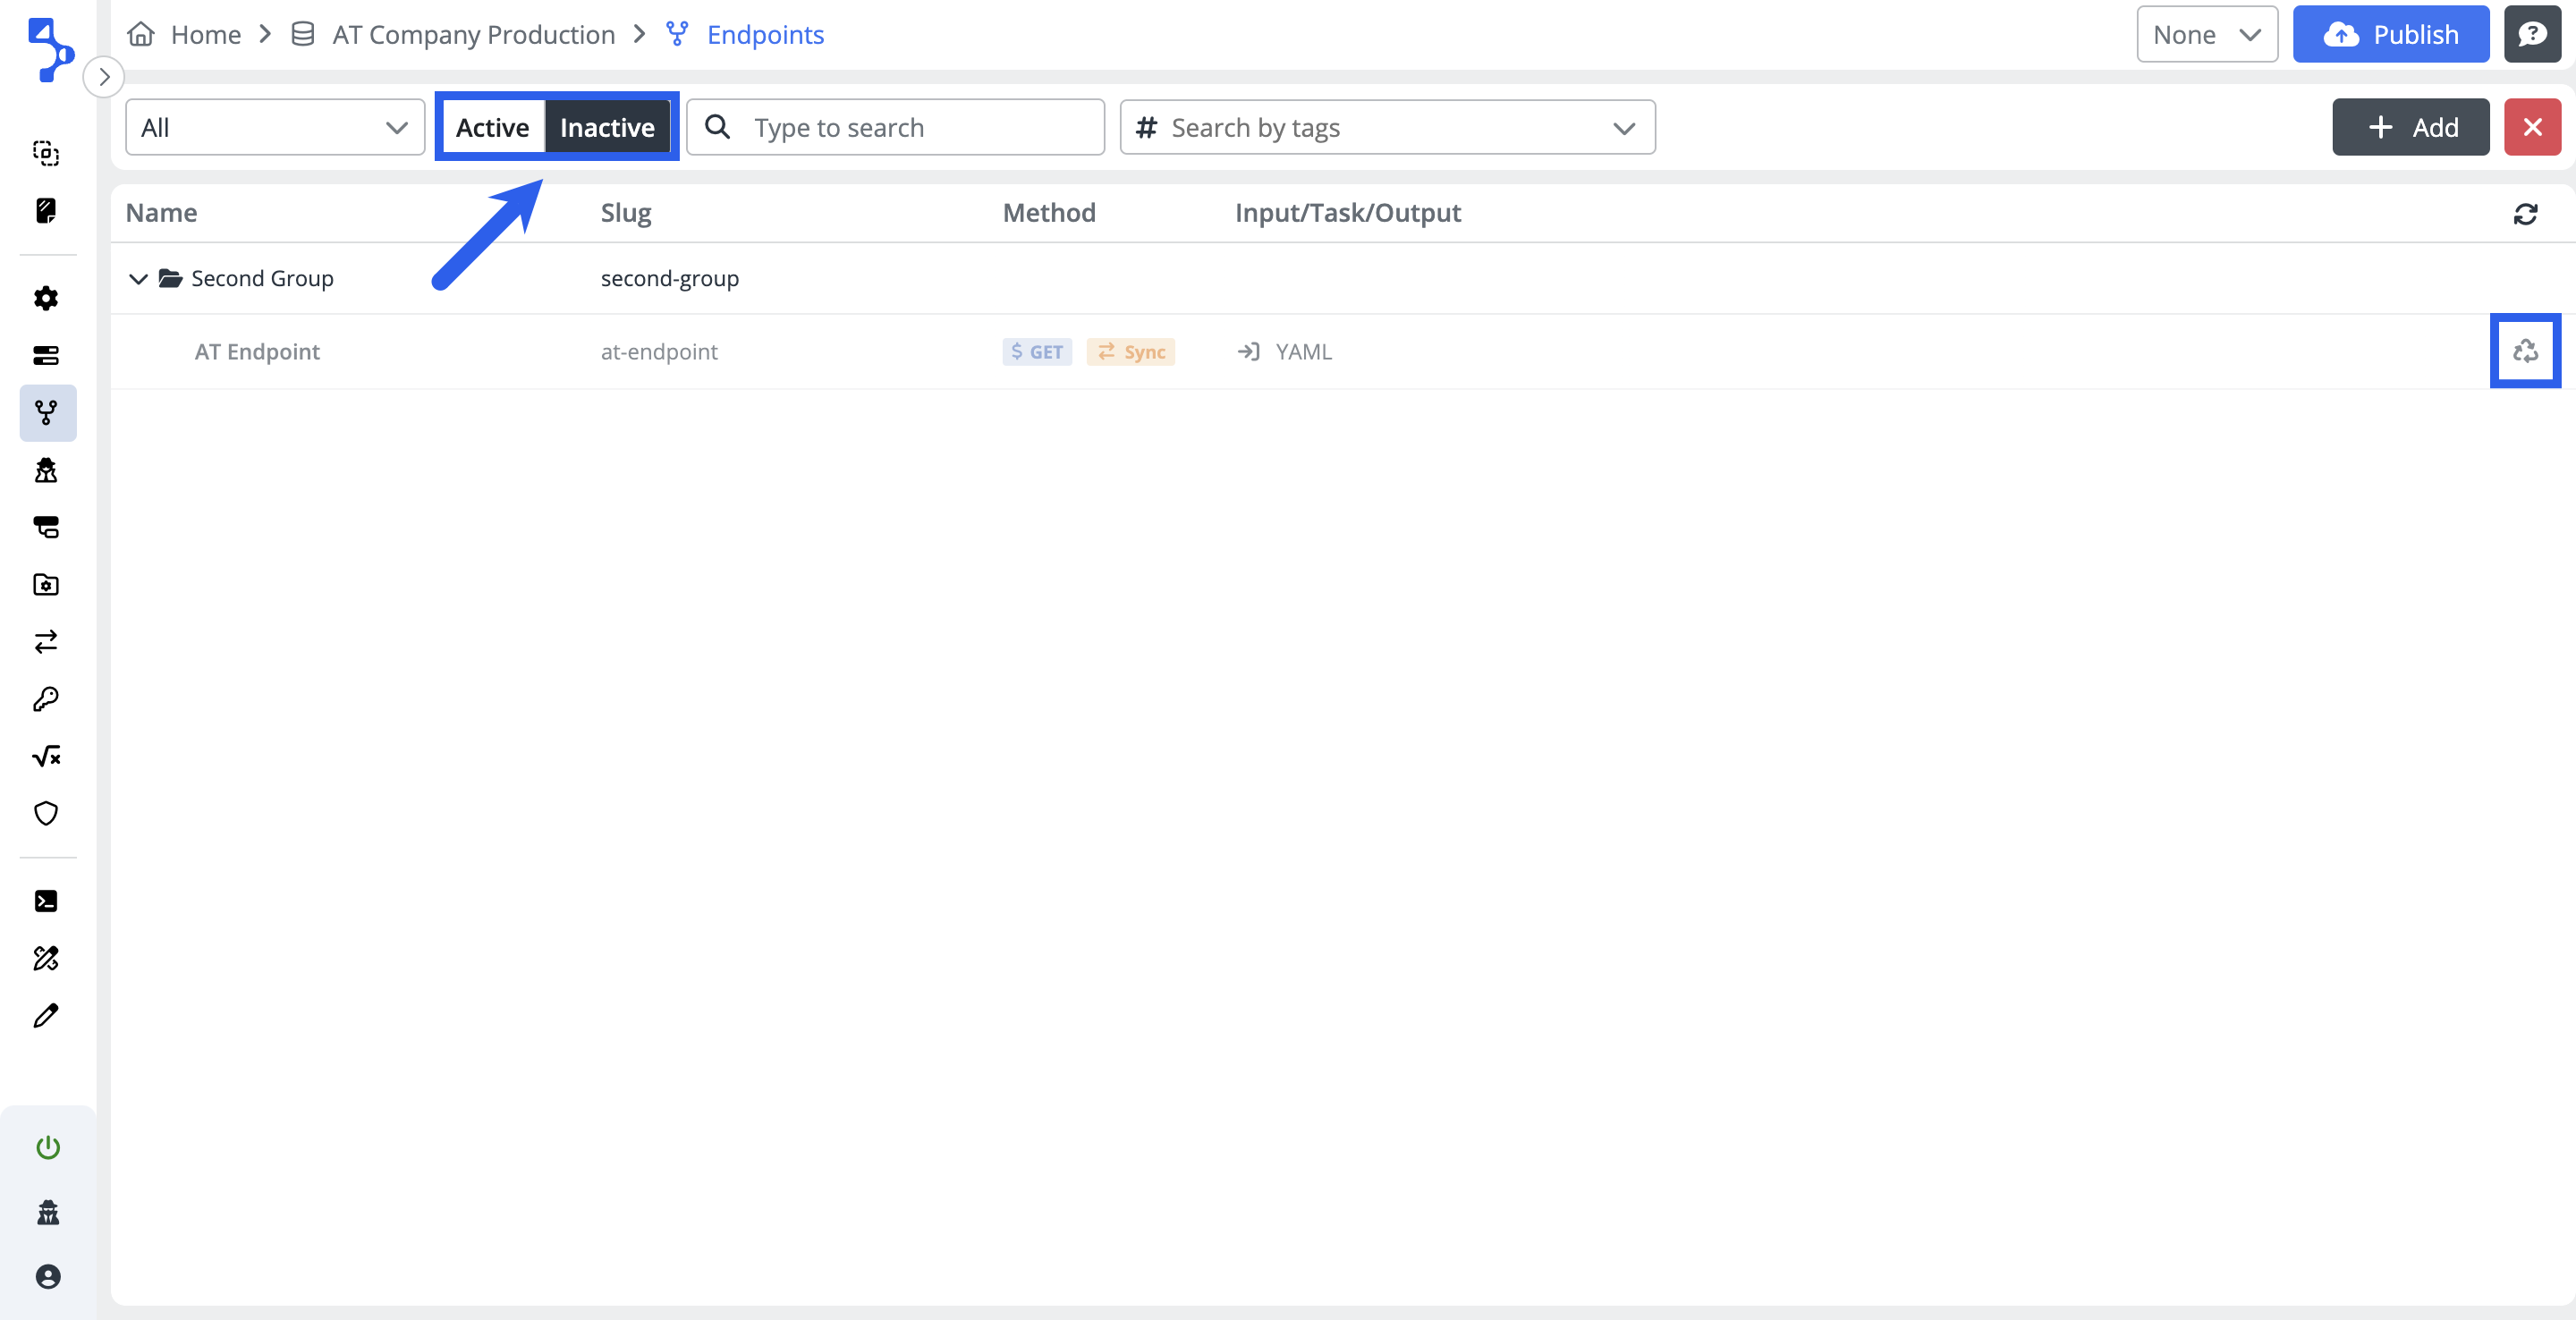
The endpoint record row includes additional controls with dynamically changing icons of a trash bin and recycling, allowing users to deactivate and reactivate the endpoint as needed.
These icons dynamically adapt based on whether active or inactive endpoints are currently displayed. The icon of the trash allows you to temporarily deactivate the endpoint, while the recycling symbol suggests the possibility of reactivating the specific endpoint.
Within the Endpoint list, an additional icon that may appear on the endpoint record row is a red or orange triangle with an exclamation mark. This icon serves as a notification, indicating that a non-runnable or non-executable task has been selected for the endpoint. Hovering over the icon provides additional information.
Endpoint editor
To create a new endpoint click the +Add button located in the top right corner of the screen. You will navigate to the Endpoint editor.
The Endpoint editor contains:
-
seven tabs available for configuration and set up: General, POST, GET, PUT, PATCH, DELETE and Tokens
Note
The Tokens tab is displayed when the Token option is selected as the authentication type on the General tab in the Security section.
Endpoint header menu
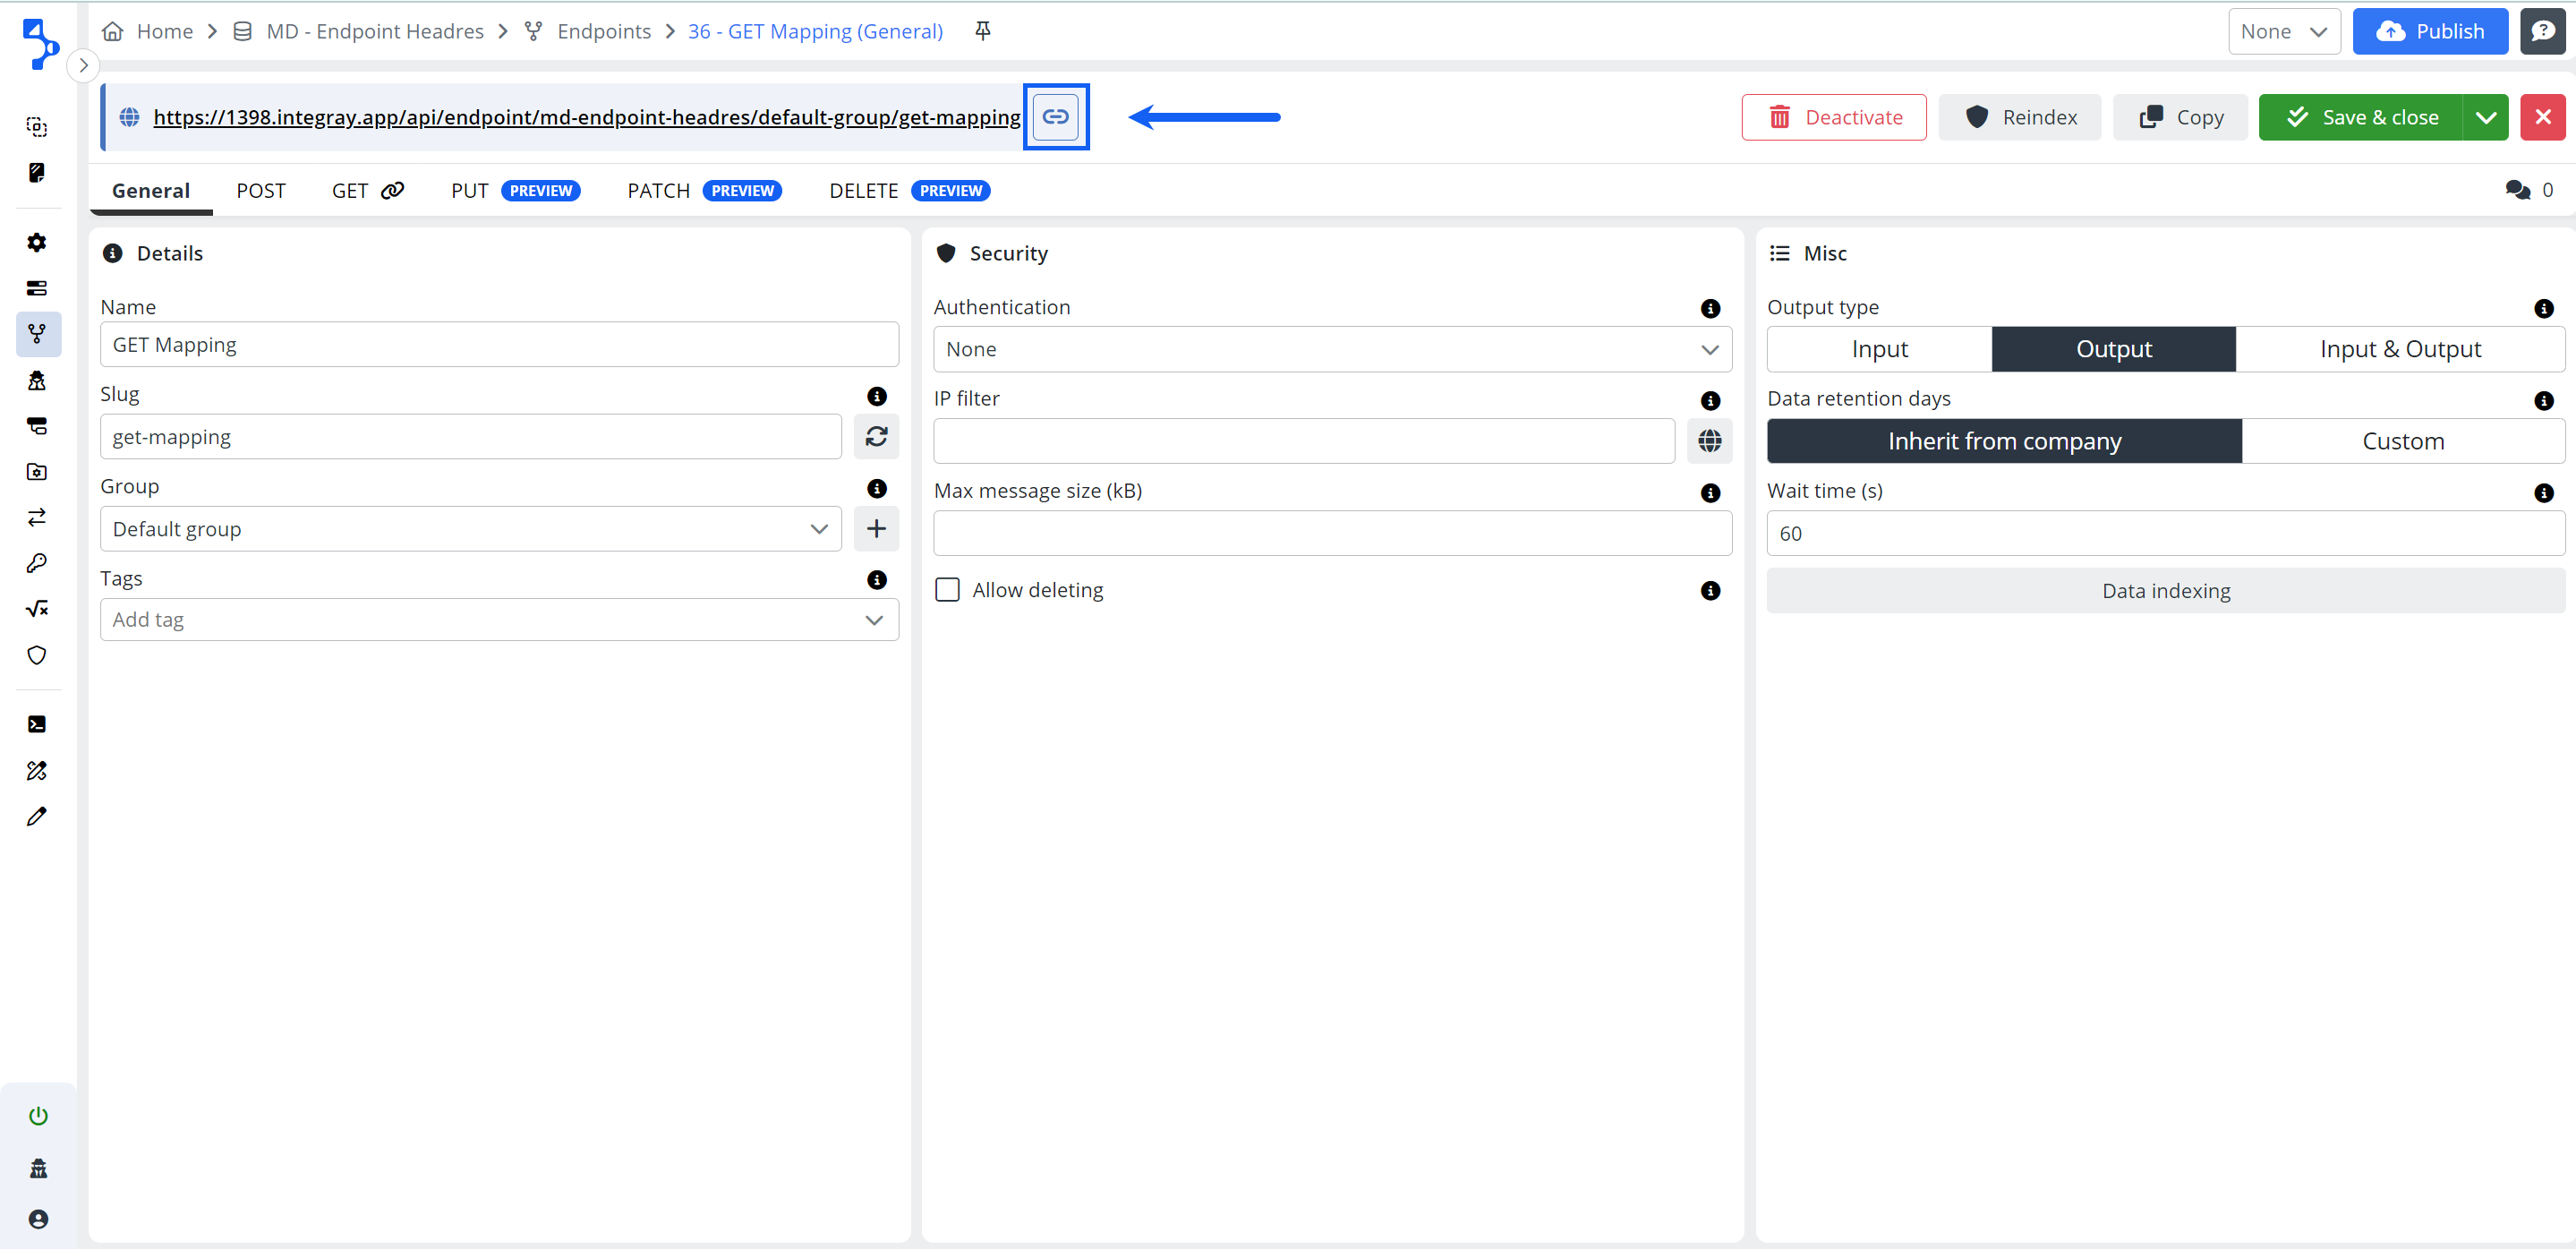
Endpoint link
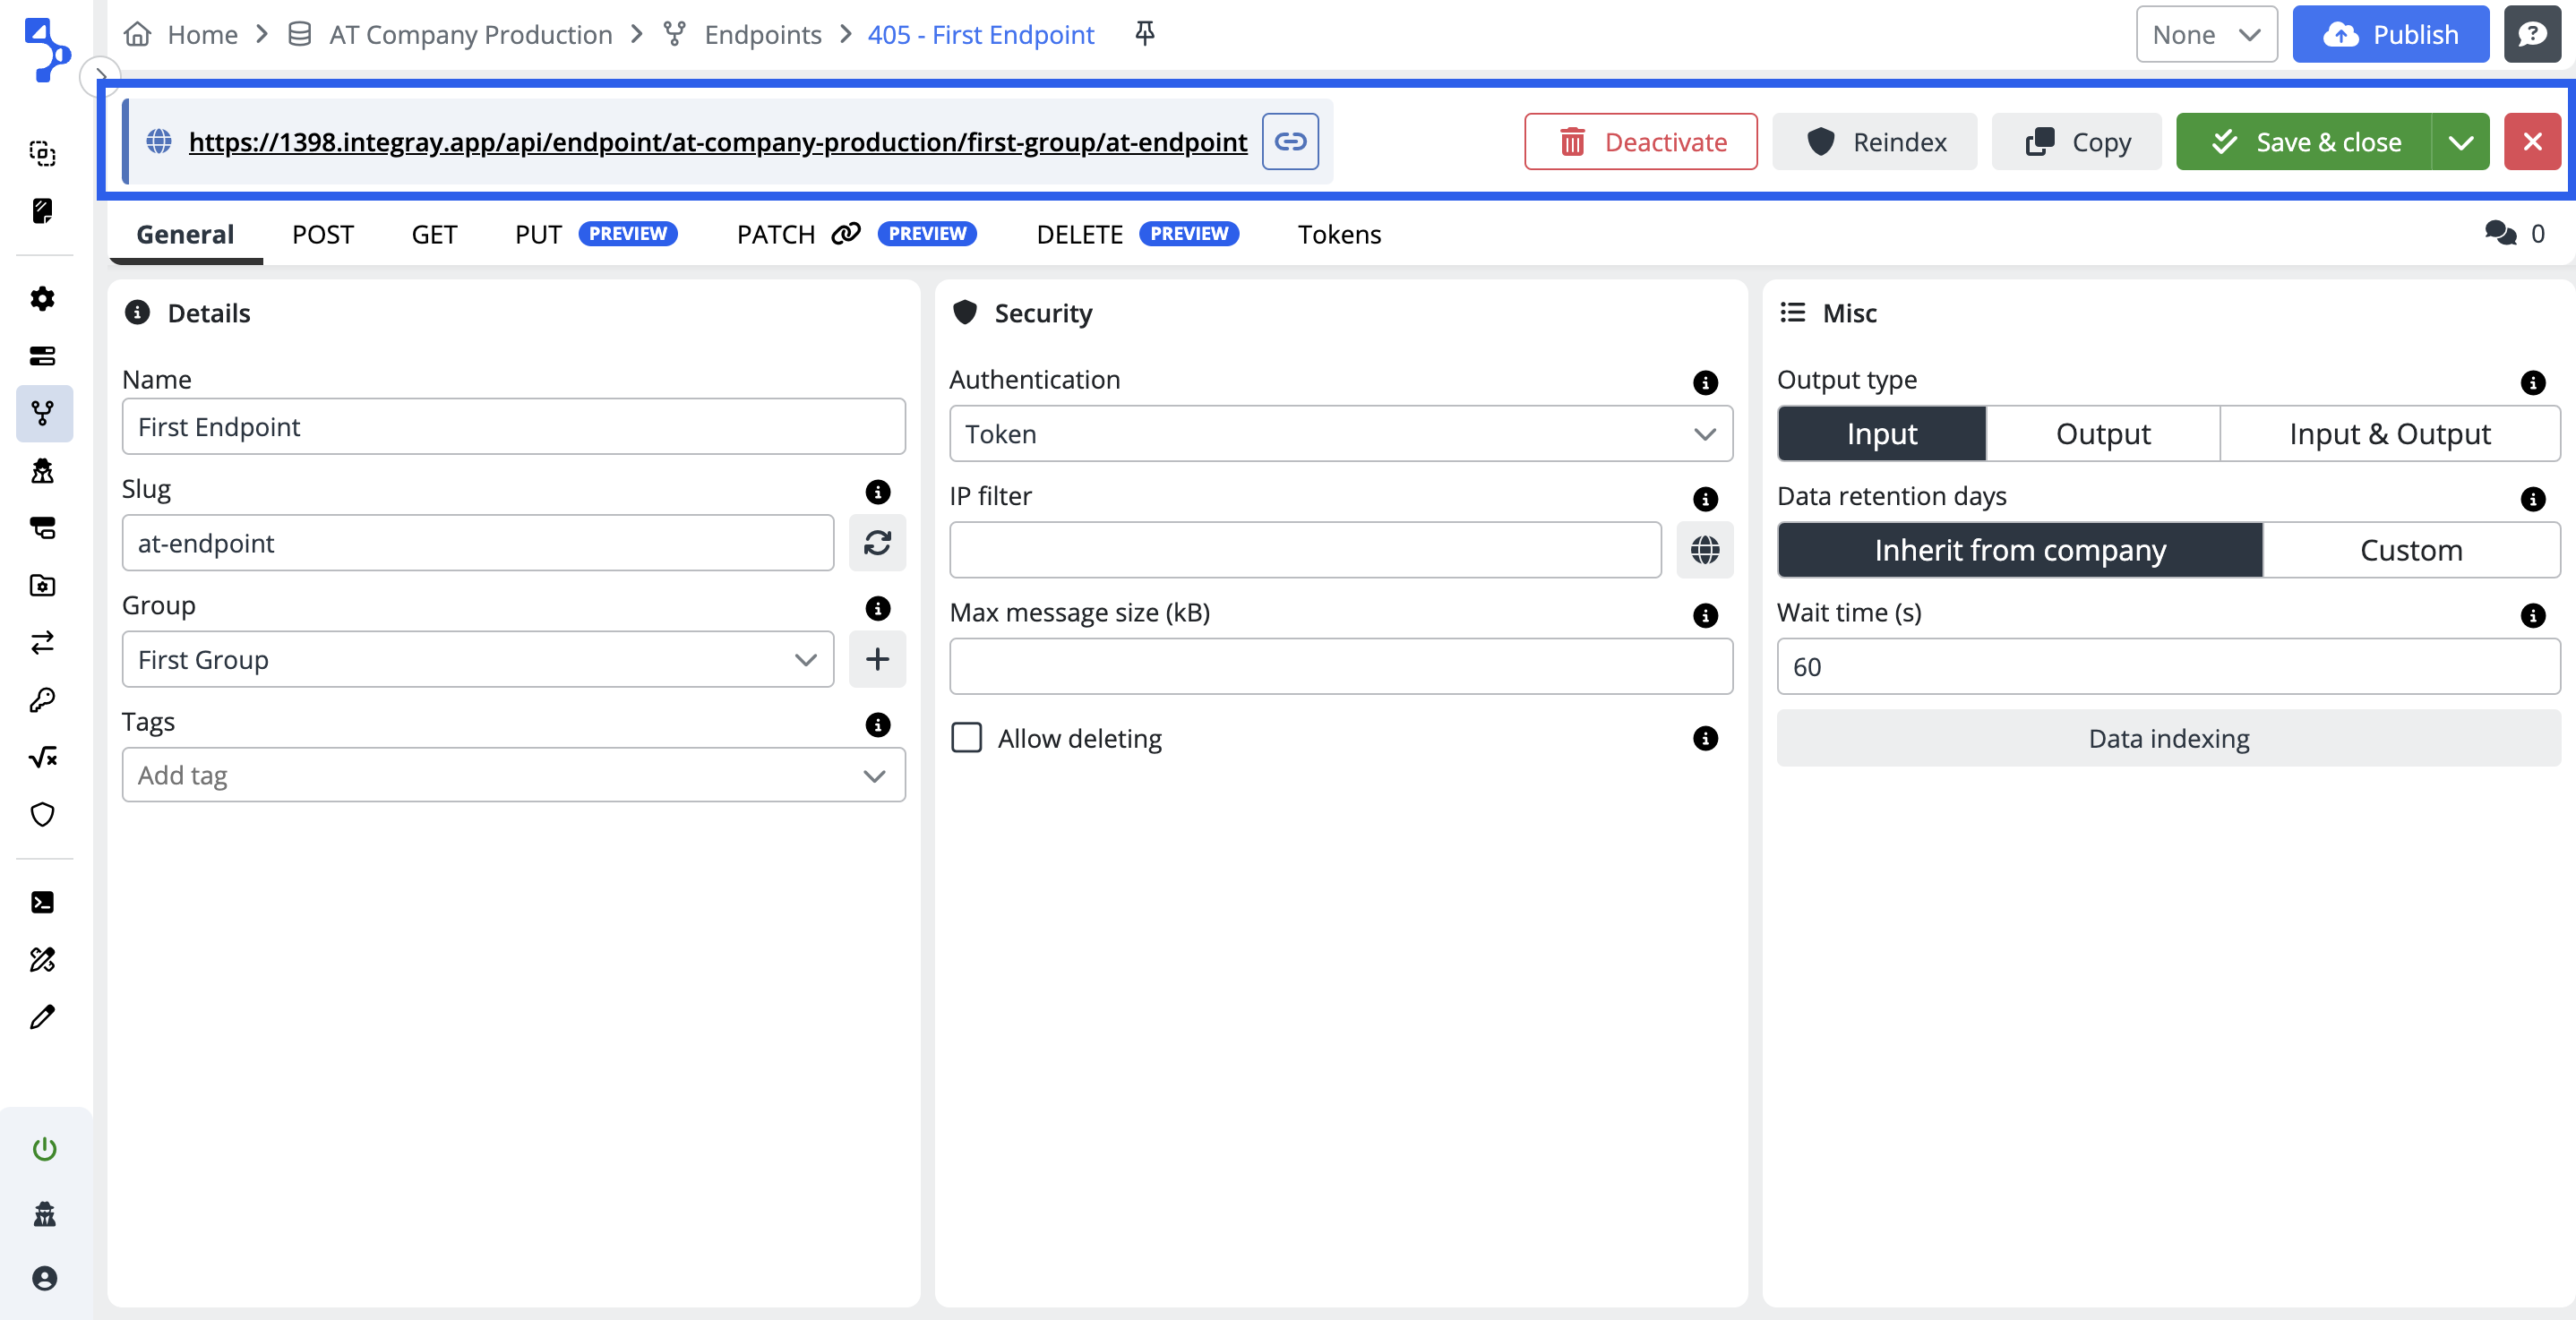
The endpoint link is a URL assembled out of several parts:
-
sever URL
-
company slug
-
endpoint group slug
-
endpoint slug
https://<server_url>/api/endpoint/<company_slug>/<endpoint_group_slug>/<endpoint_slug>
Copy endpoint link button
You can copy the URL to the clipboard using the button located next to the endpoint link in the endpoint header menu.
Deactivate
The Deactivate button is used to deactivate an endpoint. Deactivated endpoints can be accessed through the Inactive view, which you can display in the Endpoint List. From this section, it is also possible to reactivate endpoints.
Reindex
This serves to reindexing of data poins in endpoint data search based on conditions defined in data indexing. The Reindex button re-generates indexes on the existing endpoint data. Reindexing will run on the background without visibility for the user. The Reindex button will be disabled if the endpoint contains any unsaved changes.
Copy
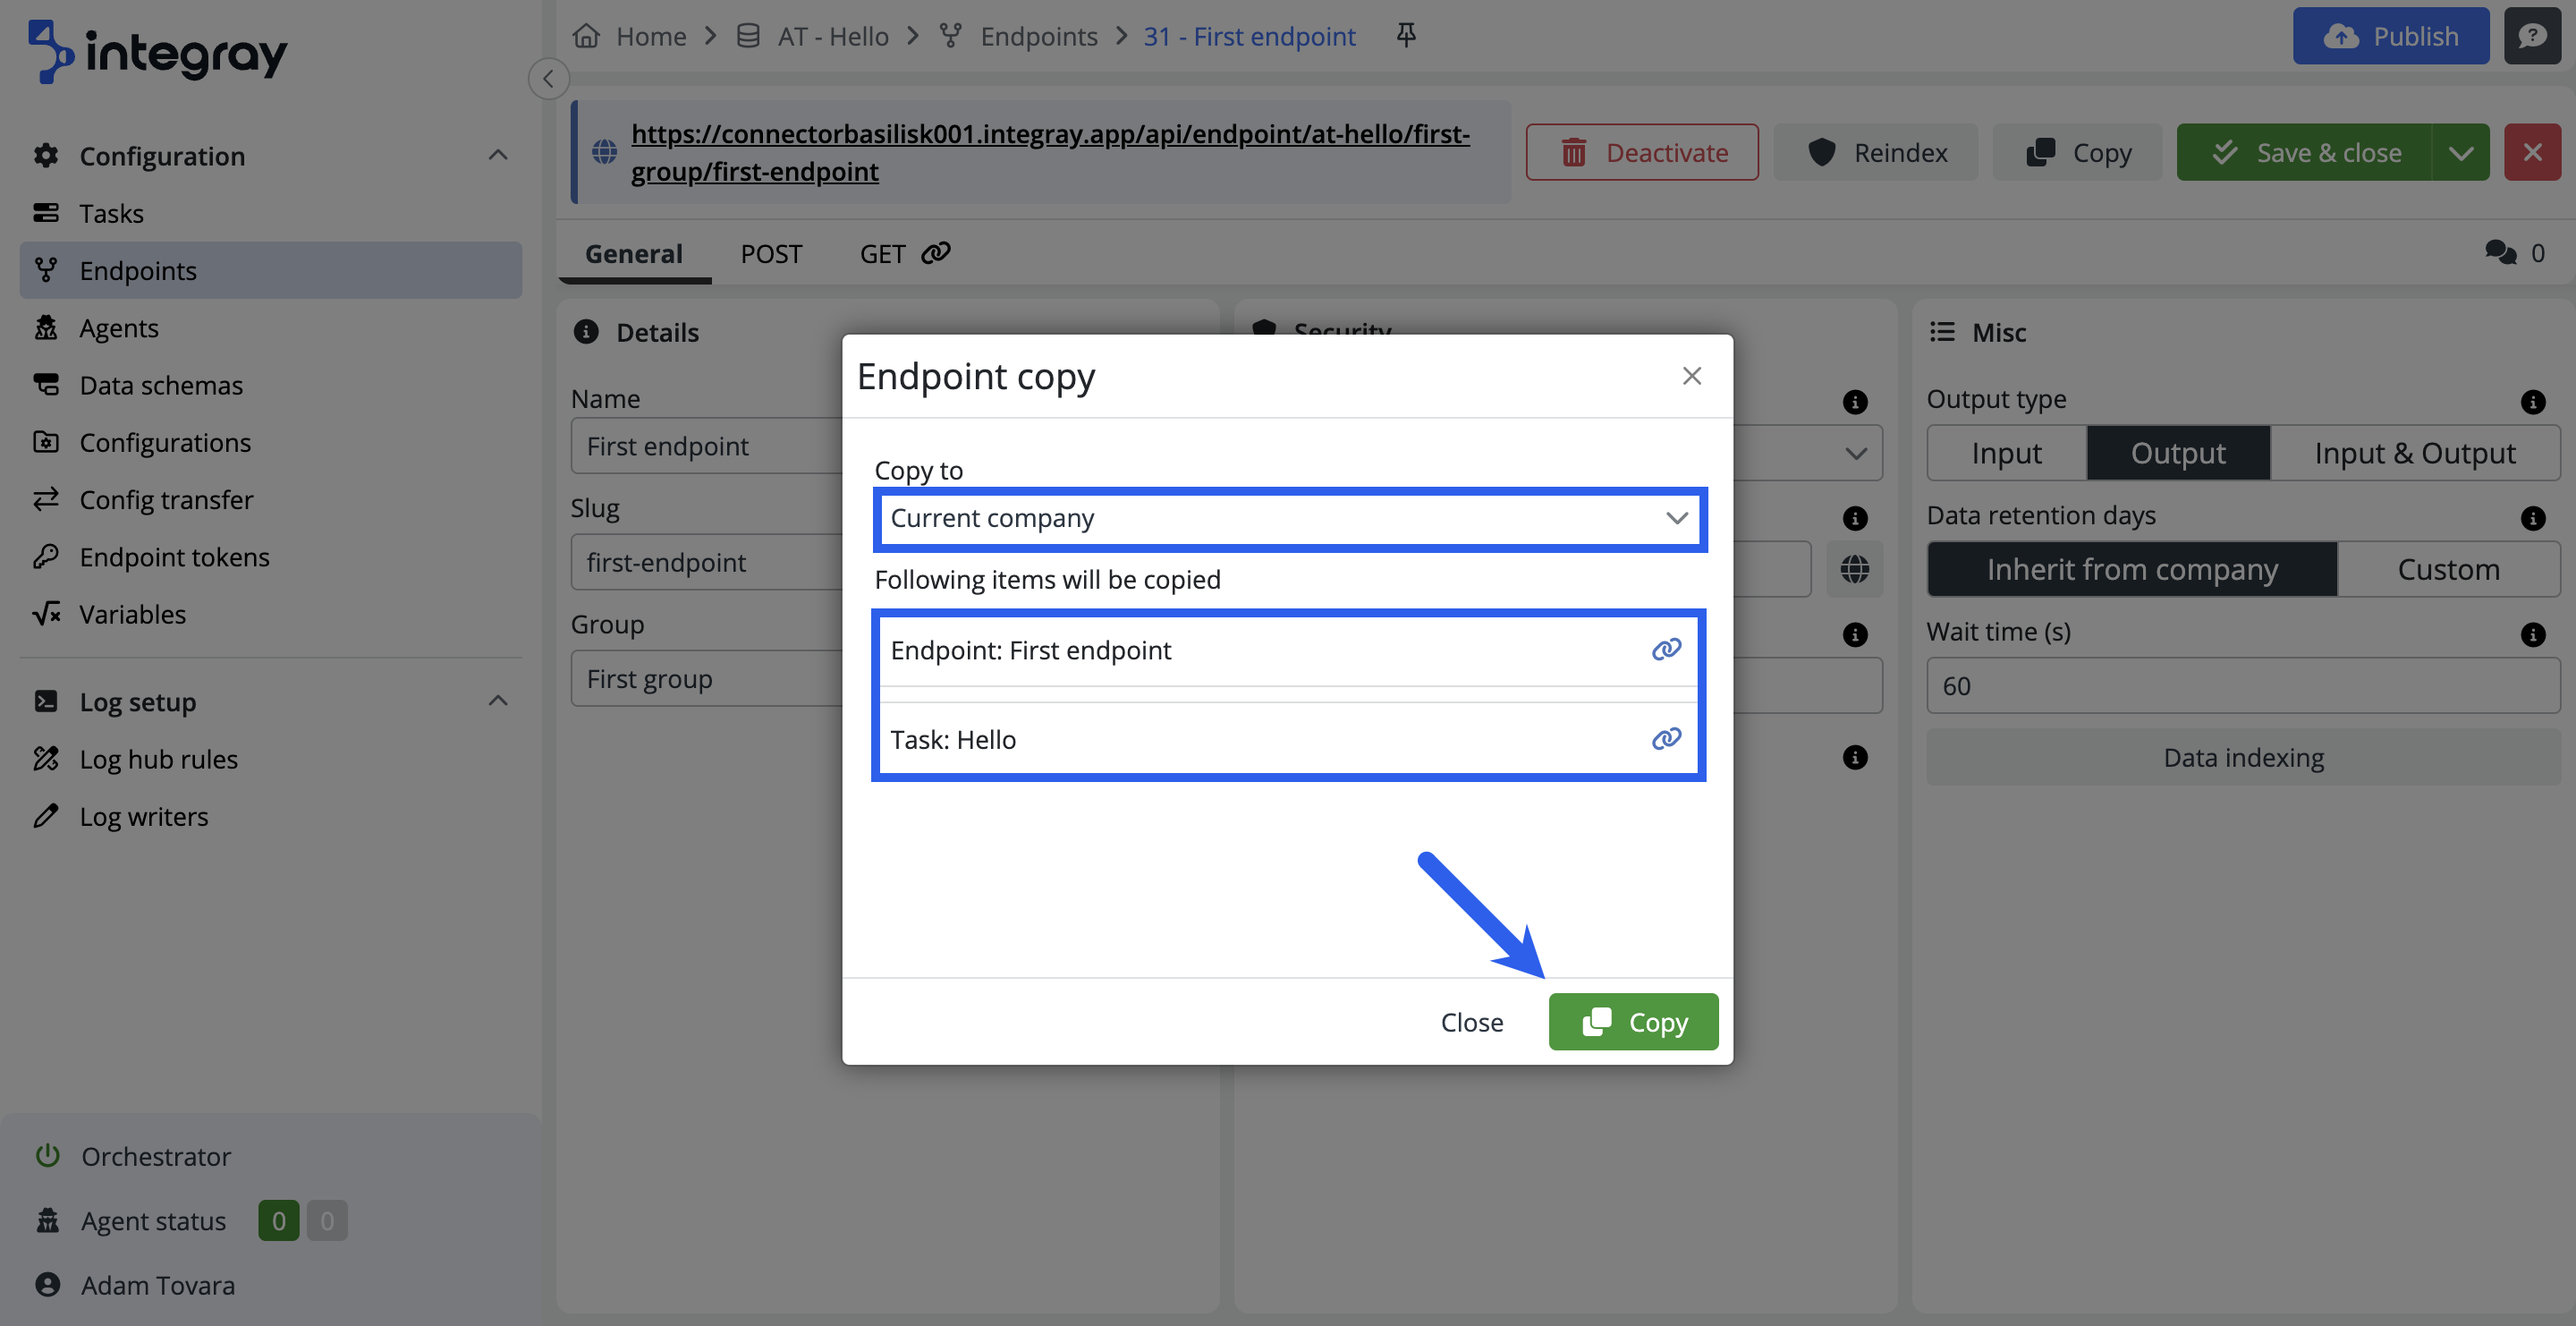
Click the Copy button to copy the endpoint and its configuration to the same or another company within the installation.
If you copy the endpoint to another company, the new endpoint and slug will share the same name as the original. However, a "copy" suffix will be added when copying within the current company.
The copy button allows you to copy only the endpoint or the endpoint connected to the task. If the endpoint is linked to a task, that task and its active task steps will also be part of the copy.
By copying, the primary tokens will remain the same as in the original endpoint. The feature ensures the copying of the secondary tokens assignments, if defined.
In the modal dialog window Endpoint copy, you will see which items will be copied. Select the destination company from the list of available companies. The default is the current company. Click the Copy button to proceed and finish the copy of the endpoint.
Warning
Make sure you understand the following specific related to endpoint copy:
-
The Copy endpoint is copied into the same endpoint group as the original endpoint.
-
If the endpoint is linked to the task, the copied task will be set to the "Not runnable" state.
-
In the case of a copy to another company, the following items may be part of the copy: endpoint, task, task steps, data schema, configuration, agent, task group and endpoint group.
-
Publish the changes after you complete the copying process.
Save & Close / Save
Click the save and close button or its save version to ensure, that the configuration changes on the endpoint are saved and you won't lose them when leaving the endpoint editor. If you try to leave the endoint editor with unsaved changes, the platform will notify you with a warning in the modal dialog window "Unsaved changes".
Close
Click the red square with a cross button to exit the endpoint editor and return to the Endpoint list.

