

Connector Channels
Connector Channels are logical containers used in the Integray Connector Repository (ICR) to organize connectors, configuration schemas, and related metadata.
They provide a structured way to store and distribute integration components across the Integray platform. By grouping related connectors and schemas into channels, teams can keep the connector repository organized and easier to maintain.
Connector Channels support both connector development workflows and distribution of production-ready connectors.
How Connector Channels are Used
Connector Channels are used to distribute connectors to Integray environments.
Administrators can connect their environment to one or more channels and install connectors from them.
A typical workflow looks like this:
- Connectors are developed and tested in private channels
- When ready, entities are promoted to public channels
- Administrators add these channels to their Integray environment
- Connectors are installed or synchronized from the channels
Connector Channels can be managed from the Administration → Connector Channels screen.
Connector Channels Administration
You can manage Connector Channels from the Administration → Connector channels screen.
This screen allows you to view available channels, install connectors, or add new channels to your environment.
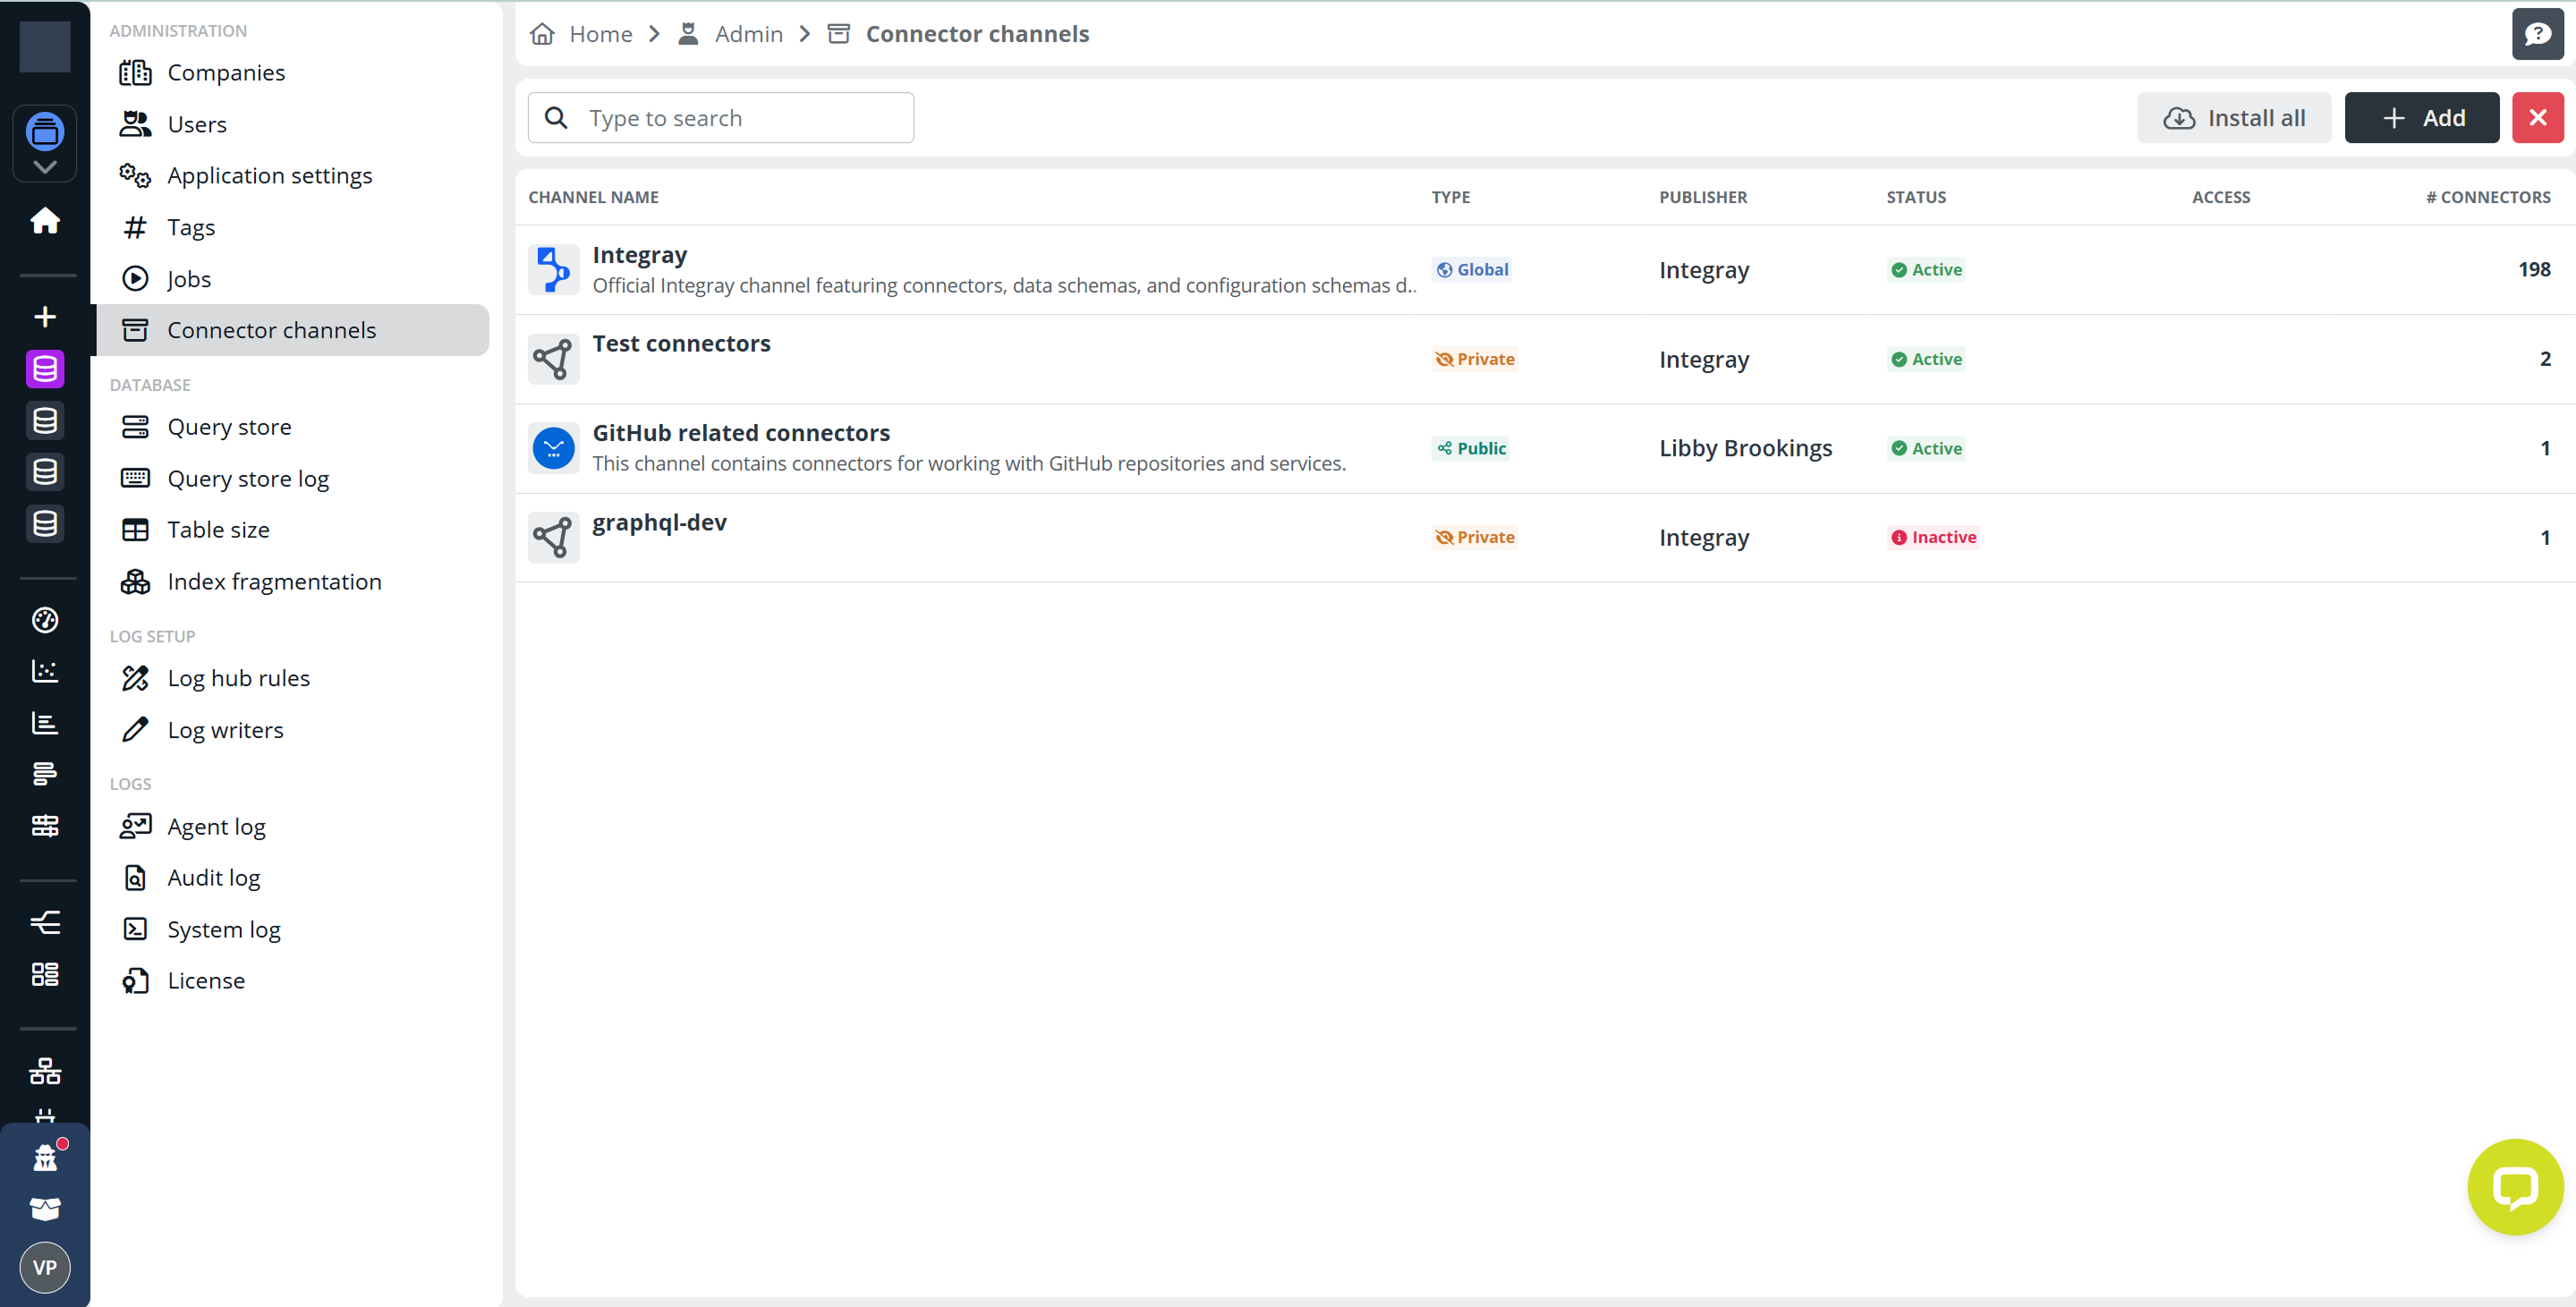
Connector Channels List
The main area of the screen displays a list of all connector channels available in your system.
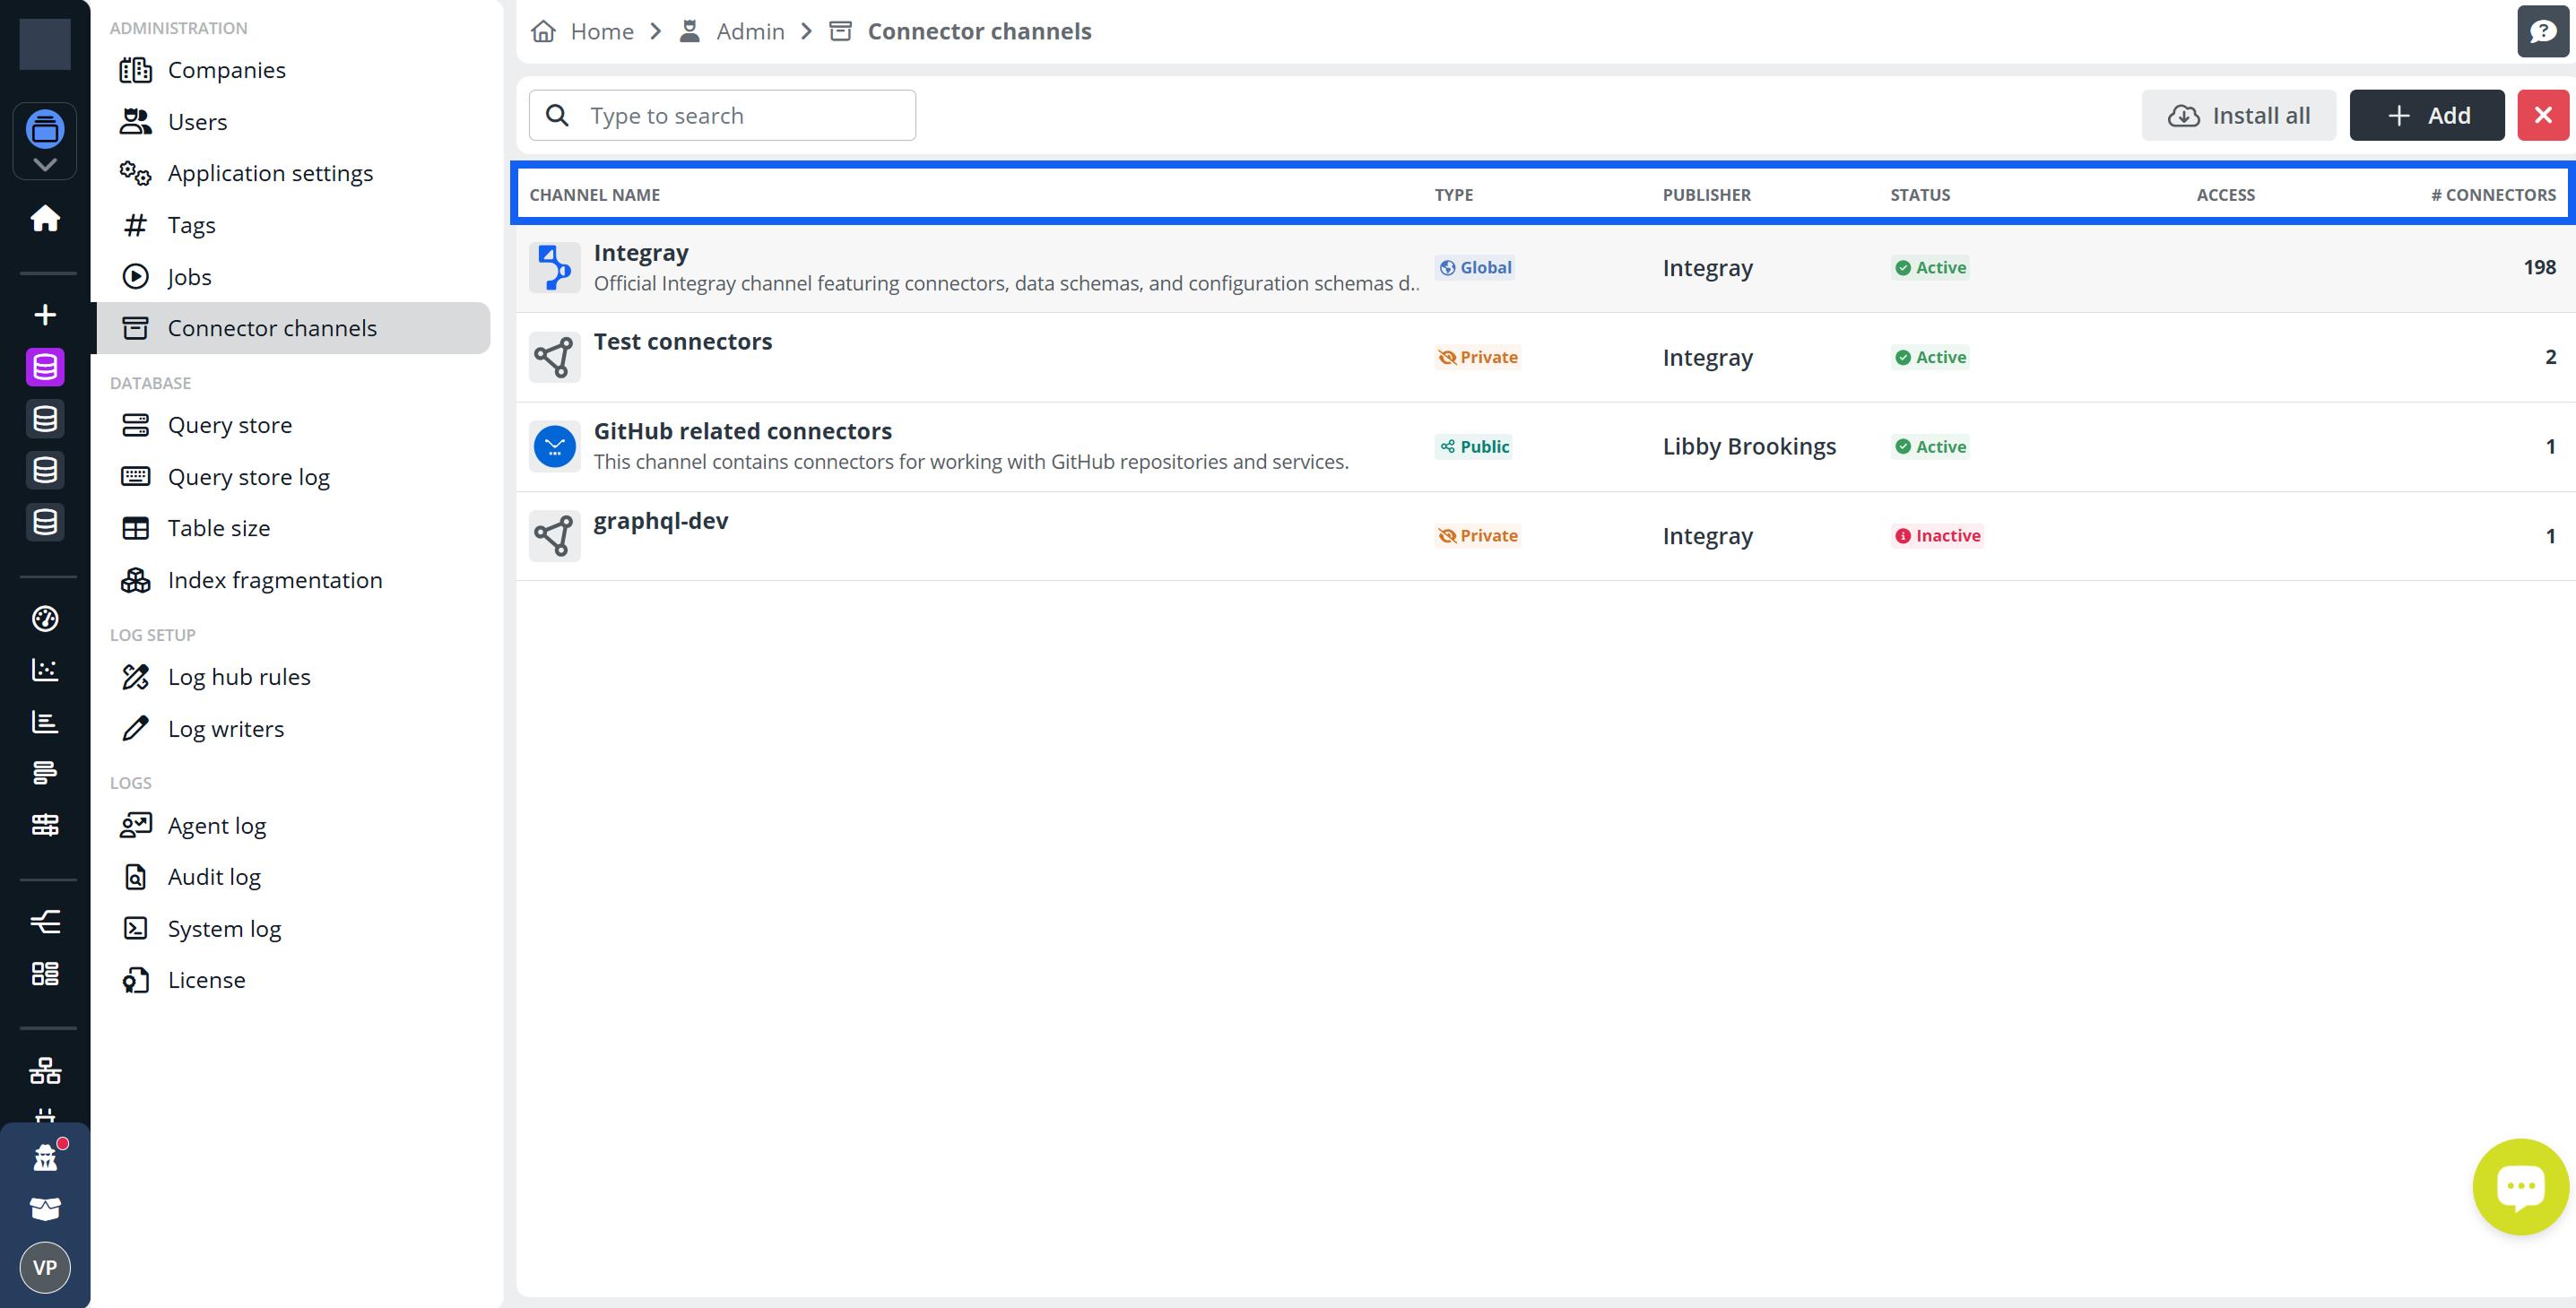
Each channel entry shows key information including:
- Channel name
- Type (Global, Public, Private)
- Publisher
- Status
- Access
- Number of connectors
This overview helps you quickly identify available channels and the connectors they contain.
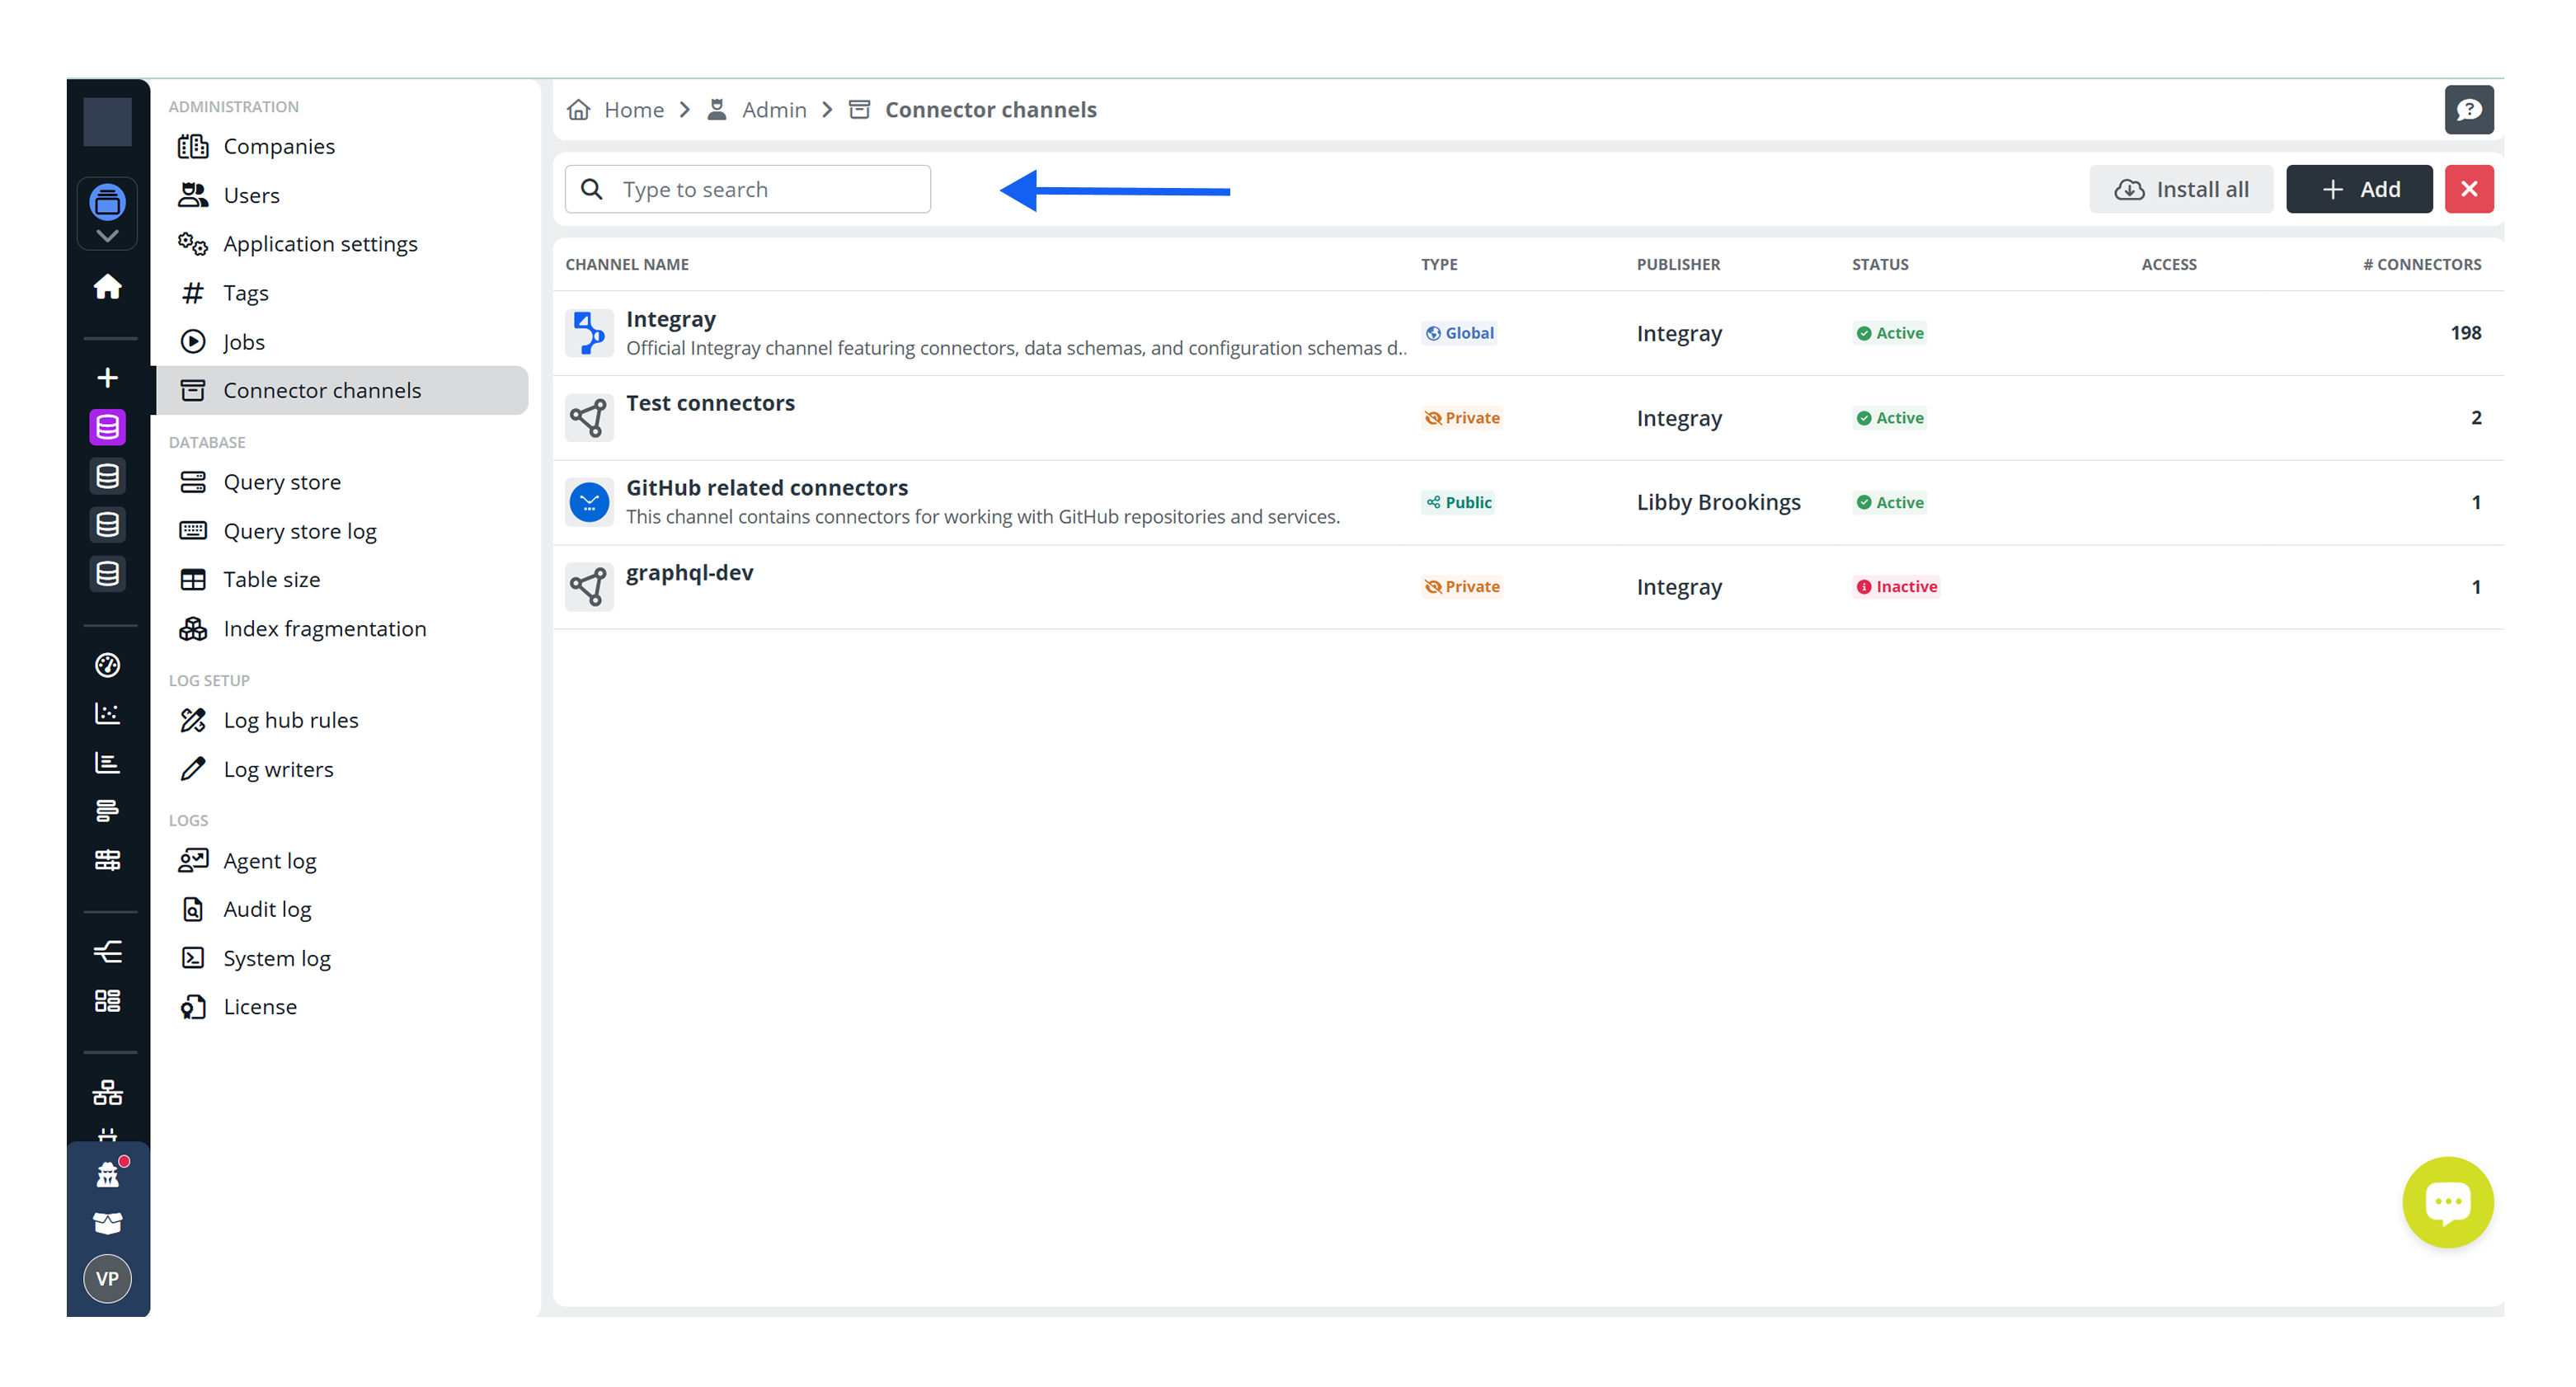
Searching Channels
Use the search field at the top of the screen to quickly locate a channel by name.
As you type, the list is filtered dynamically, making it easier to find a specific channel when many channels are available.
Adding a Channel
To add a new channel, click + Add in the upper-right corner of the screen.
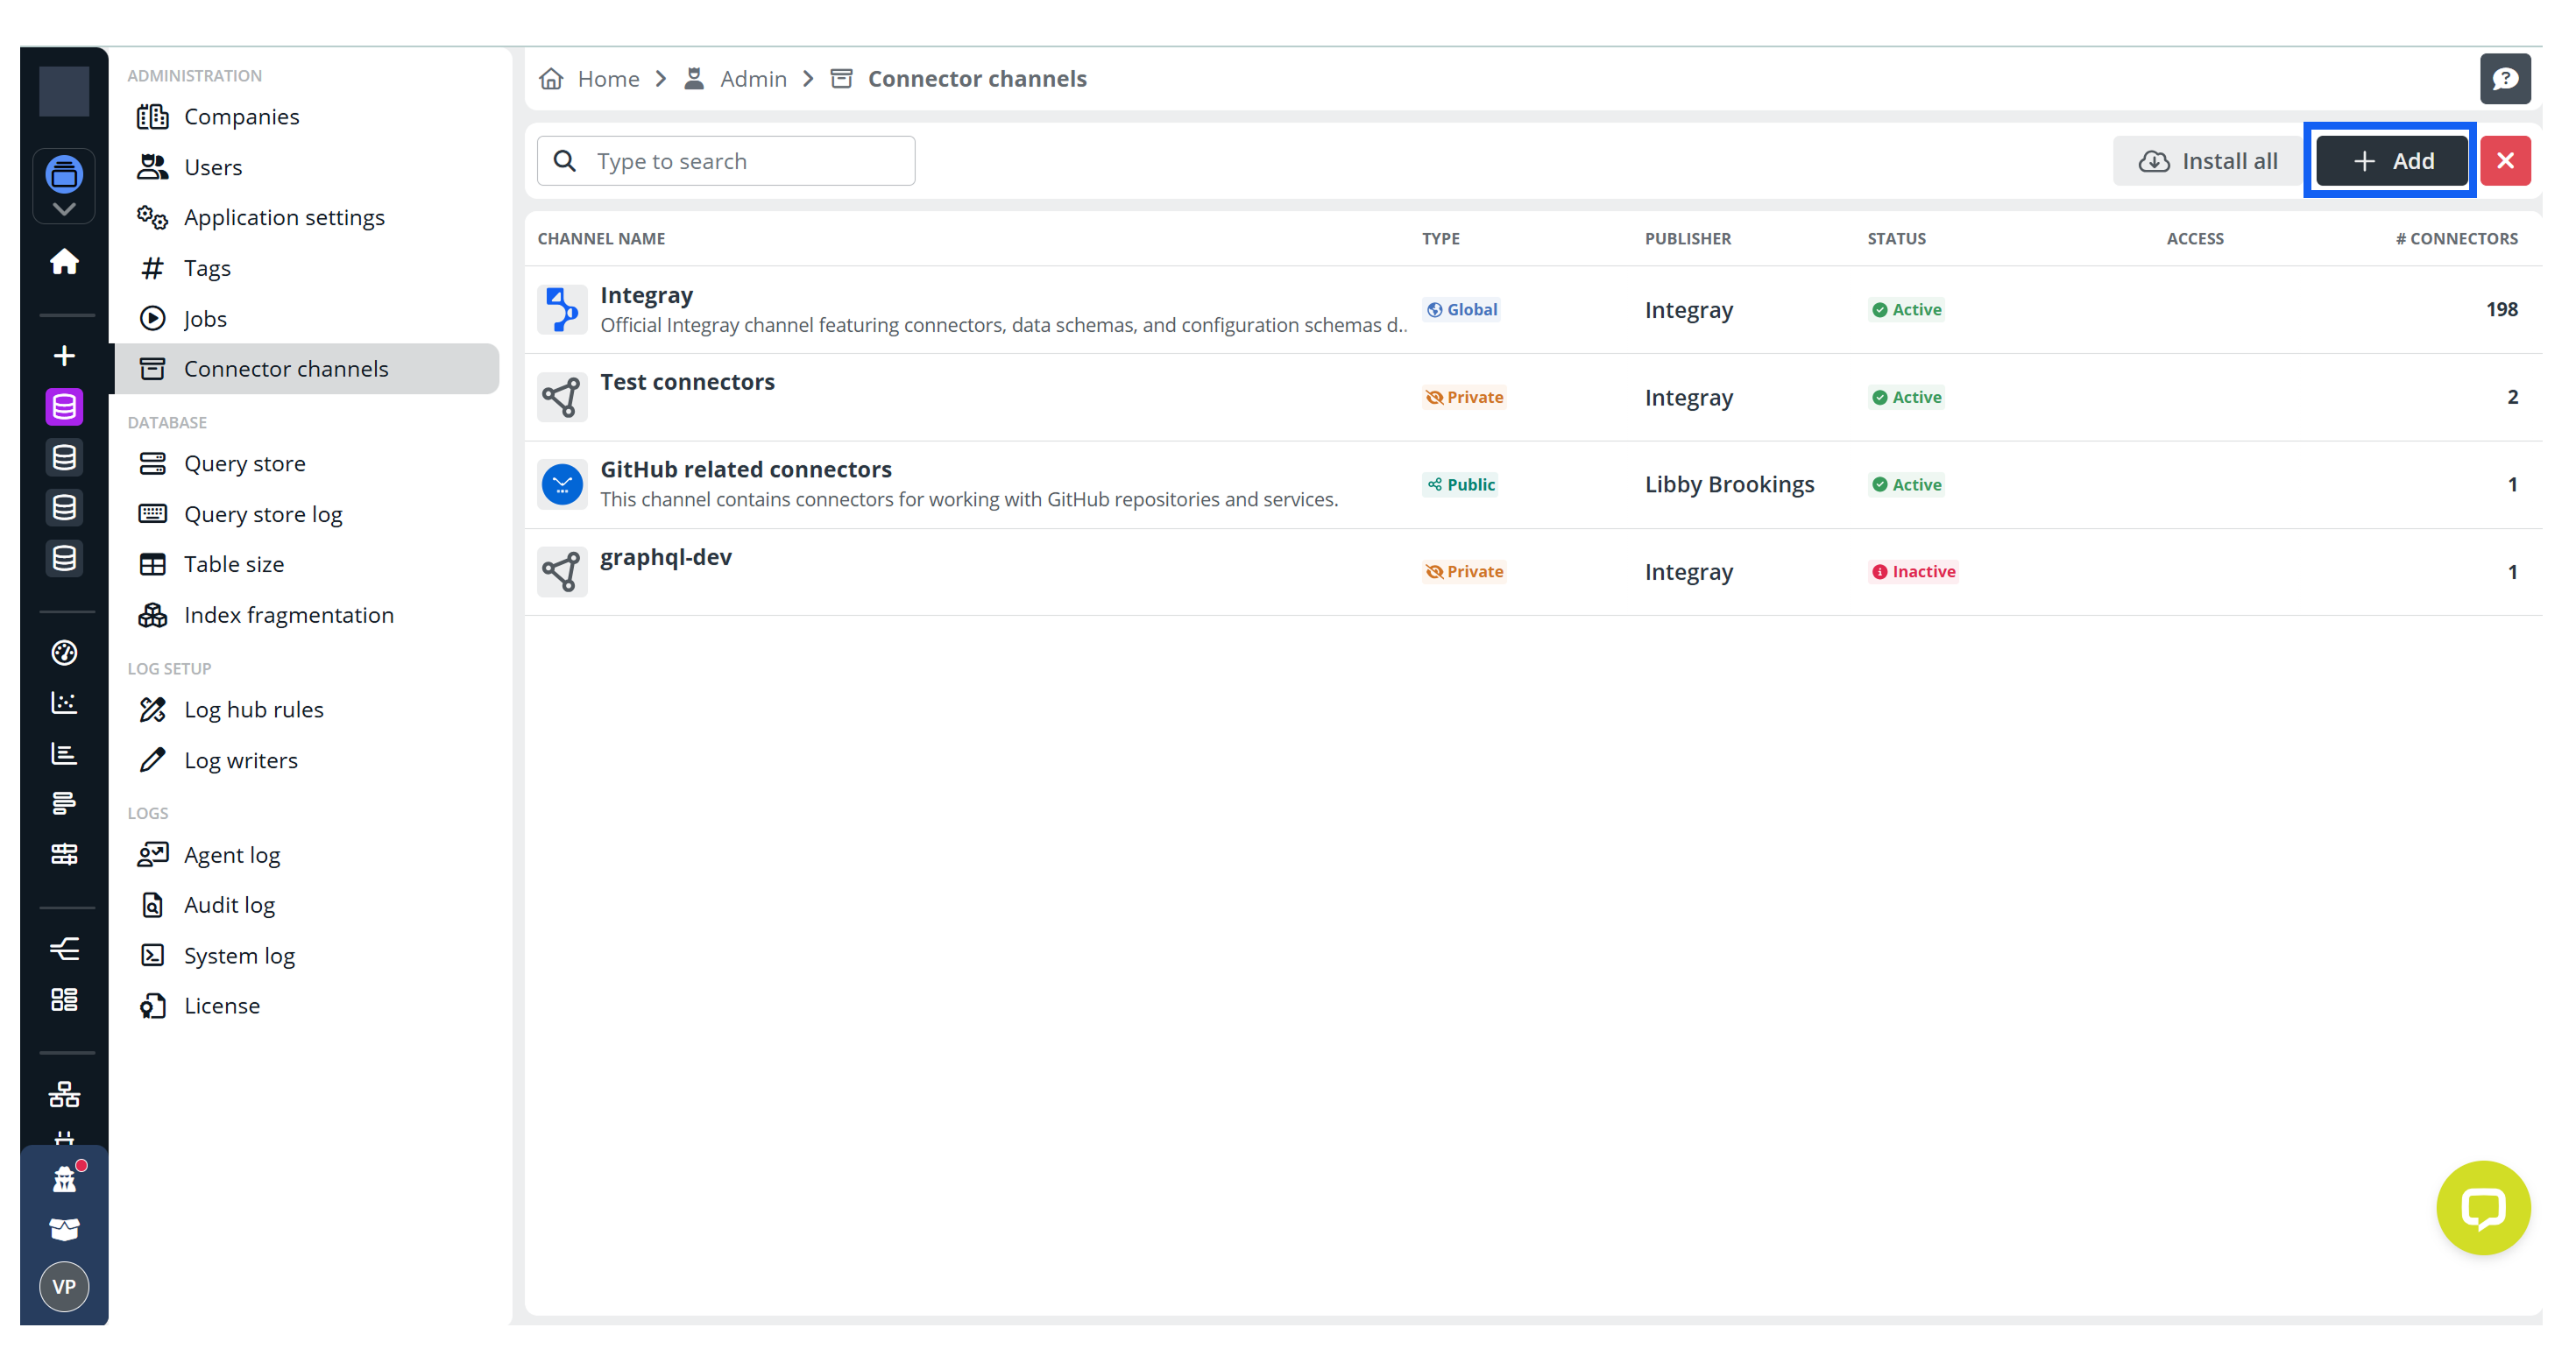
This opens the Add Channel dialog where you can select a channel from the repository.
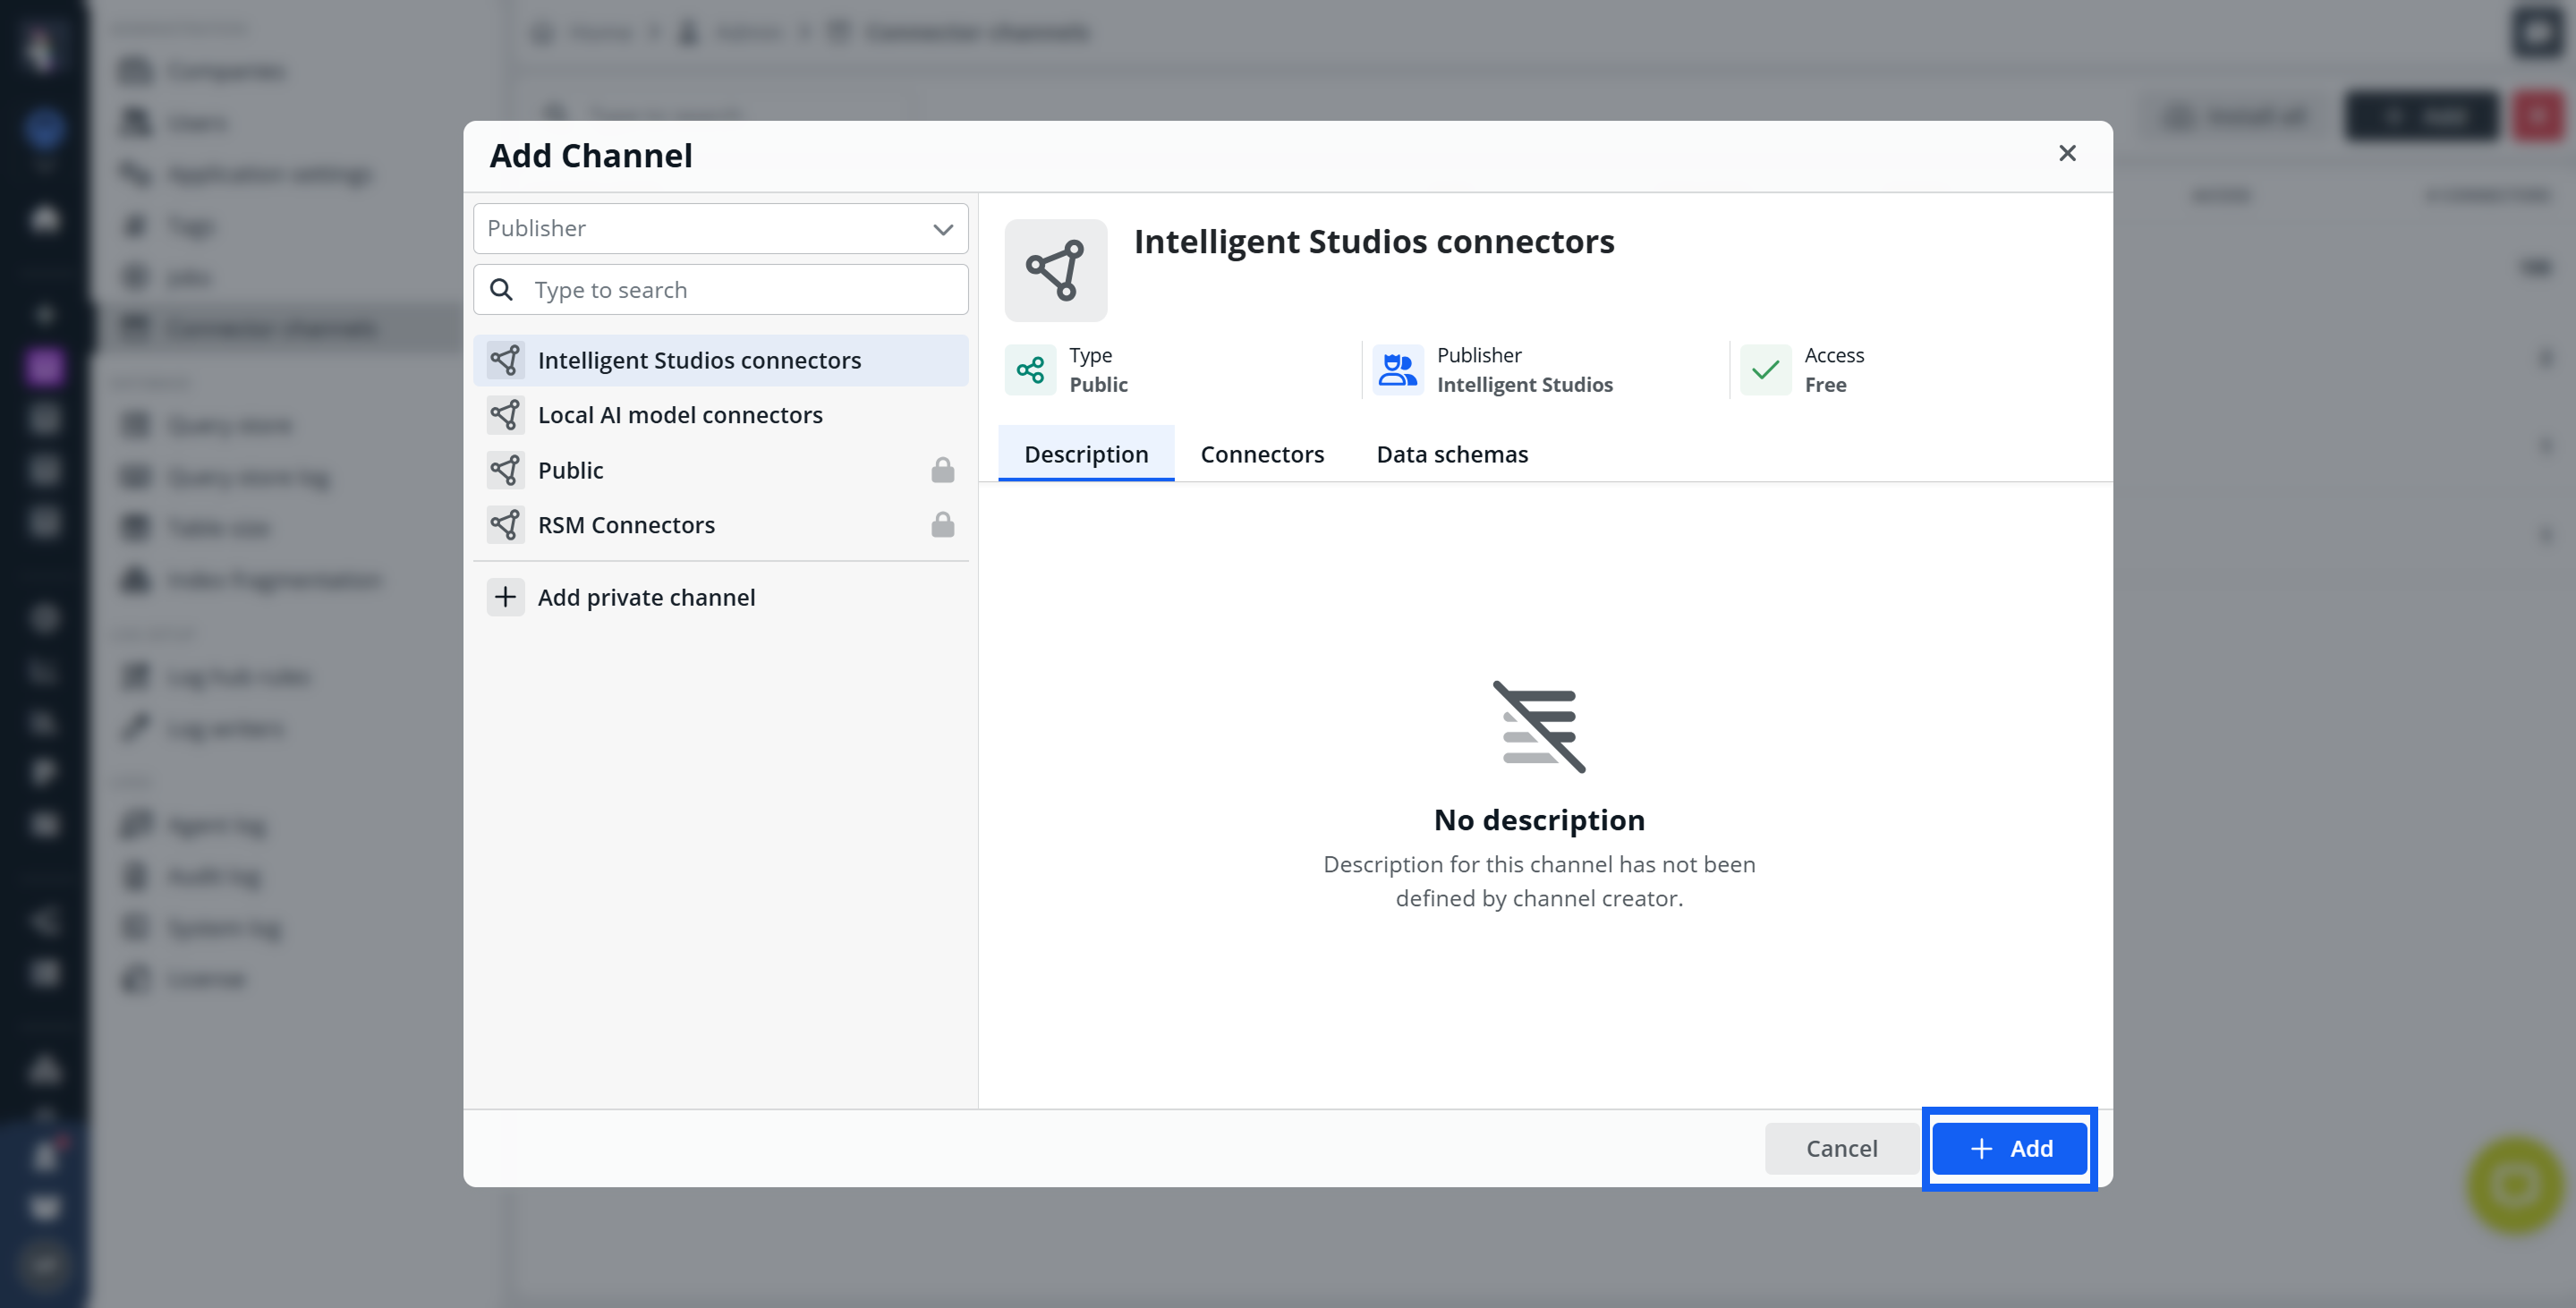
After selecting a channel, click Add to include it in your environment.
Adding a Private Channel
If the channel you need is not publicly available, you can connect to a private channel.
To add a private channel:
- Select Add private channel
- Enter the Channel ID
- Provide an authentication token if the channel is restricted
- Click Verify to validate the channel
- Click Add
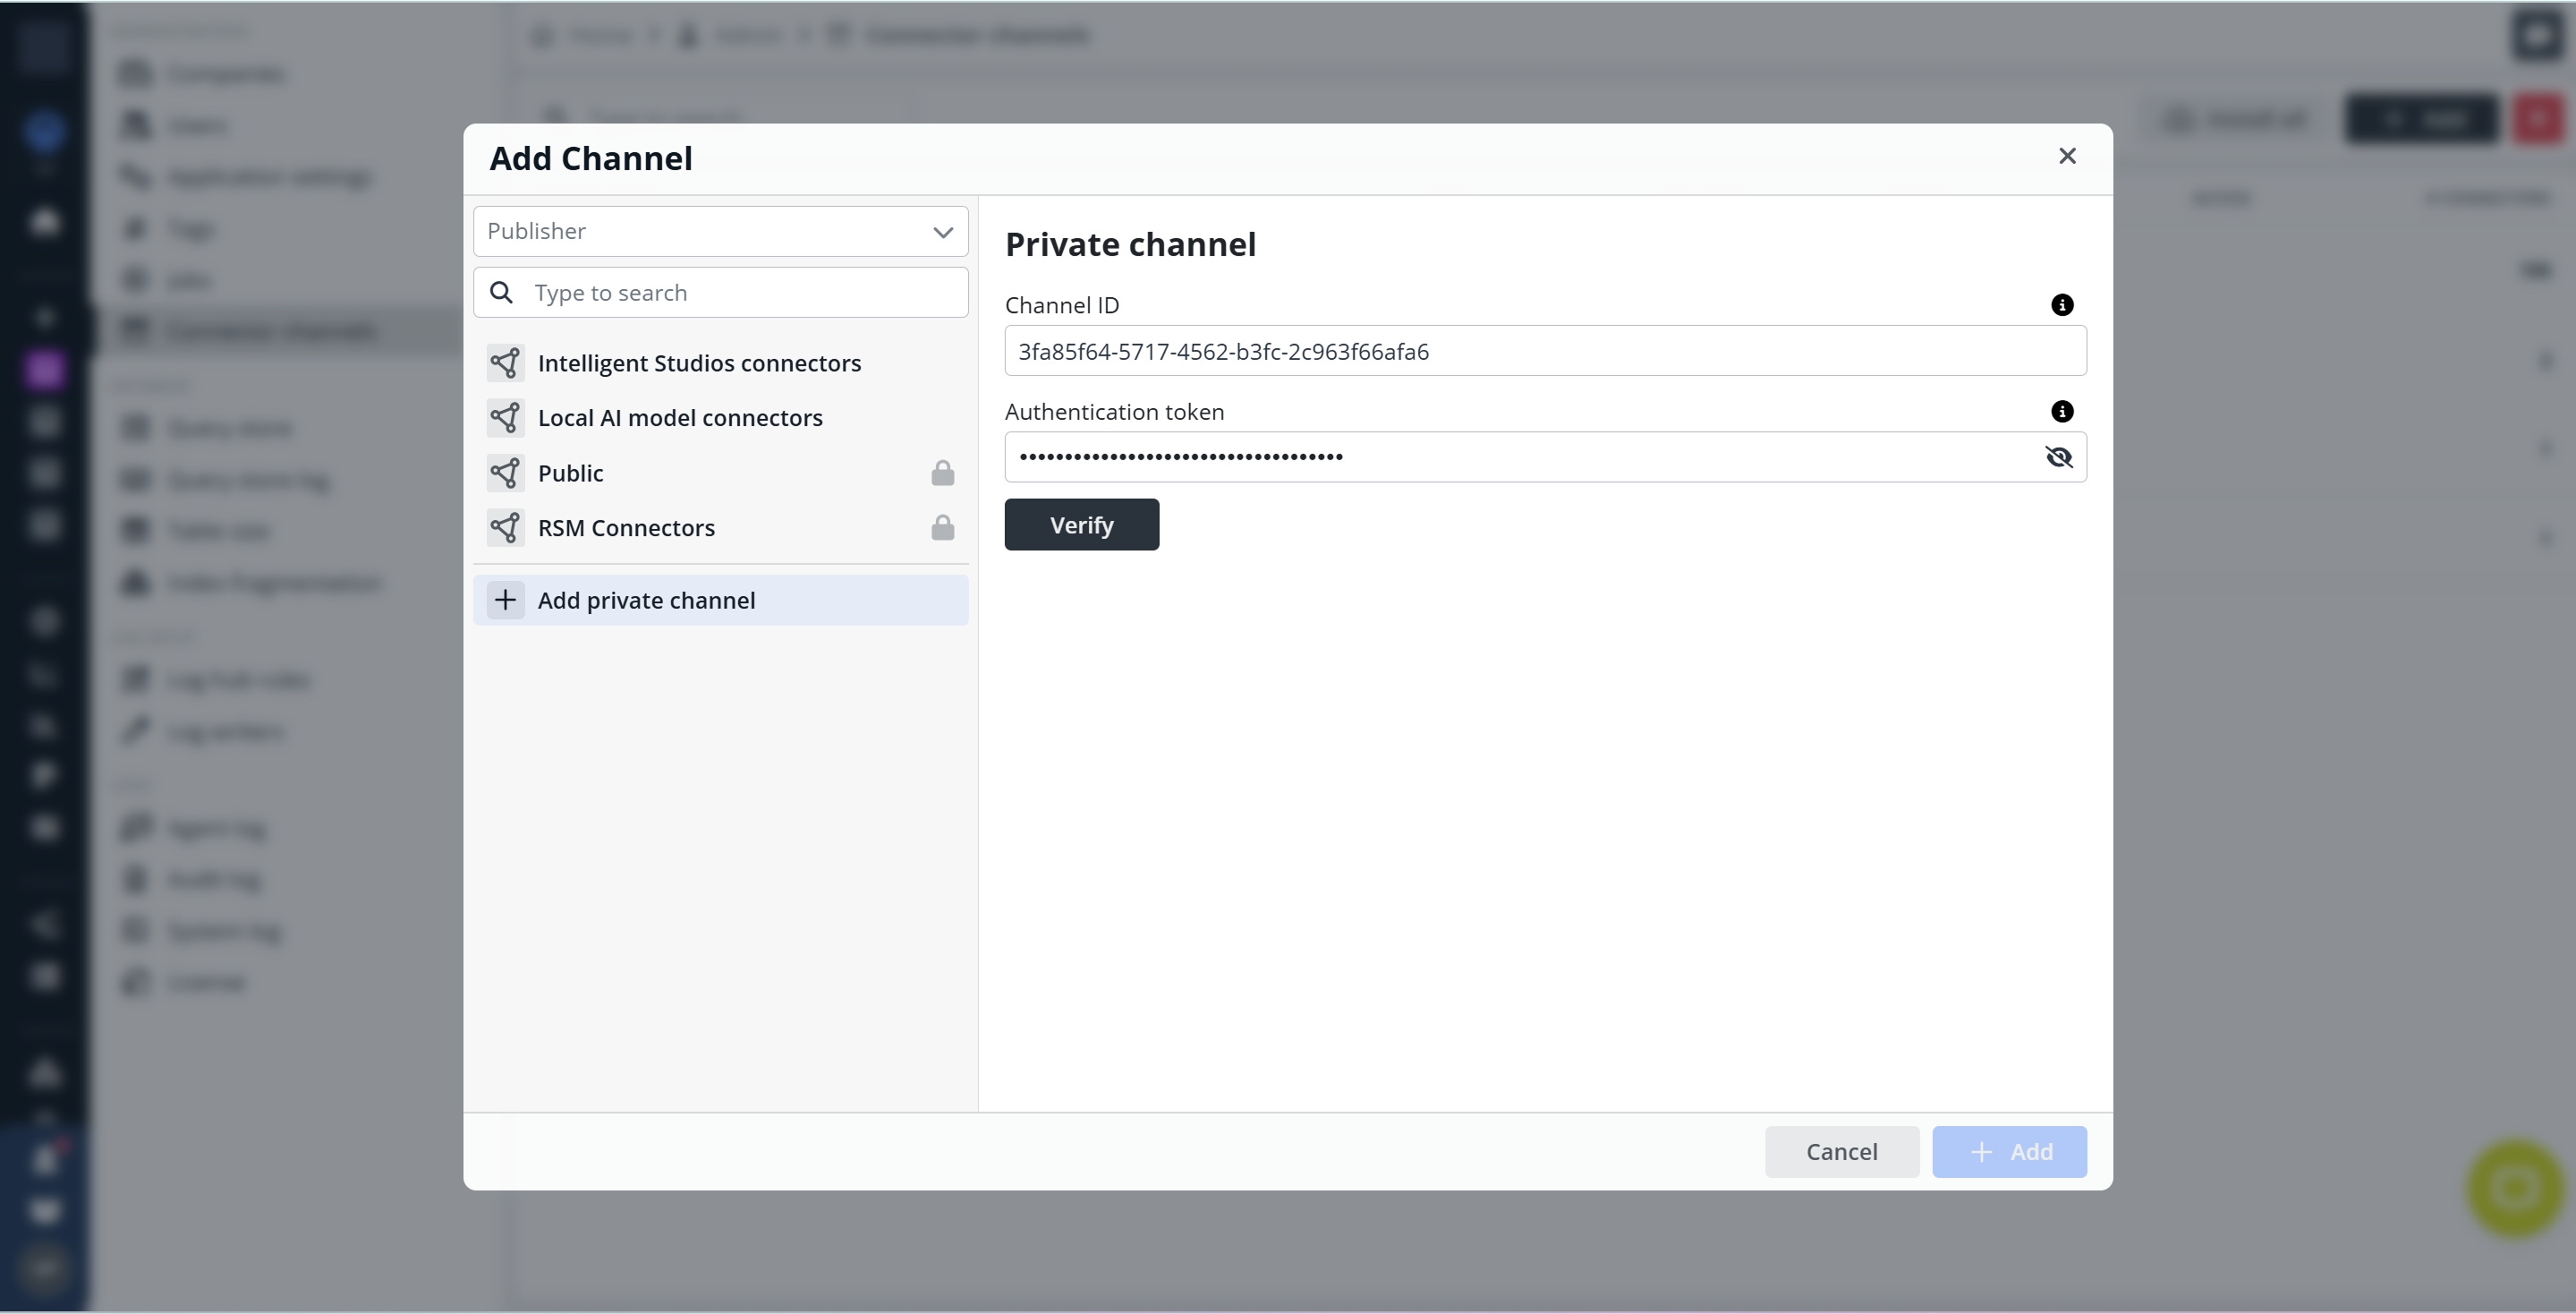
Once added, the channel and its connectors become available in your environment.
Installing Connectors
Connector channels may contain multiple connectors that can be installed into the platform.
You can install connectors directly from the Connector Channels screen by clicking the Install all button.
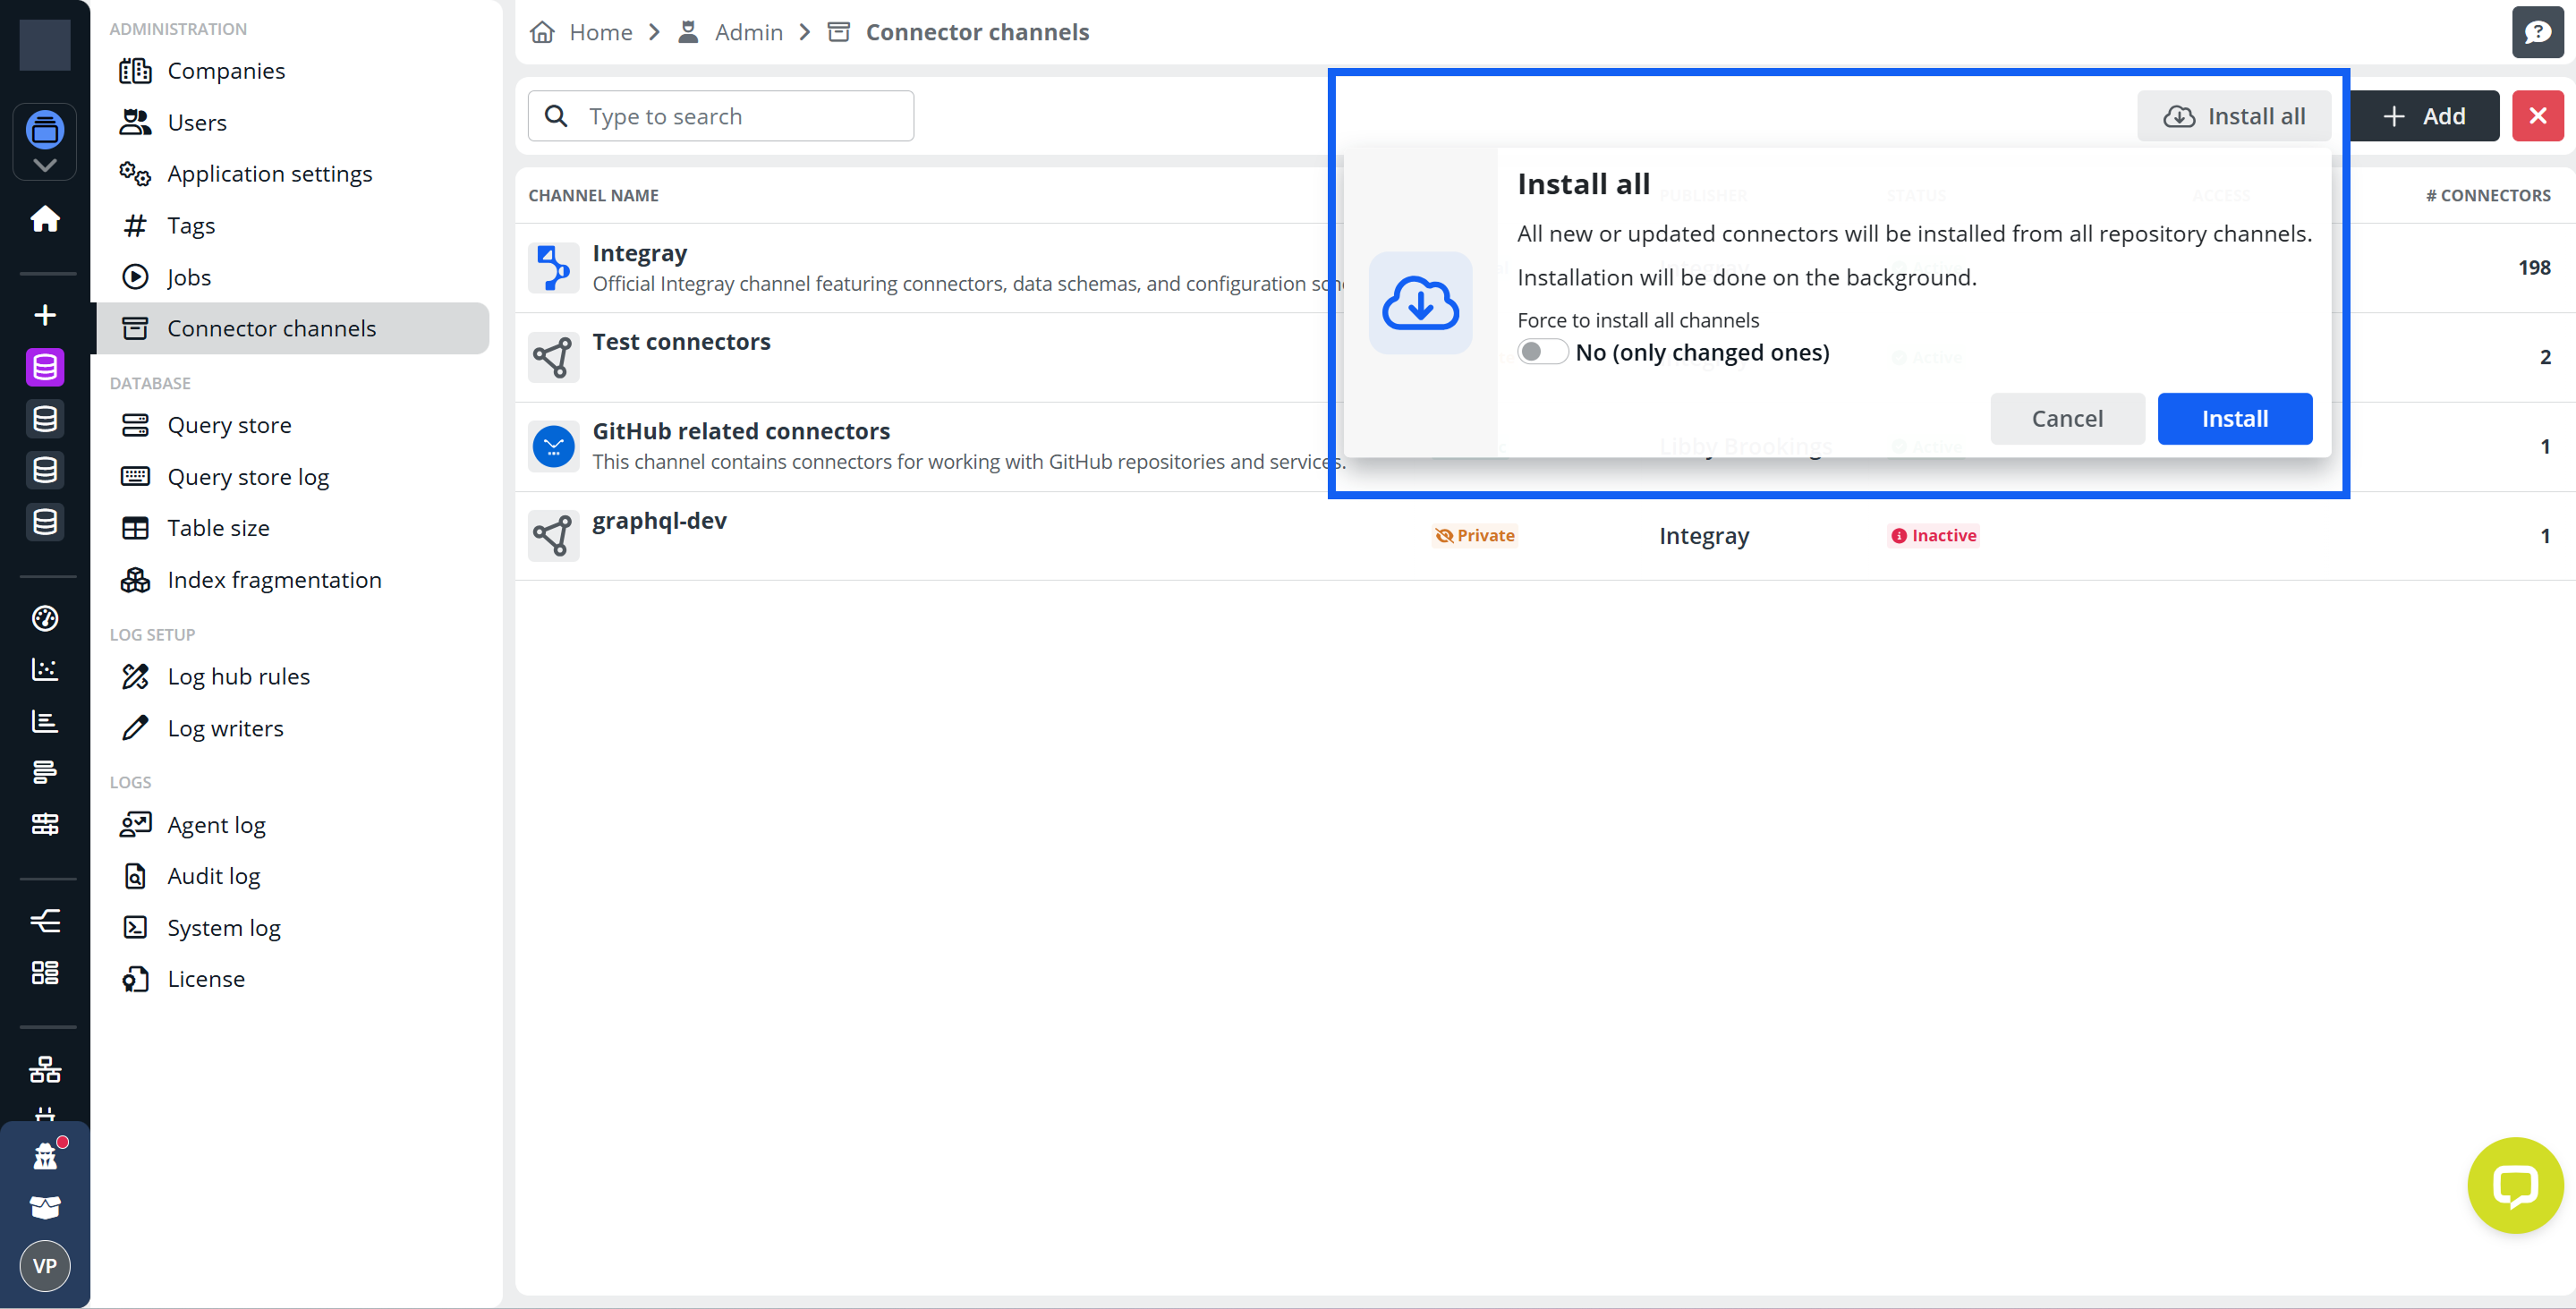
Alternatively, connectors can also be synchronized through the Jobs section. Running the Connectors update job retrieves the latest connectors from all configured channels and synchronizes them with your environment.

During this process, the system also synchronizes channel restrictions and access settings to ensure that restricted channels remain properly protected.
Channel Types and Properties
Connector Channels can differ by visibility and access control.
These properties determine who can see a channel and how it can be accessed.
Channel Visibility
Each channel has a defined visibility level that determines who can access and manage it.
Private Channels
Private channels are created by default when you add a new channel.
They are typically used for:
- development
- testing
- experimental connector configurations
- personal or team workspaces
Private channels allow full modification of their content. You can edit the channel settings, manage entities, promote the channel, or delete it when it is no longer needed.
Public Channels
Public channels are intended for stable and production-ready connector entities.
Unlike private channels, public channels cannot be created directly. A channel becomes public only after entities from a private channel are promoted to an existing public channel.
Public channels provide a reliable source of shared connectors and schemas that can be used across the system.
Public vs Private Channels
| Feature | Public | Private |
|---|---|---|
| Visibility | Visible to all users in the system | Only visible to the creator and authorized users |
| Creation | Cannot be created directly – must be promoted from PRIVATE | Default visibility when creating a new channel |
| Modification | Limited editing capabilities – cannot be deleted or demoted | Full editing capabilities – can be modified, promoted, or deleted |
| Deletion | Cannot be deleted | Can be deleted by the creator |
| Promotion | Already public – no action needed | Entities can be moved to a selected PUBLIC channel, and the original PRIVATE channel will be deleted |
| Use Case | Production-ready, stable channels for general use | Development, testing, or personal channels |
Restricted Channels
Connector Channels can optionally be marked as restricted.
Restricted channels require authentication using access tokens for all operations. This adds an additional layer of security when working with sensitive data or protected integrations.
Restricted channels are commonly used when:
- connectors access protected systems
- integrations expose sensitive data
- controlled access is required
- authentication and auditing are needed
Non-restricted channels do not require authentication and can be accessed without access tokens.
Restricted vs Non-Restricted Channels
| Feature | Restricted | Non-Restricted |
|---|---|---|
| Access Control | Requires valid access token for all operations | No token required – open access |
| Token Management | Can create, view, and manage access tokens | Token management not available |
| Security Level | High – controlled access with authentication | Low – publicly accessible |
| Use Case | Sensitive data, production APIs, secure integrations | Public data, open APIs, general information |
| Token Options Menu | “Tokens” option appears in channel menu | No token management option |
| Configuration | Set during channel creation or editing | Default state for new channels |
Access Tokens
When a channel is marked as restricted, you can create and manage access tokens for that channel.
Access tokens allow applications, services, or users to securely access channel resources.
Token management allows you to:
- create new access tokens
- set optional expiration dates
- view active tokens
- delete unused or compromised tokens
For security reasons, the token value is displayed only once when it is created. You should store it securely after generation.
Advanced Channel Features
Channel Entities
Each Connector Channel can contain different types of entities used by connectors.
Typical channel entities include:
- Configurations – connector configuration definitions
- Data schemas – input and output data structures
- Connector metadata – additional configuration information
These entities define how connectors behave and how data flows between integrated systems.
Channel Promotion
Promotion is the process of moving entities from a private channel to a public channel.
This step is usually performed when a connector configuration has been fully tested and is ready to be shared.
During promotion:
- all entities from the private channel are moved to the selected public channel
- the original private channel is permanently deleted
Because this action cannot be undone, you should ensure that the channel has been properly tested before promoting it.
Integray Connector CLI
The Integray Connector CLI is a command-line tool that allows you to interact with the Integray Connector Repository (ICR) programmatically.
It is primarily used by developers when building, publishing, or managing connectors outside of the Integray user interface.
You can install the CLI tool from NuGet.
Using the CLI, you can automate common tasks related to connector development and repository management.
Typical use cases include:
- publishing connectors to a connector channel
- uploading configuration schemas and data schemas
- managing connector artifacts during development
- integrating connector publishing into CI/CD pipelines
- synchronizing connector resources with the Integray Connector Repository